Just got a Synology DS412+ 2 weeks back. This is my second Synology NAS after the DS1511+. Stock for the Synology DS412+ was limited in Singapore. I had to place an order with the distributor who is also nice enough to hold the set for me until I went down to collect it.
I noticed that there hasn't been much discussion on the DS412+ here so thought just share some of my views with regards to this.
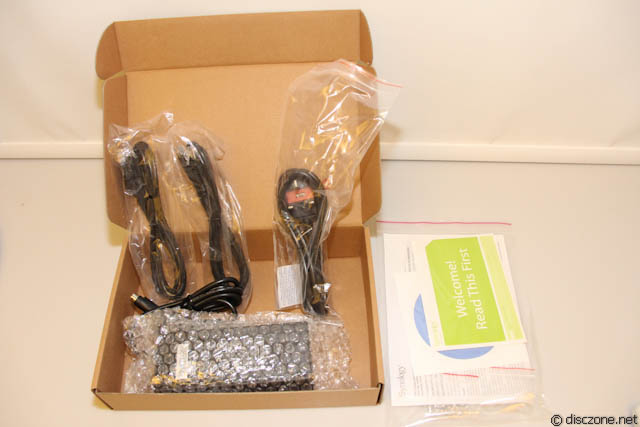
At the top, are a layer of brown cartons which you will see later that house the Power Brick, Power Cords, 2 x black LAN cables and of cause, the typical disclaimers, quick guides and an installation disk. Taking all these out, below sits the Synology DS412+ frame nicely wrapped with a white foam layer. Unwrapping the outer white foam layer reveals the cool black body of the Synology DS412+. The 4 x HDDs Bay is covered by a shiny plastic cover that, for some, may find it to be a dust and finger print magnet. On the right side of the front are the Status and Disk LEDs, a USB 3.0 port and a bright blue power button, starting from the top to the bottom.
The Box

Accessories
The DS412+ itself
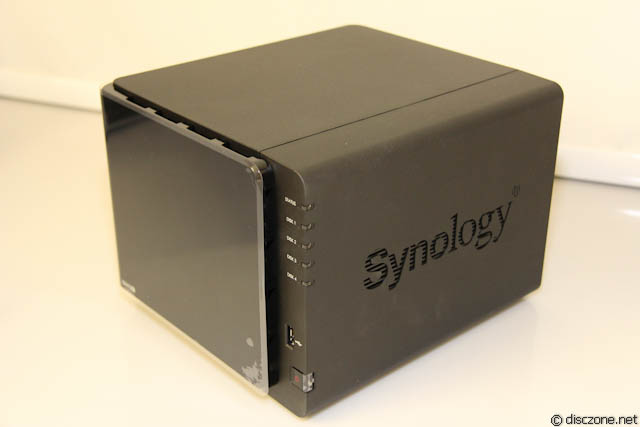
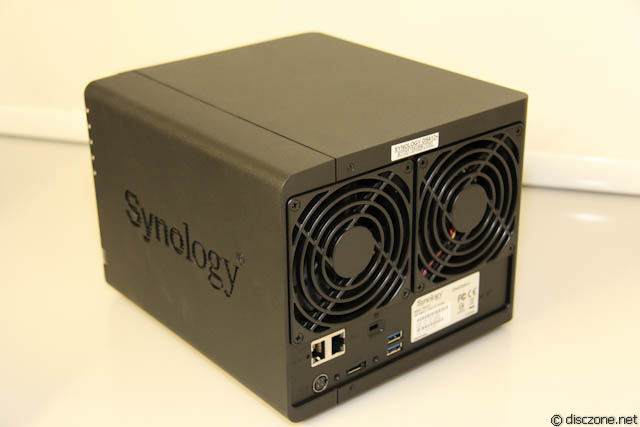
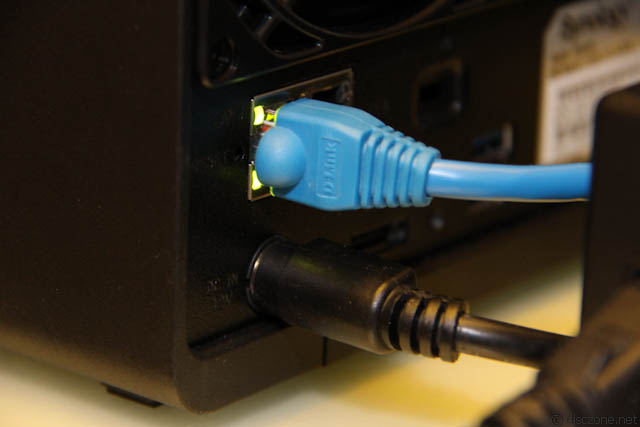
Unwrapping the outer white foam layer reveals the cool black body of the Synology DS412+. The 4 x HDDs Bay is covered by a shiny plastic cover that, for some, may find it to be a dust and finger print magnet. On the right side of the front are the Status and Disk LEDs, a USB 3.0 port and a bright blue power button, starting from the top to the bottom. At the rear of the unit is another bunch of USB 3.0 ports, eSATA port, Power port and, of cos, 2 x Gigabit LAN ports. At the top of these are 2 big fans that will cool down the HDDs inside the unit when it gets too hot. Surprising, the fans are pretty silence and I don’t even notice them turning unlike the ones I have in my PCs and other NAS.
The rear view
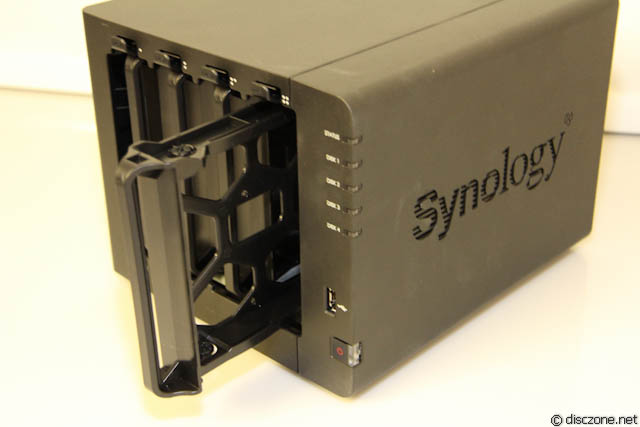
Removing the nice shiny front cover reveals the 4 HDDs Bays. Unlike the DS1511+ in which the locking mechanisms for the HDD caddies are at the front, for the Synology DS412+, there is a small release mechanism which says “Push” at the top of each bay. These when pushed in, will then allow you to take out the caddie individually to be installed with the HDDs.
The HDDs bays
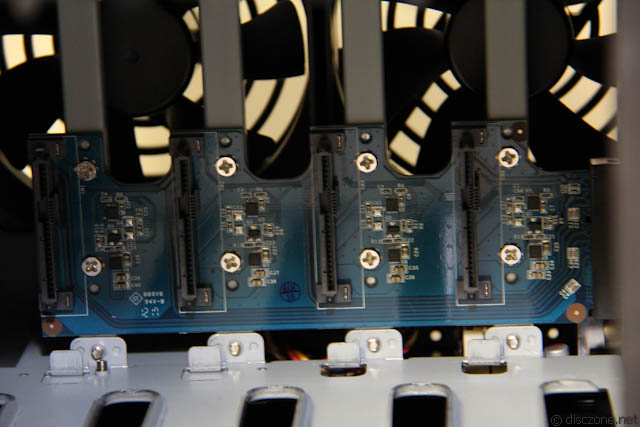
Zooming into the back plane of the Synology DS412+ after taking out all the 4 caddies, will show the circuit board with the 4 x SATA connectors to which the HDDs will slot into, guided by the metal rails at the top and bottom of the unit.
LEDs in action
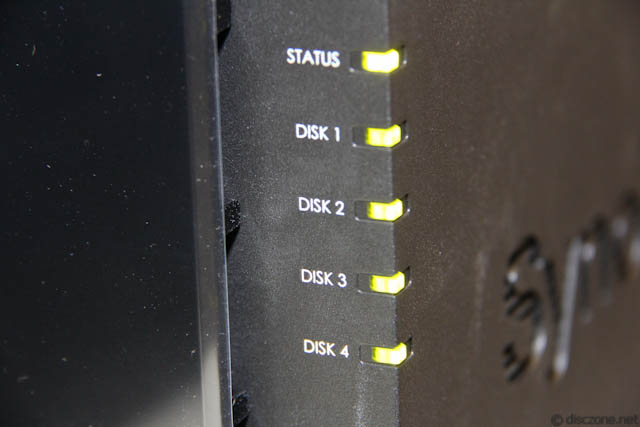
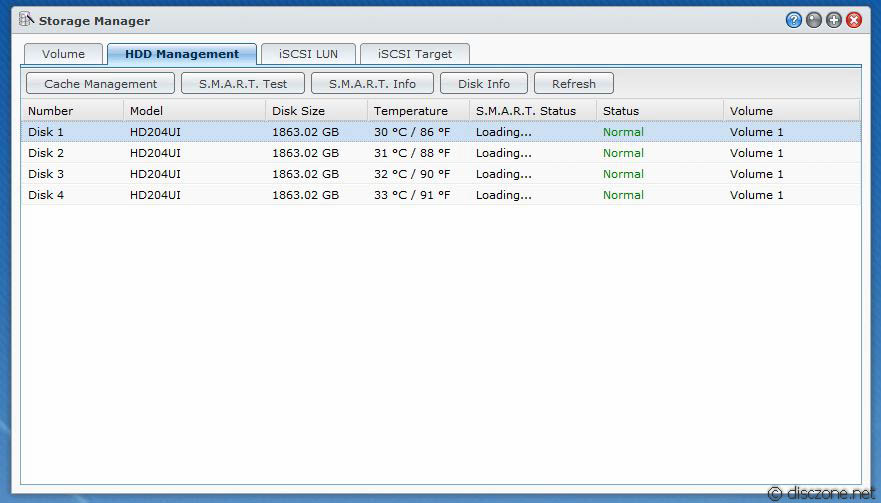
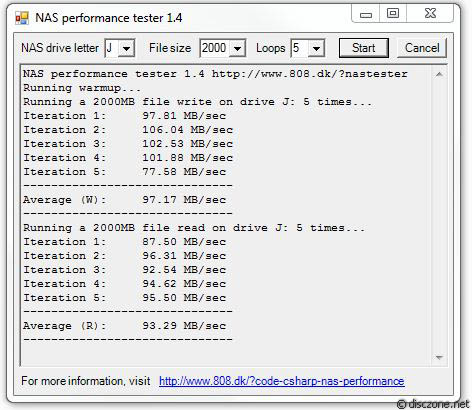
After installing my 4 x Samsung F4 2TB HDDs into the Synology DS412+, the moment of truth comes along with the powering on of the unit. The unit immediately starts beeping after I pressed the power button in the front. The status light goes amber but the HDDs LEDs are all green. This is normal as I’ve yet to install the DiskStation Manager (DSM) 4.0 into the setup. Using the latest copy of the Synology Assistant and DSM 4.0 downloaded from Synology’s Down Center, it took me around 5 – 10 mins to complete the installation (and stop the irritating beeping) and to be able to log into the unit for configuration of the HDDs.
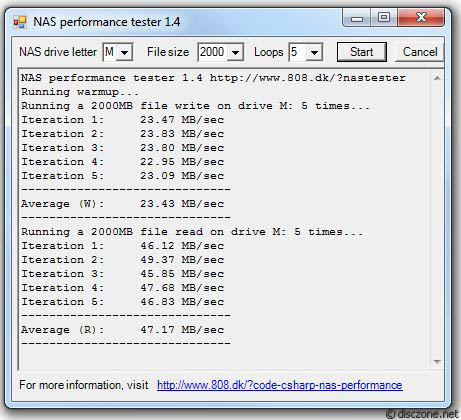
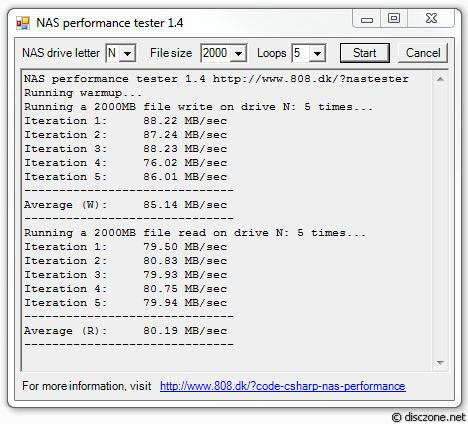
I'll cover the software and the speed test portions again in the next part.
I noticed that there hasn't been much discussion on the DS412+ here so thought just share some of my views with regards to this.
At the top, are a layer of brown cartons which you will see later that house the Power Brick, Power Cords, 2 x black LAN cables and of cause, the typical disclaimers, quick guides and an installation disk. Taking all these out, below sits the Synology DS412+ frame nicely wrapped with a white foam layer. Unwrapping the outer white foam layer reveals the cool black body of the Synology DS412+. The 4 x HDDs Bay is covered by a shiny plastic cover that, for some, may find it to be a dust and finger print magnet. On the right side of the front are the Status and Disk LEDs, a USB 3.0 port and a bright blue power button, starting from the top to the bottom.
The Box
Accessories
The DS412+ itself
Unwrapping the outer white foam layer reveals the cool black body of the Synology DS412+. The 4 x HDDs Bay is covered by a shiny plastic cover that, for some, may find it to be a dust and finger print magnet. On the right side of the front are the Status and Disk LEDs, a USB 3.0 port and a bright blue power button, starting from the top to the bottom. At the rear of the unit is another bunch of USB 3.0 ports, eSATA port, Power port and, of cos, 2 x Gigabit LAN ports. At the top of these are 2 big fans that will cool down the HDDs inside the unit when it gets too hot. Surprising, the fans are pretty silence and I don’t even notice them turning unlike the ones I have in my PCs and other NAS.
The rear view
Removing the nice shiny front cover reveals the 4 HDDs Bays. Unlike the DS1511+ in which the locking mechanisms for the HDD caddies are at the front, for the Synology DS412+, there is a small release mechanism which says “Push” at the top of each bay. These when pushed in, will then allow you to take out the caddie individually to be installed with the HDDs.
The HDDs bays
Zooming into the back plane of the Synology DS412+ after taking out all the 4 caddies, will show the circuit board with the 4 x SATA connectors to which the HDDs will slot into, guided by the metal rails at the top and bottom of the unit.
LEDs in action
After installing my 4 x Samsung F4 2TB HDDs into the Synology DS412+, the moment of truth comes along with the powering on of the unit. The unit immediately starts beeping after I pressed the power button in the front. The status light goes amber but the HDDs LEDs are all green. This is normal as I’ve yet to install the DiskStation Manager (DSM) 4.0 into the setup. Using the latest copy of the Synology Assistant and DSM 4.0 downloaded from Synology’s Down Center, it took me around 5 – 10 mins to complete the installation (and stop the irritating beeping) and to be able to log into the unit for configuration of the HDDs.
I'll cover the software and the speed test portions again in the next part.
Last edited:
")
