Formula11
Member
- Joined
- Jul 5, 2010
- Messages
- 218
- Reaction score
- 0
Hi. For the sake of those friends who I am unable to meet, I try my best to help.
Briefly,
Level 1 - Ordinary Kawasaki rose (my folding methods - scarfree)
Level 2 - Modified model (with stems, leaves, central petals)
Level 3 - Gift-of-gifts rose (with stems, leaves, central petals, calyx, rounding effects) ie. Final complete set.
================================
In this series I am only teaching level 1.
I hope that everyone have origami experiences, as level 1 is advanced origami. (You shall see)
Even if you come to my teaching sessions, I will still need to take 2.5 hours to teach you the following series. Therefore by following these series yourself, you have saved some money at least.
================================
If you face any problem while folding, the friends that I have taught previously will be in this forum - yes1705, McRaurel, Moow. They have very good experiences and I strongly recommend them as well.
I do not sell the roses, and therefore the least I can do is teach you how to make them ..
From my experience, this skill can create meaningful sincerest gift for many wonderful occasions - Valentines day, Mothers' Day, Christmas, Birthdays, Anniversaries - or while even visiting a kind friend in hospital.
Sincerely, I wish that great kindness can come from learning this skill,
and I wish everyone great aspirations, great moments ahead with this skill.


================================
Please follow PIC-001 to PIC-113
Level 1 - Expected final product :
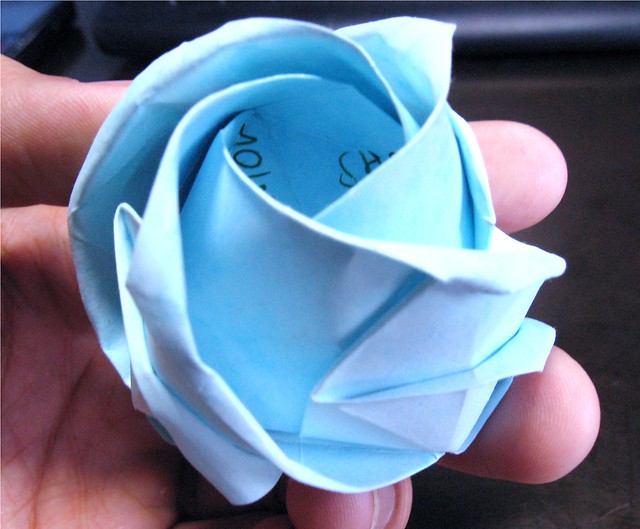
================================
PIC-001
Don't use photocopy paper - too thin and collapse easily. Use normal art papers.
* * *
This is "HIDE" side

Briefly,
Level 1 - Ordinary Kawasaki rose (my folding methods - scarfree)
Level 2 - Modified model (with stems, leaves, central petals)
Level 3 - Gift-of-gifts rose (with stems, leaves, central petals, calyx, rounding effects) ie. Final complete set.
================================
In this series I am only teaching level 1.
I hope that everyone have origami experiences, as level 1 is advanced origami. (You shall see)
Even if you come to my teaching sessions, I will still need to take 2.5 hours to teach you the following series. Therefore by following these series yourself, you have saved some money at least.
================================
If you face any problem while folding, the friends that I have taught previously will be in this forum - yes1705, McRaurel, Moow. They have very good experiences and I strongly recommend them as well.
I do not sell the roses, and therefore the least I can do is teach you how to make them ..
From my experience, this skill can create meaningful sincerest gift for many wonderful occasions - Valentines day, Mothers' Day, Christmas, Birthdays, Anniversaries - or while even visiting a kind friend in hospital.
Sincerely, I wish that great kindness can come from learning this skill,
and I wish everyone great aspirations, great moments ahead with this skill.
================================
Please follow PIC-001 to PIC-113
Level 1 - Expected final product :
================================
PIC-001
Don't use photocopy paper - too thin and collapse easily. Use normal art papers.
* * *
This is "HIDE" side
Last edited:


