Origami rose

moow

Junior Member
Joined
Jun 11, 2001
Messages
14
Reaction score
0
I too follow youtube to do the rose but it is indeed different .
i realise when u fold the rose there always a few line here and there that kinda "scar" the rose.so i took up the lesson from rick.
His method is quite different from all the youtube i've seen so far. seems like he really put in time n effort to dissect the folding process and come up with something of his own.

It a 1 piece fyi.

Rick is conducting another lesson :

Date: 15-Jan-2011 Sat. 12pm to 5.30pm.
Location: Near Cityhall.

PM him if ur interested :)

He normally has 2 lesson : basic and advance ,since there isnt much time to teach all in one shot. If u know the online method ... you shouldnt have much problem undestanding the concept of his method.

You shld attend his lesson esp it kinda hard to explain some folds.
 

Death4ngel

Arch-Supremacy Member
Joined
Sep 13, 2008
Messages
10,920
Reaction score
0
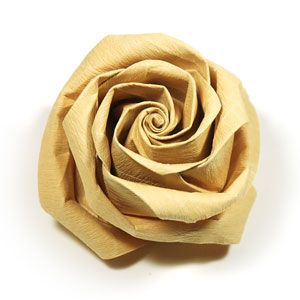
I managed to make this rose following its website.

kawasaki_rose_new_91.jpg
 

moow

Junior Member
Joined
Jun 11, 2001
Messages
14
Reaction score
0
well.... u just compare urs with his . If you feel your is nicer than u follow your method bah.
There no right or wrong, just an additional folding method you could explore.
 

McRaurel

Member
Joined
Dec 29, 2009
Messages
309
Reaction score
0
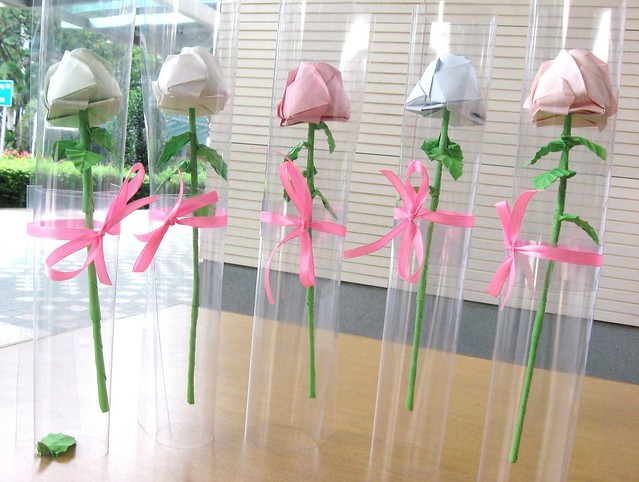
55685_465752812810_628532810_6136549_3742773_o.jpg


These are the roses taught by TS. One must really have the patience and be motivated to do this.

In my first trial, 1 rose head= 1 hour.
Slowly yet progressively, i succeeded in doing it under 30 mins.

But overall, including the rose head, stem and leaves took me an hour..

so imagine doing that for a thousand roses to impress your love ones...
 

yes1705

Master Member
Joined
Jan 4, 2004
Messages
3,173
Reaction score
0
I had known Rick since his first class he conducted in August 2010. If you really want learn how to fold your own paper rose (complete with rose, stem and leaves) with your own hands, you would like you can make with Rick's method. Rick is very experienced at this paper rose and he always tries his utmost to show you how to understand his steps.

Like most origami works, you will definitely become better at this when you practise consistently and make more of them by yourself.
 

Formula11

Member
Joined
Jul 5, 2010
Messages
218
Reaction score
0
The next lesson is on 15-Jan-2011 Sat, 12pm - 5pm, near Cityhall.
Fee will be disclose privately. (I adjust the fees after each lesson)

Just leave me your hp no. or email me at giftofgiftsrose@hotmail.com and
I will get back to you asap.

* * *
@Moow and Yes1705,
I second your comments totally - consistent practise and don't give up.
Really appreciate the kindest comments ~


"Learning today, or learning 2 years later. Whats the difference?
Probably not much difference.
But I used to wish,
I know this skill much much earlier ~ "
 

Formula11

Member
Joined
Jul 5, 2010
Messages
218
Reaction score
0
15-Jan-2011 Sat - 5th Batch students - 5.5hrs

I have a great session with my students / friends.
It's a great start to my year 2011.
I wish them great aspirations and surprises ahead with this skill(s).


SoDacHin

Junior Member
Joined
Jan 18, 2011
Messages
40
Reaction score
0
wow!! it looks awesome.. i've tried folding with napkins before..showed by a friend.. but it looks nothing like urs!
 

Formula11

Member
Joined
Jul 5, 2010
Messages
218
Reaction score
0
Teaching level 1

Hi. For the sake of those friends who I am unable to meet, I try my best to help.

Briefly,
Level 1 - Ordinary Kawasaki rose (my folding methods - scarfree)

Level 2 - Modified model (with stems, leaves, central petals)

Level 3 - Gift-of-gifts rose (with stems, leaves, central petals, calyx, rounding effects) ie. Final complete set.
================================

In this series I am only teaching level 1.
I hope that everyone have origami experiences, as level 1 is advanced origami. (You shall see)

Even if you come to my teaching sessions, I will still take 2.5 hours to teach you the following series. Therefore by following these series yourself, you save $15 (at least).
================================

If you face any problem while folding, the friends that I have taught previously will be in this forum - yes1705, McRaurel, Moow. They have very good experiences and I strongly recommend them as well.

I do not sell the roses, and therefore the least I can do is teach you how to make them ..

From my experience, this skill can create meaningful sincerest gift for many wonderful occasions - Valentines day, Mothers' Day, Christmas, Birthdays, Anniversaries - or while even visiting a kind friend in hospital.

Sincerely, I wish that great kindness can come from learning this skill,
and I wish everyone great aspirations, great moments ahead with this skill.


================================

Please follow PIC-001 to PIC-113

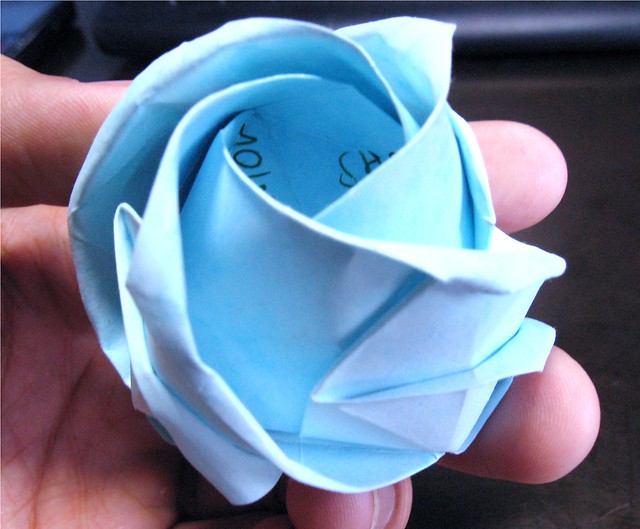
Level 1 - Expected final product :


================================

PIC-001
Don't use photocopy paper - too thin and collapse easily. Use normal art papers.
* * *
This is "HIDE" side


PIC-002
"SHOW" side


PIC-003

PIC-004
 
Last edited:

Formula11

Member
Joined
Jul 5, 2010
Messages
218
Reaction score
0
Teaching level 1

PIC-013

PIC-014

PIC-015
Line 4 Ok.


PIC-016

PIC-017

PIC-018
Line 5 Ok.


PIC-019
Now for line 6.
Notice the highlighted yellow dot ? Line 6 originate from there.
Line 6 is the most important line of all the 12 lines. If line 6 is wrong, then the rest of the line 7 to line 12 will be affected.


PIC-020
 
Last edited:

Formula11

Member
Joined
Jul 5, 2010
Messages
218
Reaction score
0
Teaching level 1

PIC-021

PIC-022
Now for line 7.


PIC-023

PIC-024

PIC-025
For Line 7 , it's to be folded both inward and outward - making line 7 flexible to fold in either direction. ie. The same line is to be fold twice - clockwise & anti clockwise.


PIC-026
For Line 8 , go to "SHOW" side of the paper.


PIC-027

PIC-028
Line 8, originate from the this sharpest point. Line 8 is just a short crease line.
 
Last edited:

Formula11

Member
Joined
Jul 5, 2010
Messages
218
Reaction score
0
Teaching level 1

PIC-029

PIC-030

PIC-031
Go back to "HIDE" side.


PIC-032

PIC-033
Do line 1 to line 8 for other 3 sides of the square paper. (Because you cannot proceed to line 9 without completing other sides)


PIC-034
For line 9, this is the dot (see the pen) where line 9 is born - the interception point of line 6 & 7.


PIC-035

PIC-036
 
Last edited:

Formula11

Member
Joined
Jul 5, 2010
Messages
218
Reaction score
0
Teaching level 1

PIC-037

PIC-038

PIC-039

PIC-040

PIC-041

PIC-042
Line 9 - on "SHOW" side.


PIC-043
Line 9 - on "HIDE" side.


PIC-044
Do line 9 for other three portions of the square paper.
 
Last edited:

Formula11

Member
Joined
Jul 5, 2010
Messages
218
Reaction score
0
Teaching level 1

PIC-045
Line 10 originate from this point (see the pen).


PIC-046

PIC-047

PIC-048

PIC-049

PIC-050

PIC-051

PIC-052
Line 10 Ok.
 
Last edited:

Formula11

Member
Joined
Jul 5, 2010
Messages
218
Reaction score
0
PIC-053

PIC-054

PIC-055
Fold line 10 for all the rest of the three sides.


PIC-056
Now learn line 11 - a very small square in the middle of the paper.


PIC-057

PIC-058

PIC-059

PIC-060
 
Last edited:

Formula11

Member
Joined
Jul 5, 2010
Messages
218
Reaction score
0
Teaching level 1

PIC-061
This is "SHOW" side.


PIC-062
This is "HIDE" side.
Only 1 side of line 11 is made.


PIC-063
Now all 4 sides are completed. End of Line 11.


PIC-064
Look closer at the small square made by lines 11 (Very faint at the centre).


PIC-065
Now for line 12.


PIC-066

PIC-067
Fold line 12 for all the four sides. Then it will look like this.


PIC-068
Now that we have fold 12 lines x 4 sides = 48 lines.
If everything is done correctly, the paper will float nicely like this (below), on the "SHOW" side.
 
Last edited:

Formula11

Member
Joined
Jul 5, 2010
Messages
218
Reaction score
0
Teaching level 1

PIC-069
After the 48 lines, it is time to do checking - 3 important checkings on the four corners.


PIC-070

PIC-071

PIC-072

PIC-073

PIC-074

PIC-075

PIC-076
 
Last edited:
Important Forum Advisory Note
This forum is moderated by volunteer moderators who will react only to members' feedback on posts. Moderators are not employees or representatives of HWZ Forums. Forum members and moderators are responsible for their own posts. Please refer to our Community Guidelines and Standards and Terms and Conditions for more information.
Top