You are using an out of date browser. It may not display this or other websites correctly.
You should upgrade or use an alternative browser.
You should upgrade or use an alternative browser.
Project: PrometheusCU
- Thread starter Langer
- Start date
More options
Who Replied?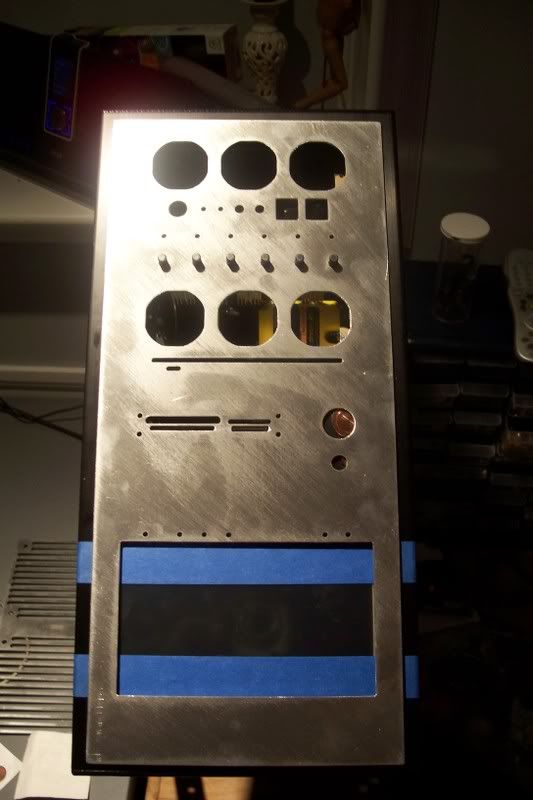
cueball1981
Supremacy Member
- Joined
- Dec 3, 2005
- Messages
- 5,968
- Reaction score
- 1
More more please....
Langer
Member
- Joined
- Sep 20, 2008
- Messages
- 221
- Reaction score
- 0
Thanks a lot guys. I appreciate the support.
Update time.
Today I decided to finally fabricate the mount for the Pico-ITX waterblock/pump.
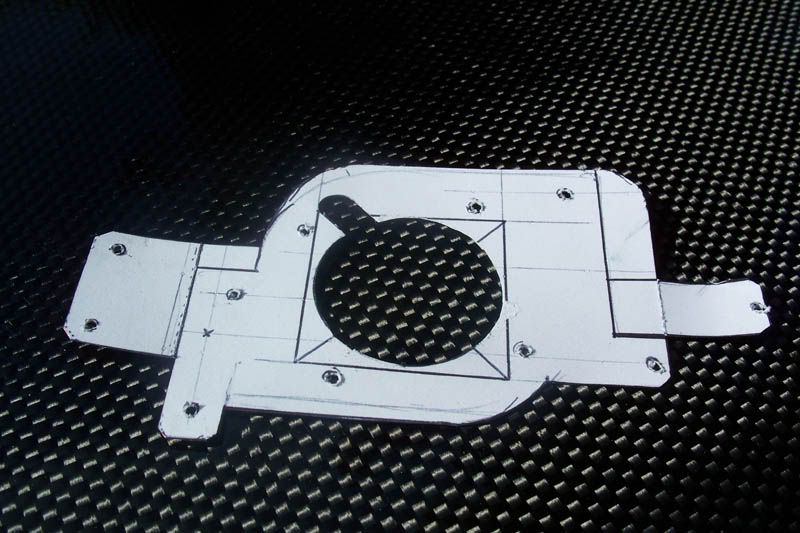
First I made a prototype from cardstock at 1:1 scale.
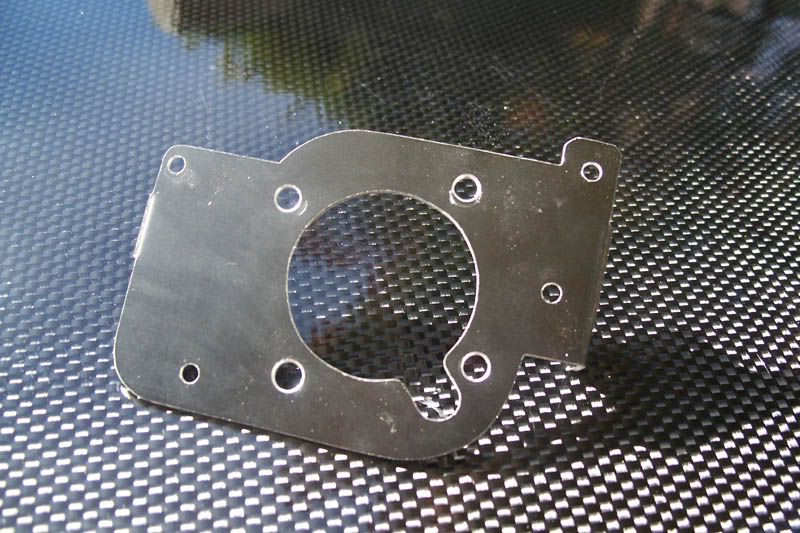
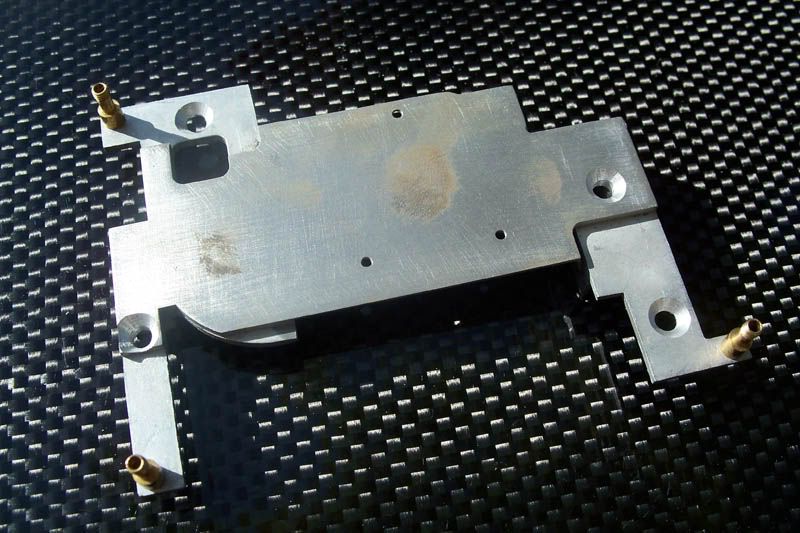
The I busted out the dremel and attacked a scrap piece of aluminum - left over from an old Lian-Li mod.
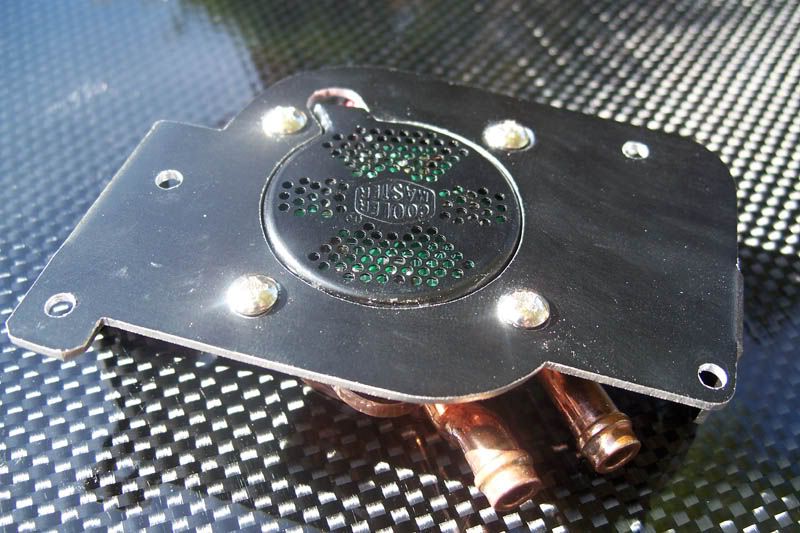
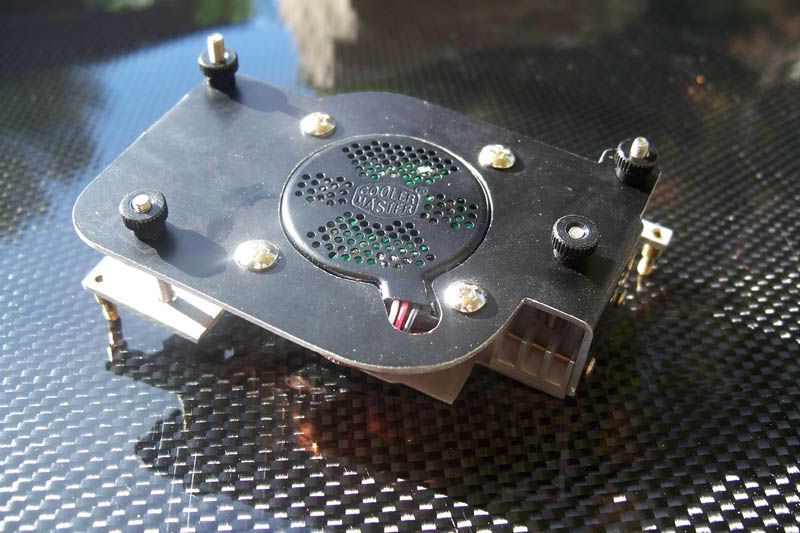
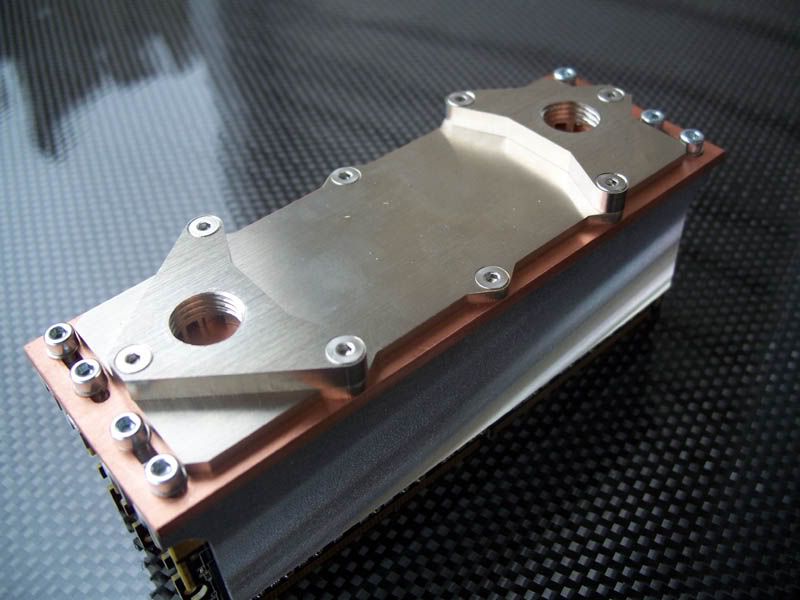
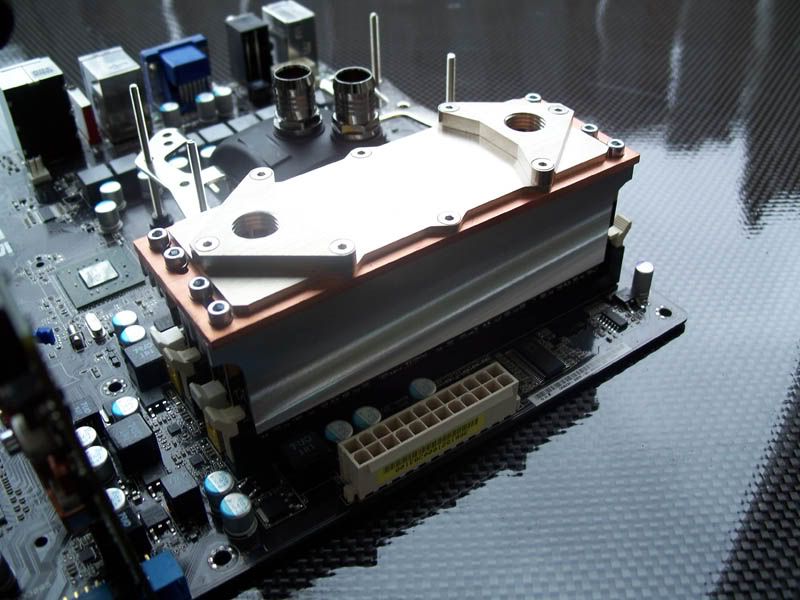
After an hour or so of hand filing, a couple quick bends, and a few holes drilled we get this:
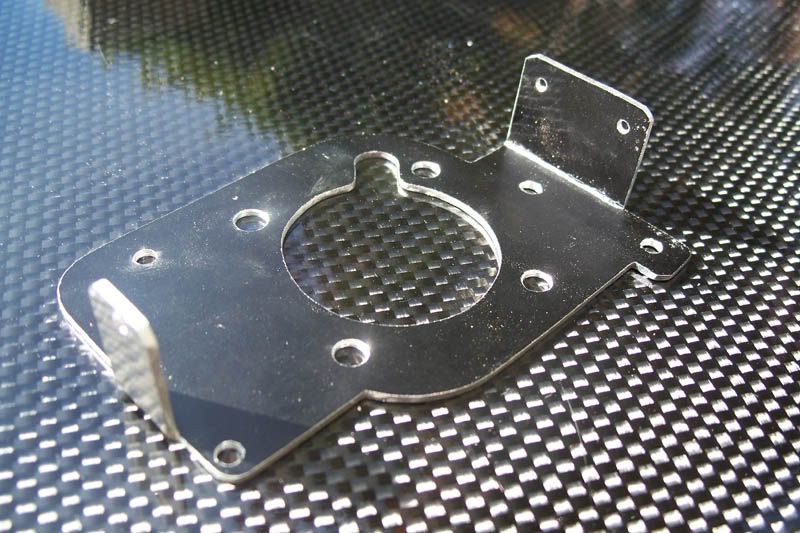
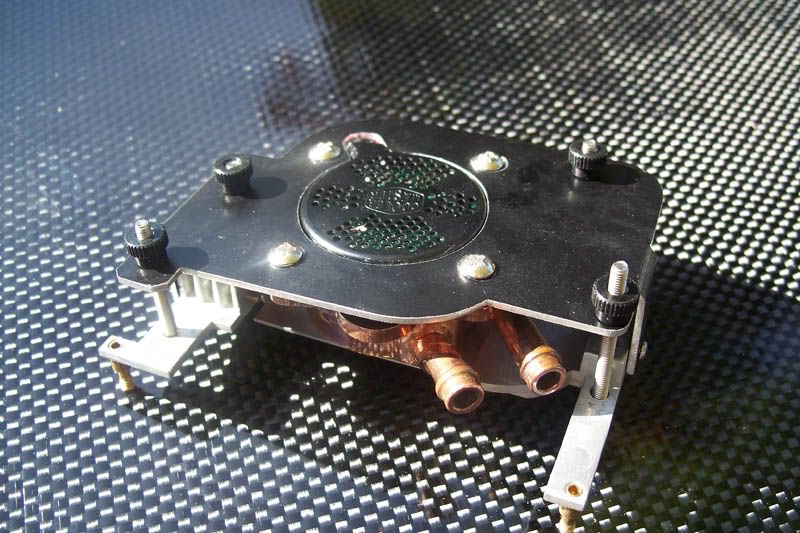
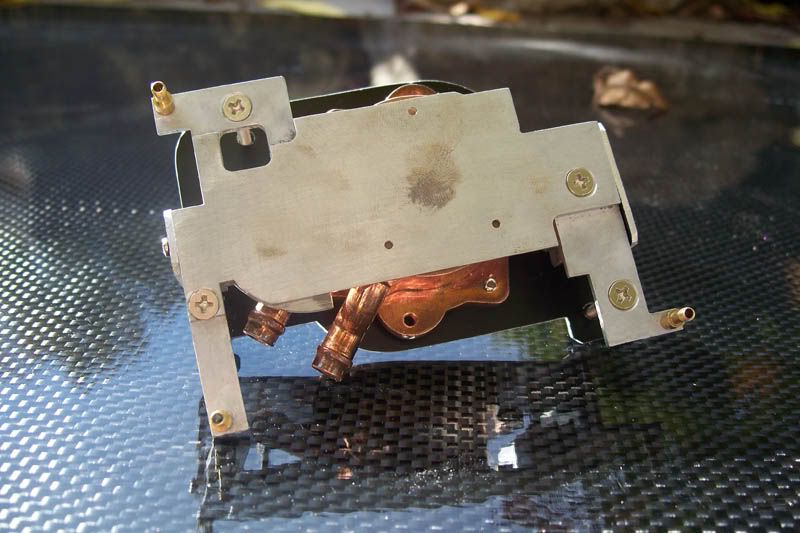
It's then mounted to the pump/waterblock:

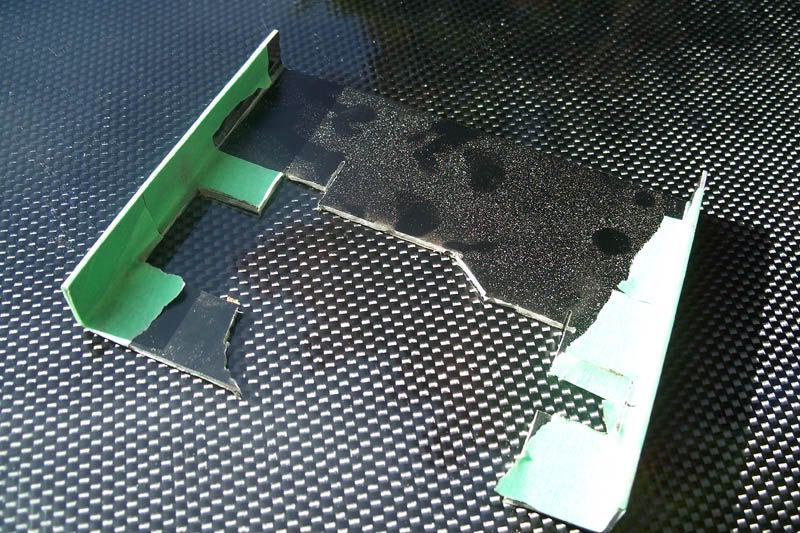
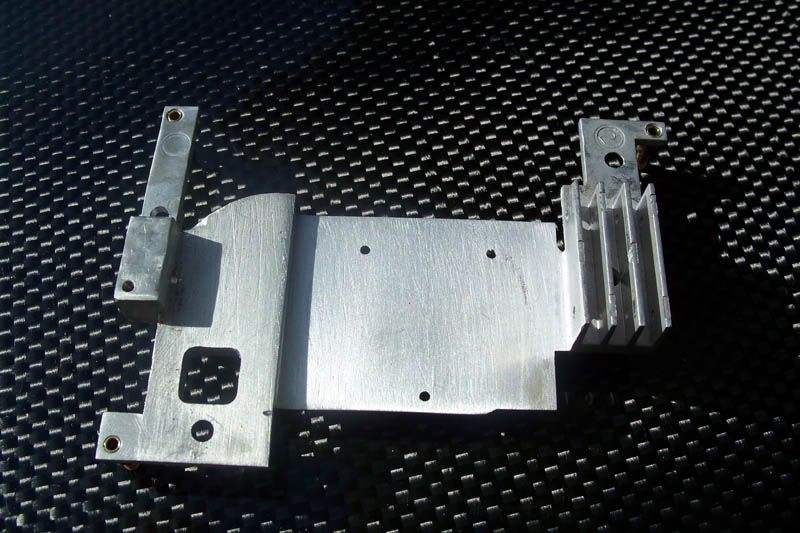
If you'll recall I did some modification to the stock Pico heatsink. I've now finished off these mods with a few counterbored holes:
Update time.
Today I decided to finally fabricate the mount for the Pico-ITX waterblock/pump.
First I made a prototype from cardstock at 1:1 scale.
The I busted out the dremel and attacked a scrap piece of aluminum - left over from an old Lian-Li mod.
After an hour or so of hand filing, a couple quick bends, and a few holes drilled we get this:
It's then mounted to the pump/waterblock:
If you'll recall I did some modification to the stock Pico heatsink. I've now finished off these mods with a few counterbored holes:
Langer
Member
- Joined
- Sep 20, 2008
- Messages
- 221
- Reaction score
- 0
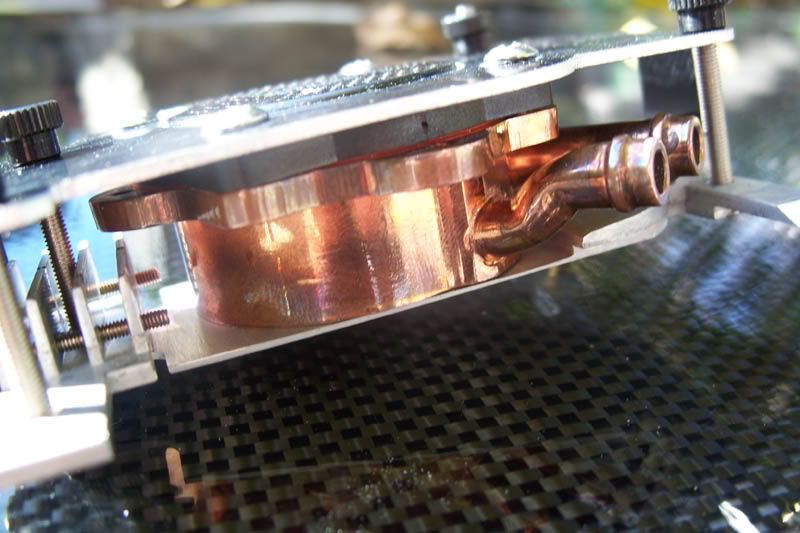
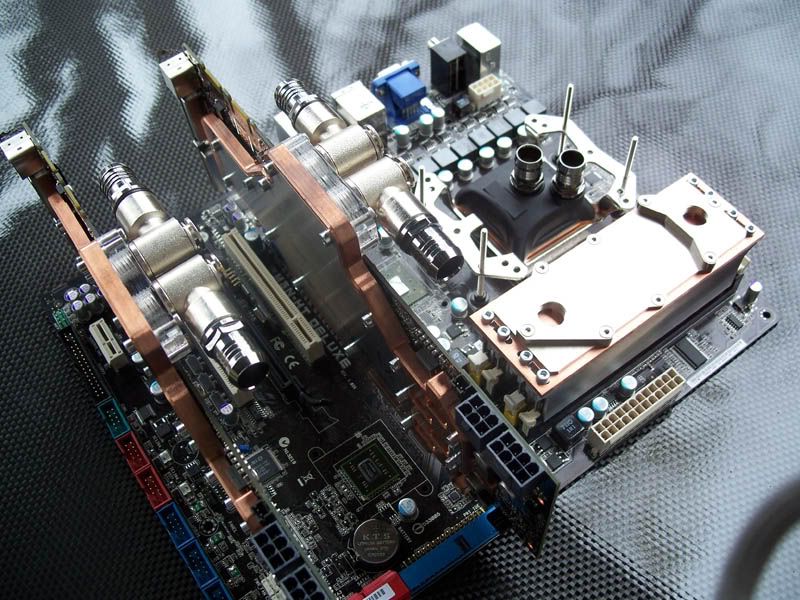
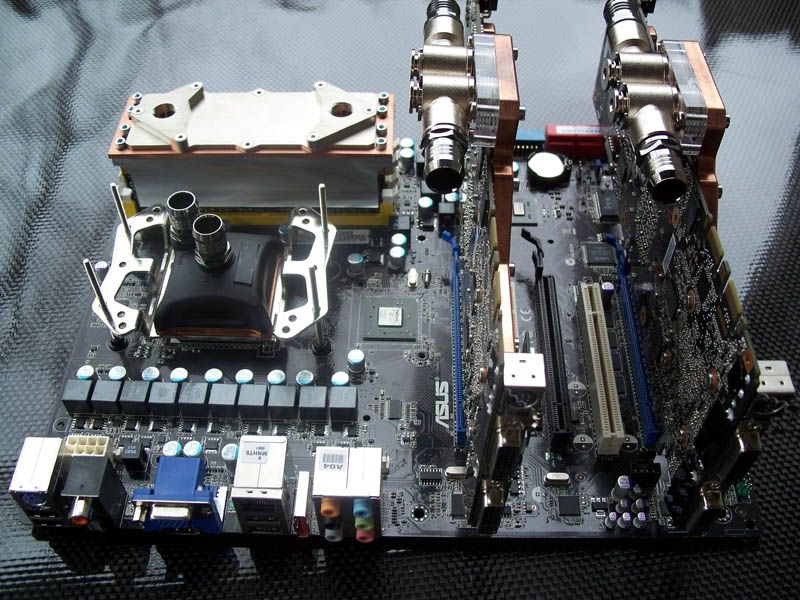
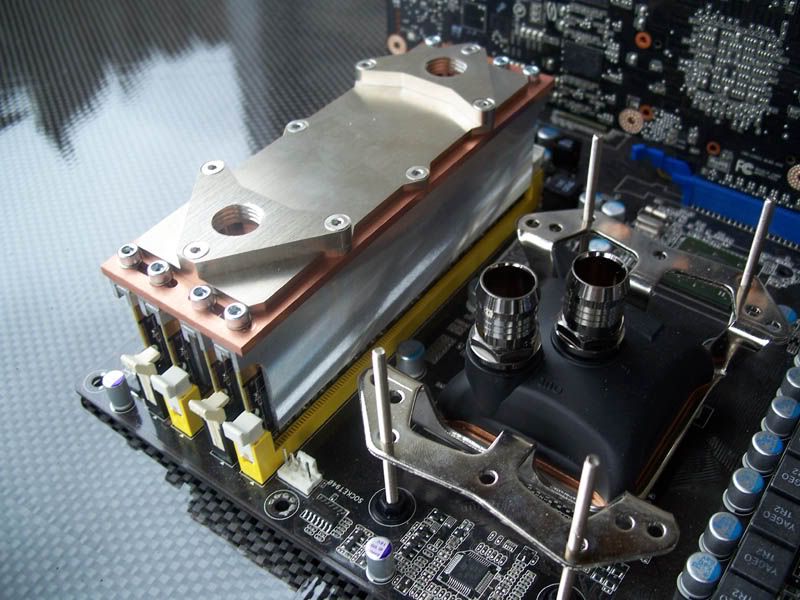
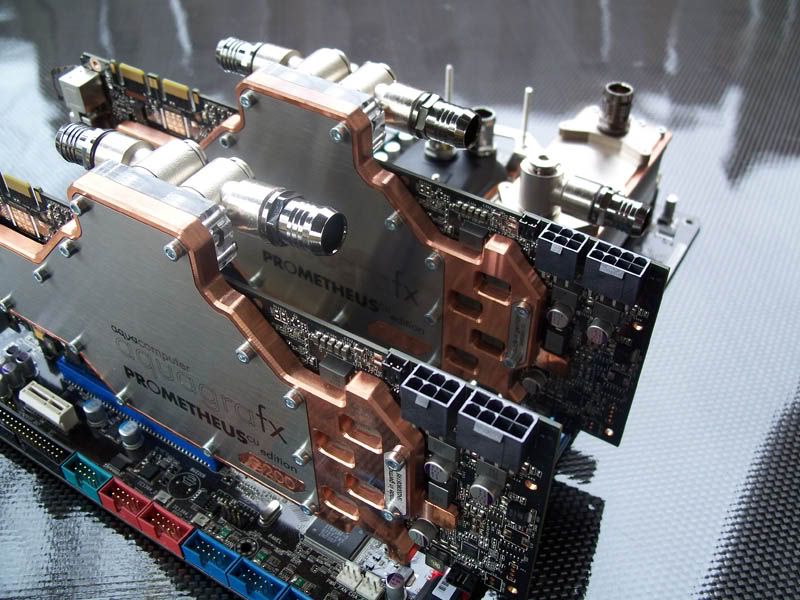
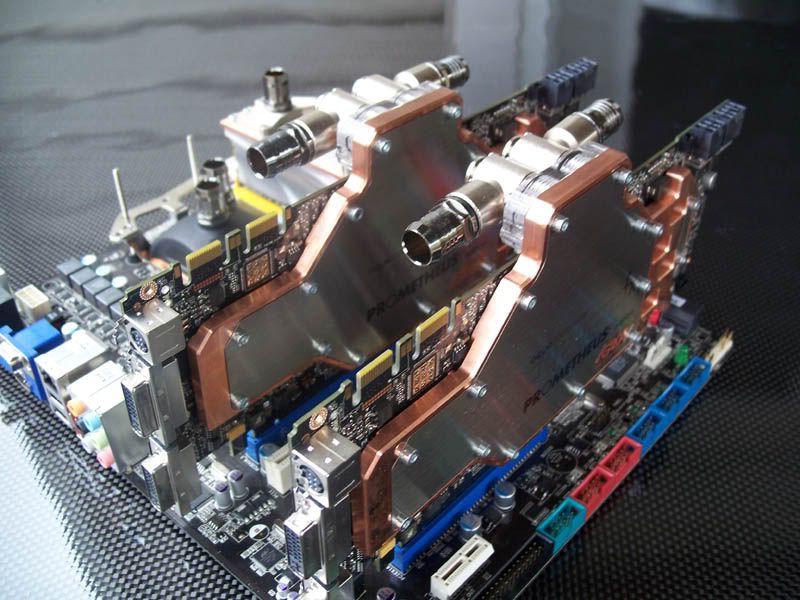
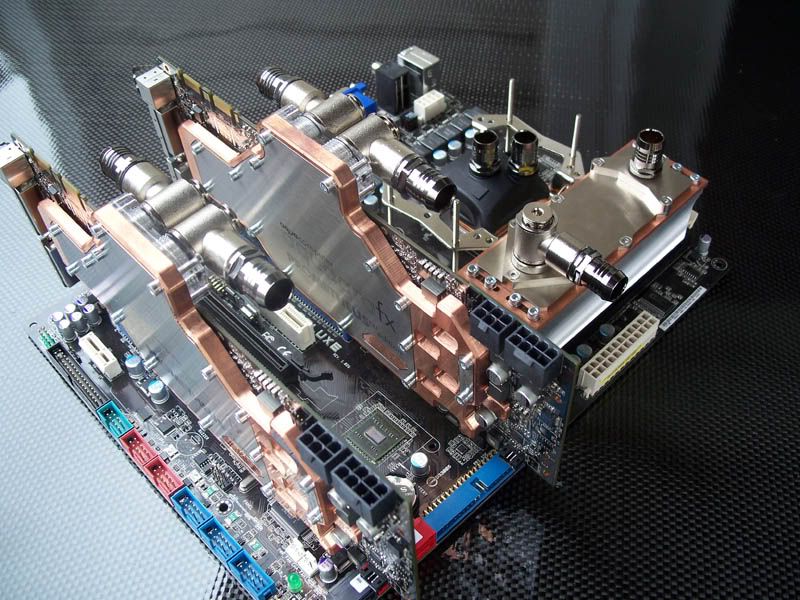
The waterblock is installed onto the stock heatsink
Finally this entire assembly is mounted to the Pico-ITX board - which is already mounted onto a bracket holding its PSU/IO/HDD. The entire thing can now be mounted into a standard 5 1/4" drive bay.
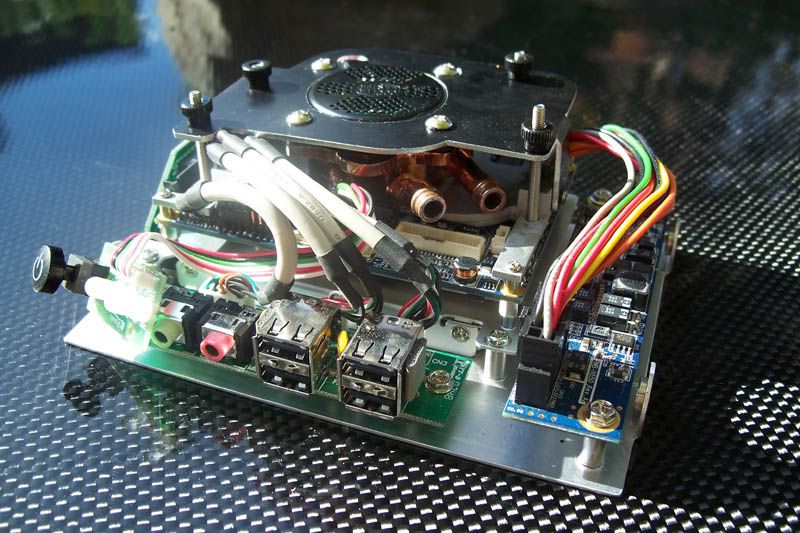
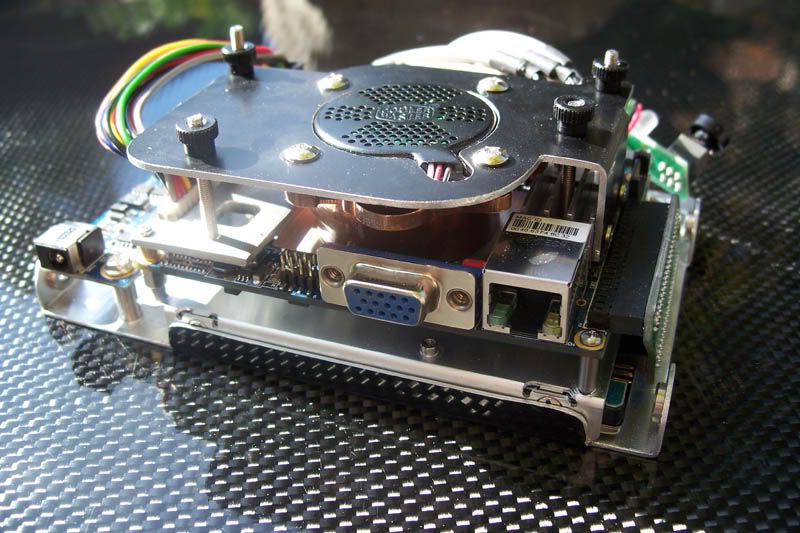
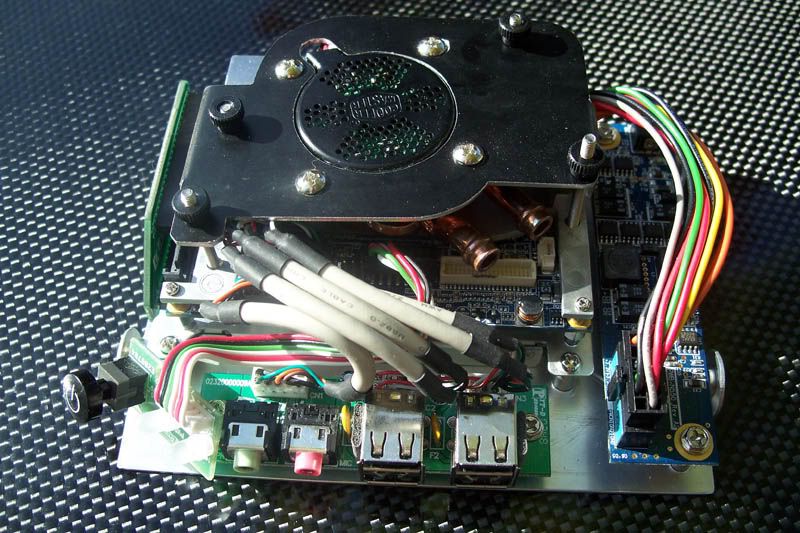
The whole thing still needs some final edge cleaning and most likely a coat of black paint - other than that she's all done.
Thanks for reading - more to come soon.
Finally this entire assembly is mounted to the Pico-ITX board - which is already mounted onto a bracket holding its PSU/IO/HDD. The entire thing can now be mounted into a standard 5 1/4" drive bay.
The whole thing still needs some final edge cleaning and most likely a coat of black paint - other than that she's all done.
Thanks for reading - more to come soon.
cueball1981
Supremacy Member
- Joined
- Dec 3, 2005
- Messages
- 5,968
- Reaction score
- 1
very nice.. wht cuttin wheel yr using for the dremel.. cos i got a few.. but they dont cut metal well..
Langer
Member
- Joined
- Sep 20, 2008
- Messages
- 221
- Reaction score
- 0
@
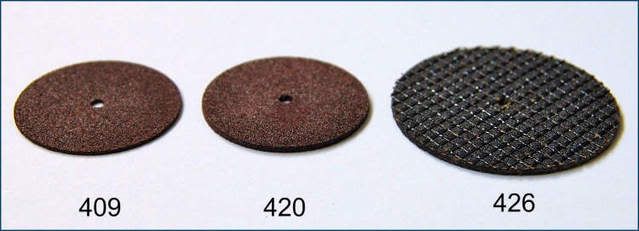
I usually use the reinforced disks, however I ran out at the beginning of fabricating this mount so I mostly used #430 - the thicker of the the friction grinding disks.
A simple question to Corsair has led to a some new developments which I will elaborate upon once the parcel arrives. This mystery parcel will be shipped tomorrow (hopefully).

I have to give a HUGE shout out to Robert from Corsair... who has been a massive help - even after that time I accidentally called his cell and woke him up (time zones are a pain). THANKS ROB!
Also some news from Mips

That RAM Freezer 4 has been reengineered and now supports Dominator class RAM. This new trinket was shipped out yesterday and is on it's way here from Germany as we speak. As an added bonus this item will soon be available from Mips if anyone else is interested.
I usually use the reinforced disks, however I ran out at the beginning of fabricating this mount so I mostly used #430 - the thicker of the the friction grinding disks.
A simple question to Corsair has led to a some new developments which I will elaborate upon once the parcel arrives. This mystery parcel will be shipped tomorrow (hopefully).
I have to give a HUGE shout out to Robert from Corsair... who has been a massive help - even after that time I accidentally called his cell and woke him up (time zones are a pain). THANKS ROB!
Also some news from Mips
That RAM Freezer 4 has been reengineered and now supports Dominator class RAM. This new trinket was shipped out yesterday and is on it's way here from Germany as we speak. As an added bonus this item will soon be available from Mips if anyone else is interested.
Langer
Member
- Joined
- Sep 20, 2008
- Messages
- 221
- Reaction score
- 0
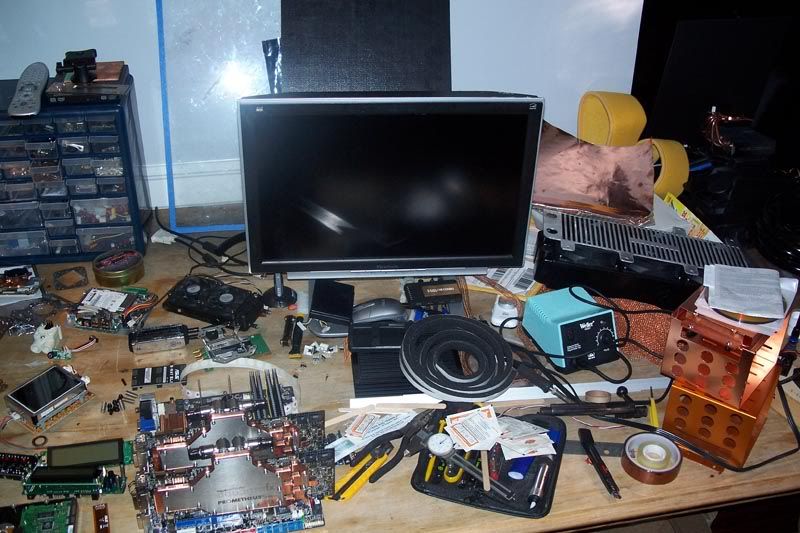
Updates...many updates.
I have more to share but I'll save it for this evening.
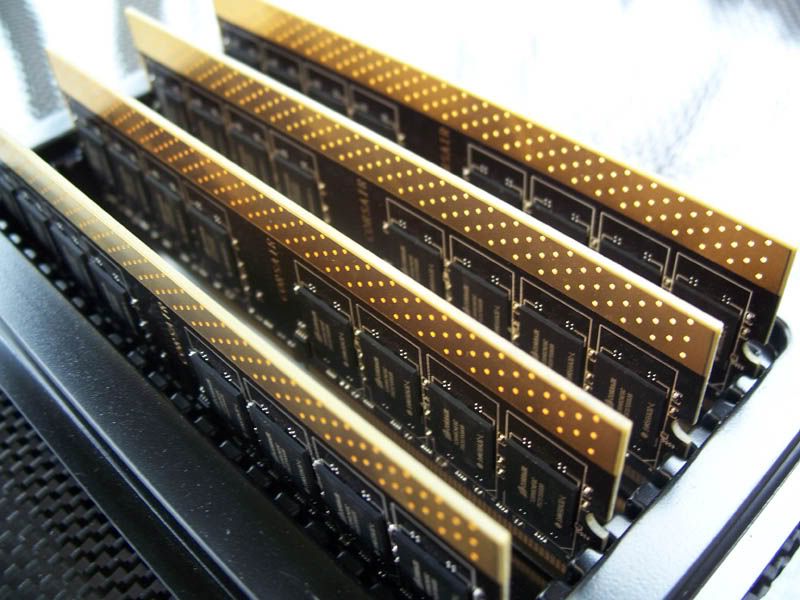
My NAKED RAM courtesy of Corsair - 8GB of 1066mhz Dominator.
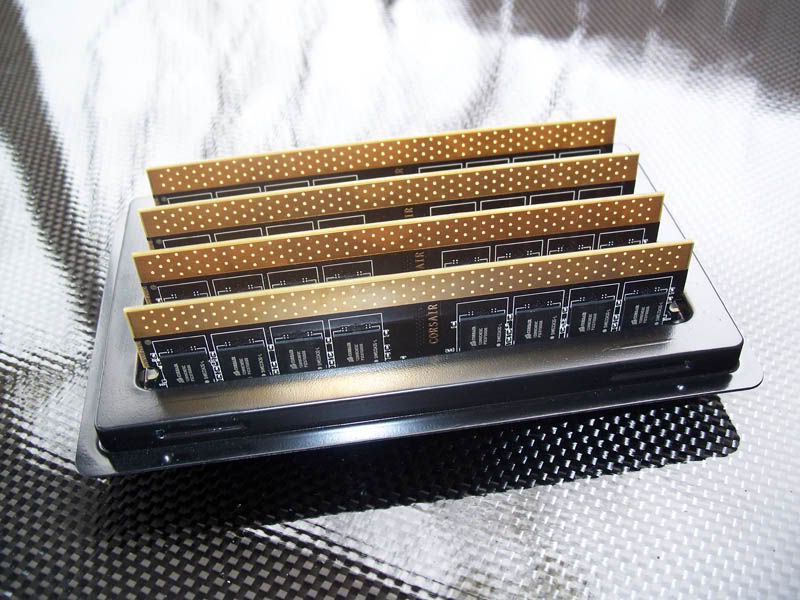
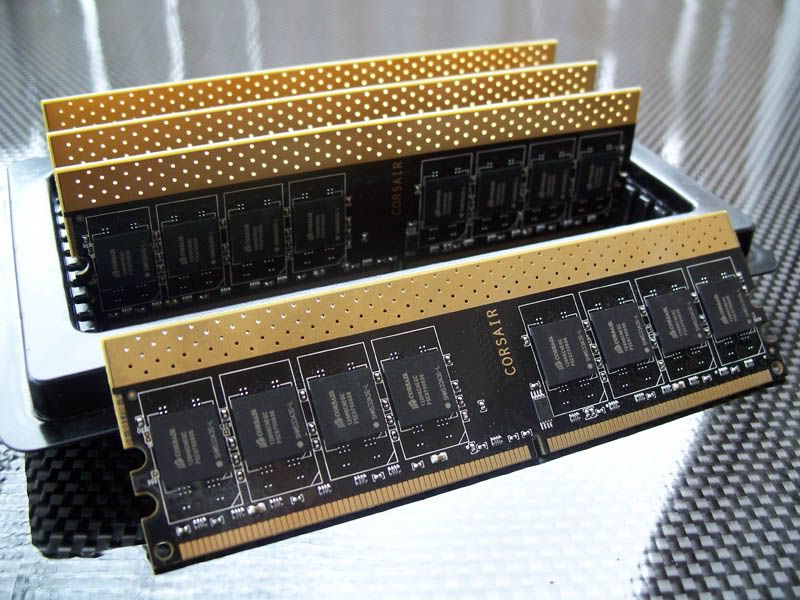
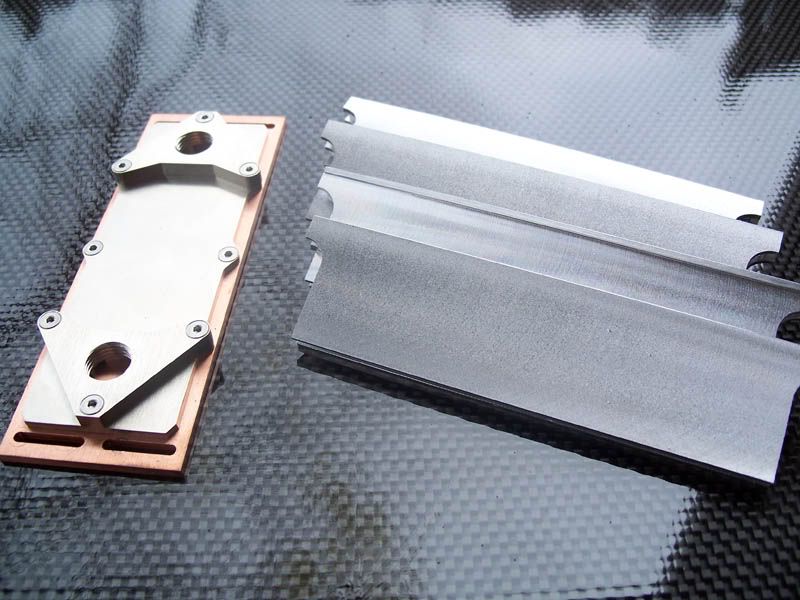
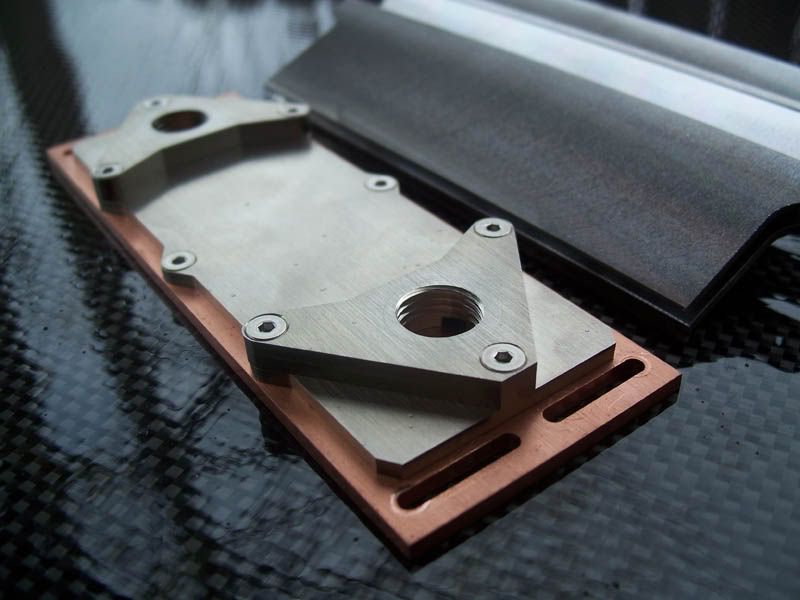
My Dominator compatible Mips RAM Freezer 4 has arrived as well. This this is BEAUTIFUL, a fantastic peice of engineering. The build quality is top notch.

I have more to share but I'll save it for this evening.
My NAKED RAM courtesy of Corsair - 8GB of 1066mhz Dominator.
My Dominator compatible Mips RAM Freezer 4 has arrived as well. This this is BEAUTIFUL, a fantastic peice of engineering. The build quality is top notch.
Langer
Member
- Joined
- Sep 20, 2008
- Messages
- 221
- Reaction score
- 0
Here they are installed:
I have several more updates to share, but I've been really busy the past week and I've not had a chance to take pictures. I'll post more stuff this evening - with that will be pics of some more Corsair goodies.
Thanks for reading.
I have several more updates to share, but I've been really busy the past week and I've not had a chance to take pictures. I'll post more stuff this evening - with that will be pics of some more Corsair goodies.
Thanks for reading.
Langer
Member
- Joined
- Sep 20, 2008
- Messages
- 221
- Reaction score
- 0
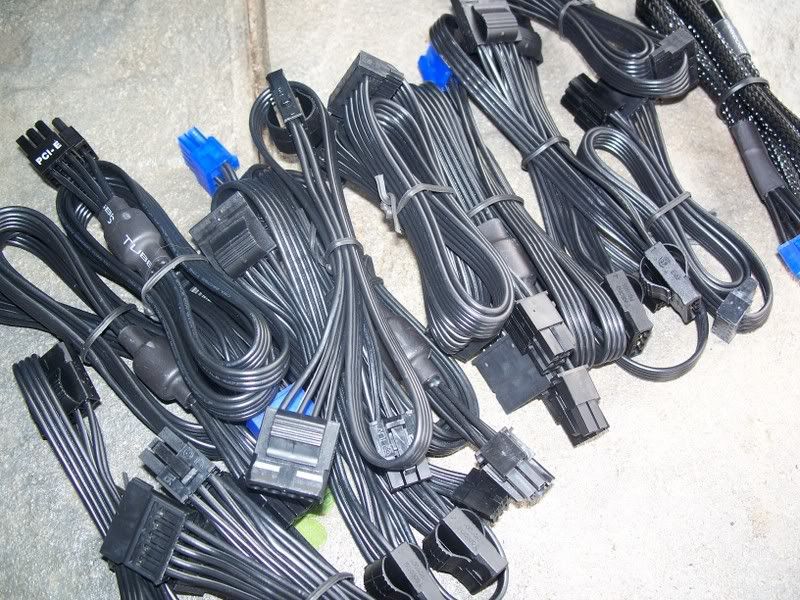
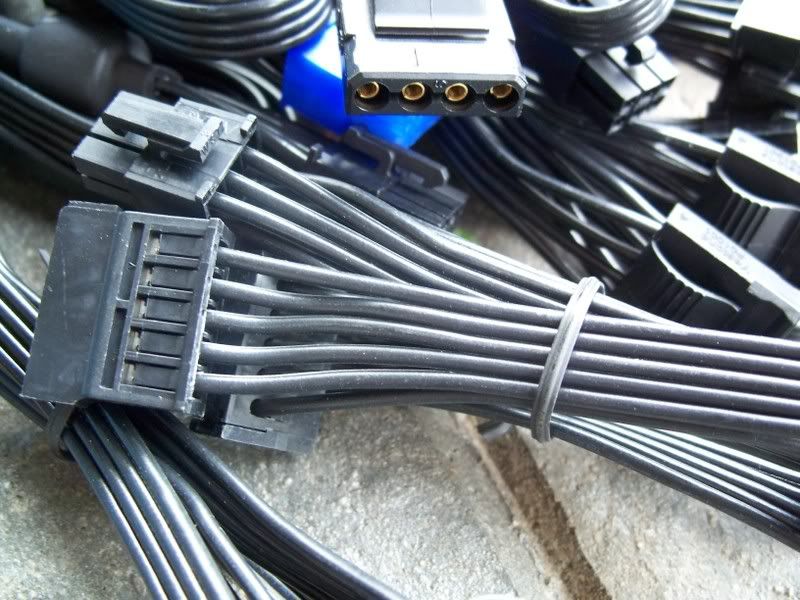
Small update. I wanted to upload these pics last night but Photobucket had other ideas.
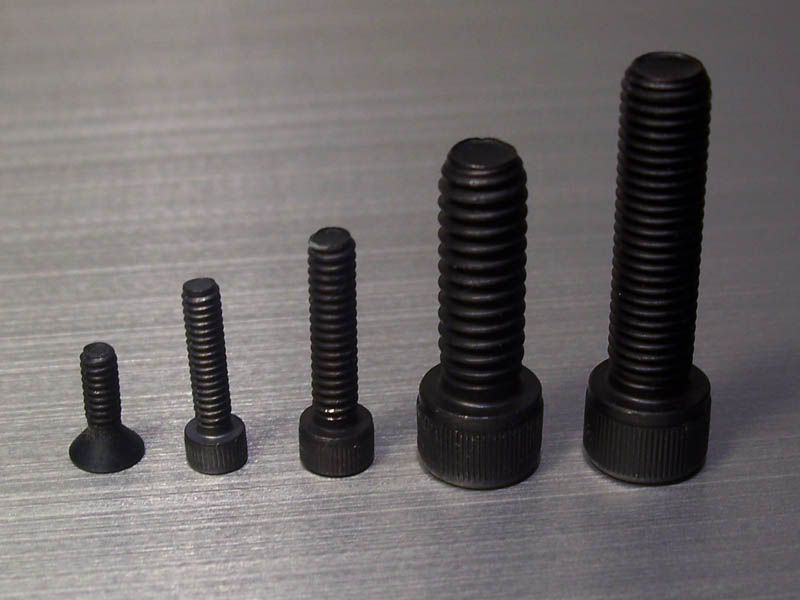
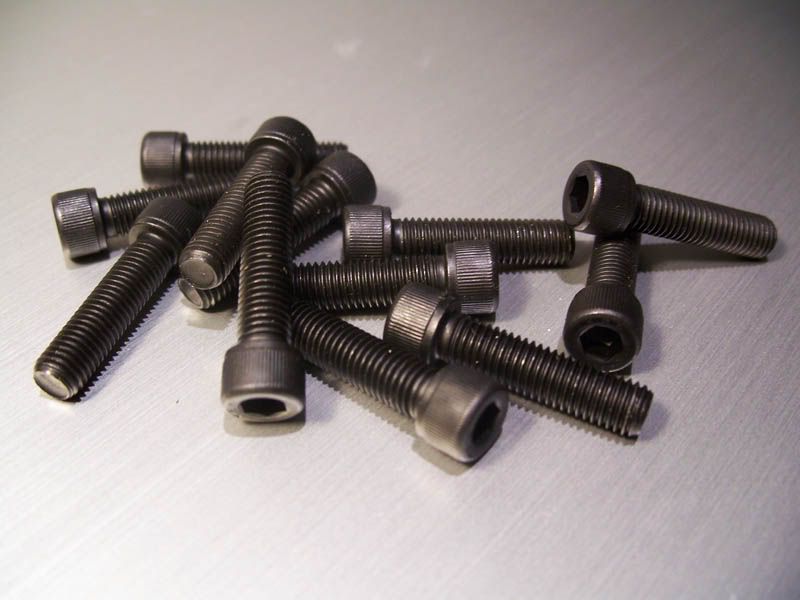
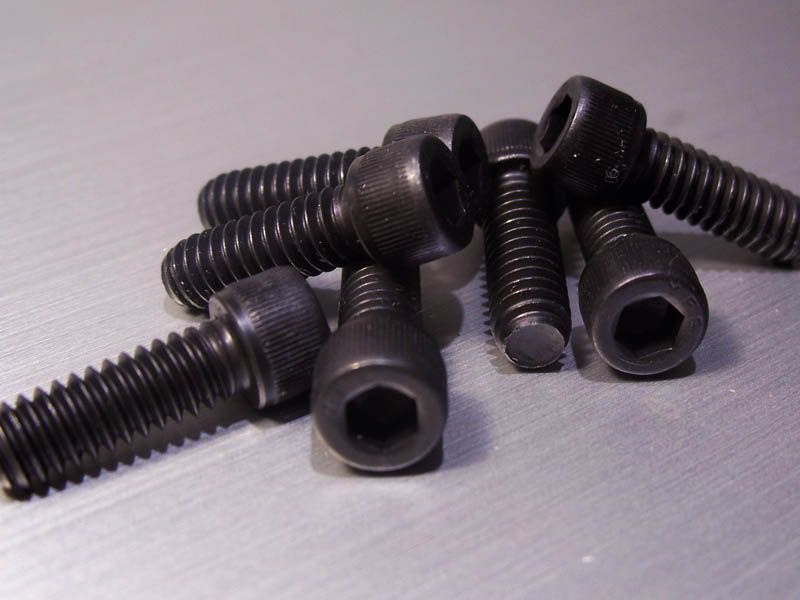
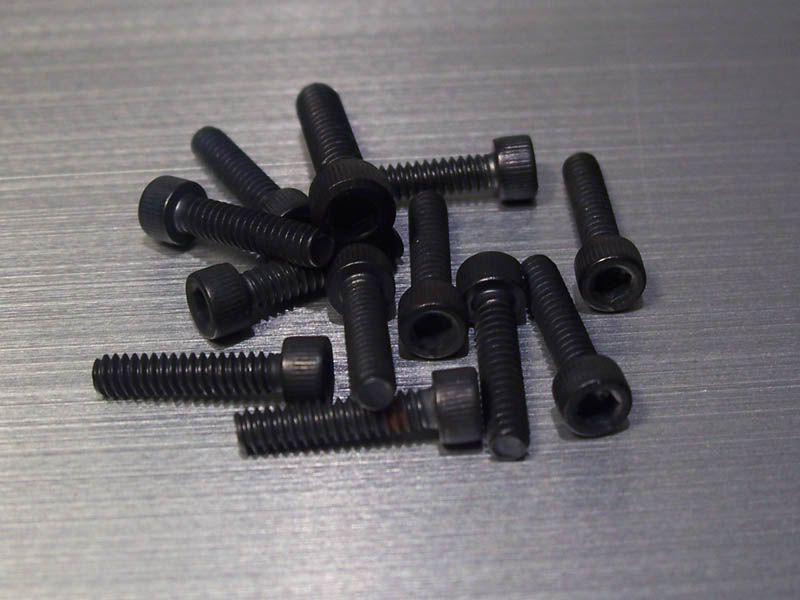
I've started ordering my hardware for this project. In the form of Brighton Socket Cap Allen Bolts, and Coutersunk Allen Bolts.
I still havent got my hands on the smaller bolts as they were special order, but here's the big stuff.
The below sizing ranges from 4-40, to 1/4-20 - I've ordered a couple hundred in each size.
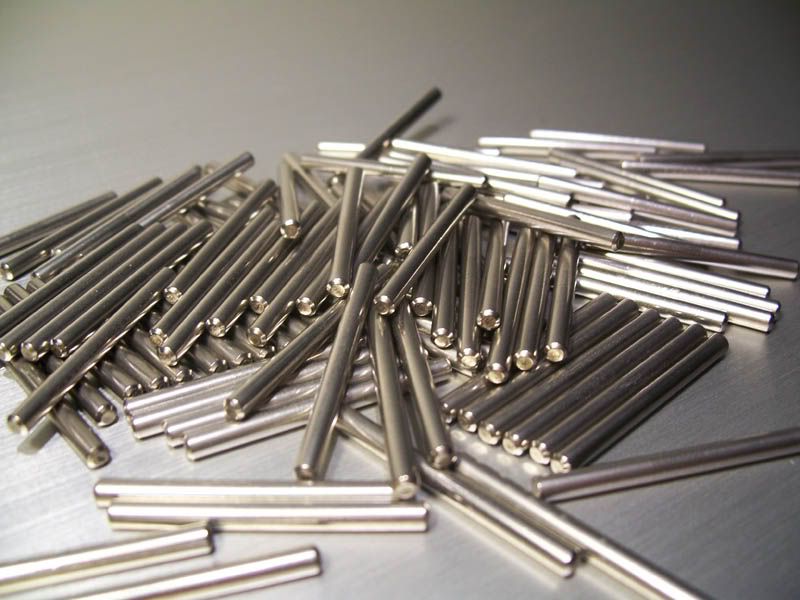
I got 100 carbide rods, the purpose of these will be revealed much later.
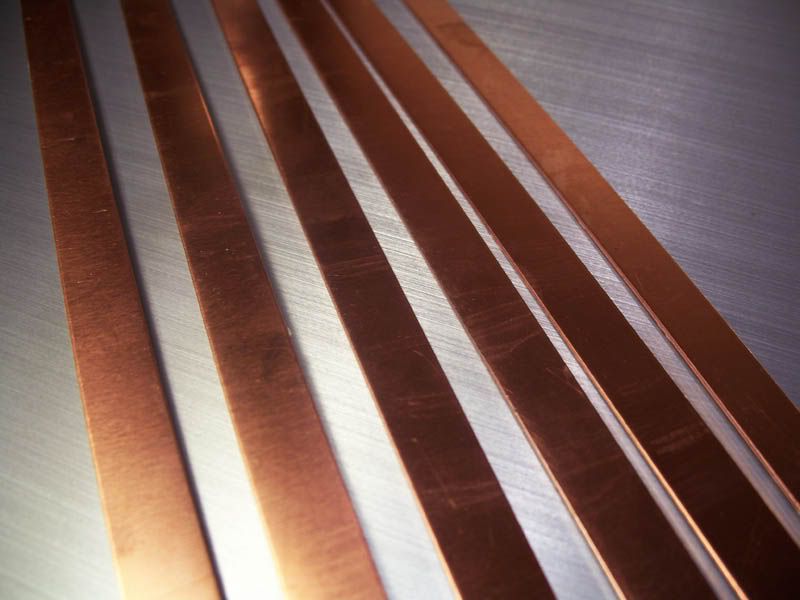
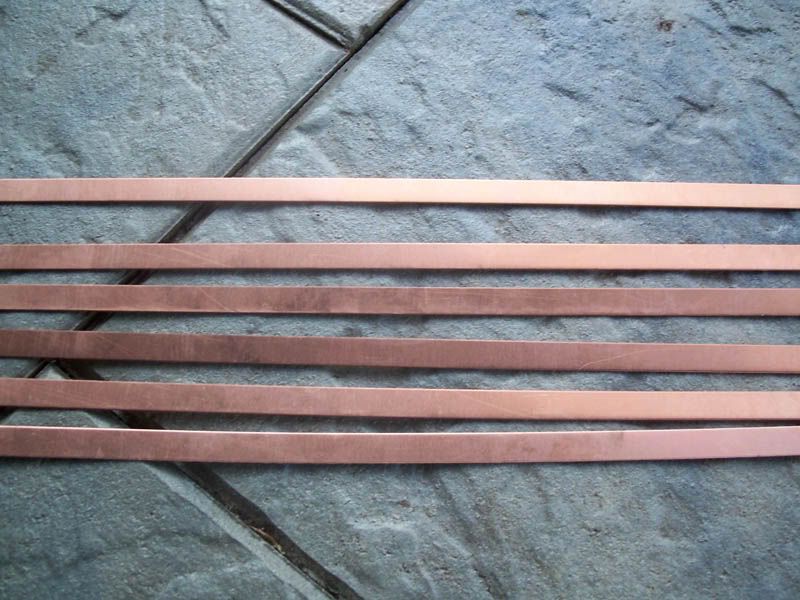
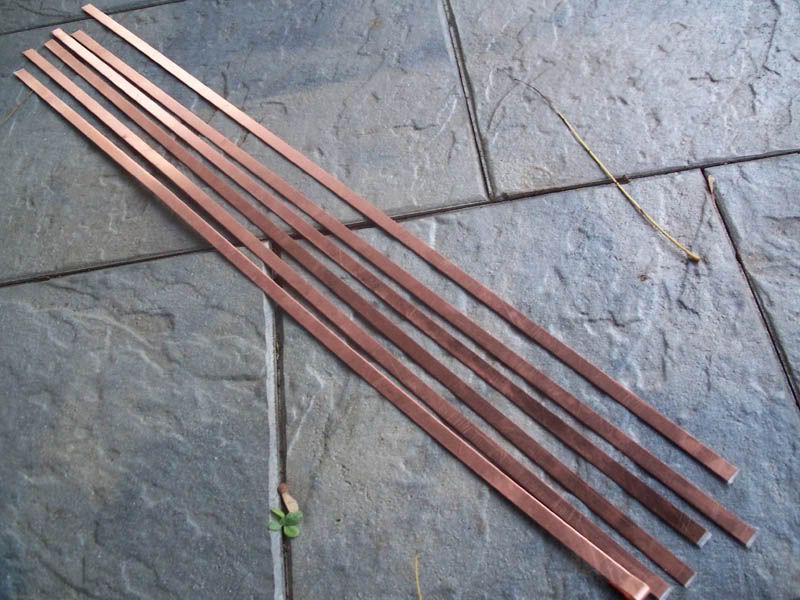
With those come six 36"x1/2"x1/16" copper flat bars. I will be bending these to fabricate cable ties and wire harness brackets.
I've started ordering my hardware for this project. In the form of Brighton Socket Cap Allen Bolts, and Coutersunk Allen Bolts.
I still havent got my hands on the smaller bolts as they were special order, but here's the big stuff.
The below sizing ranges from 4-40, to 1/4-20 - I've ordered a couple hundred in each size.
I got 100 carbide rods, the purpose of these will be revealed much later.
With those come six 36"x1/2"x1/16" copper flat bars. I will be bending these to fabricate cable ties and wire harness brackets.
Langer
Member
- Joined
- Sep 20, 2008
- Messages
- 221
- Reaction score
- 0
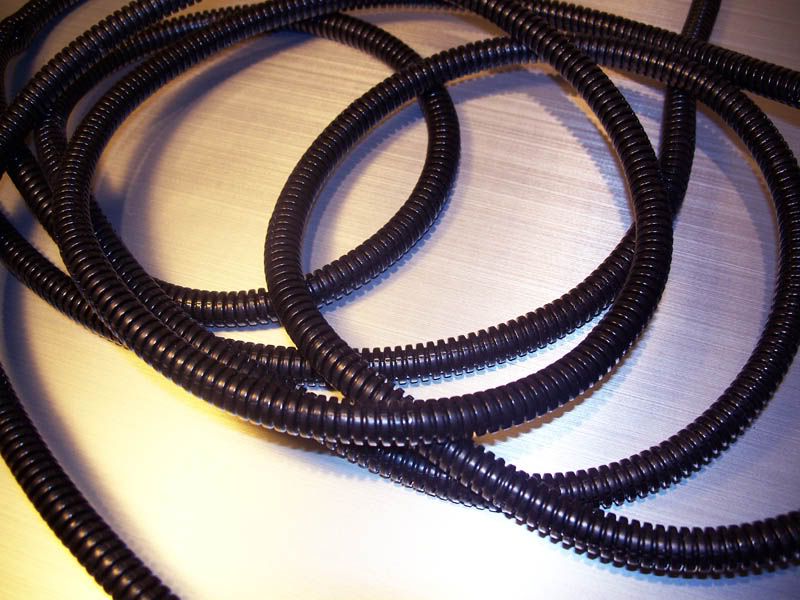
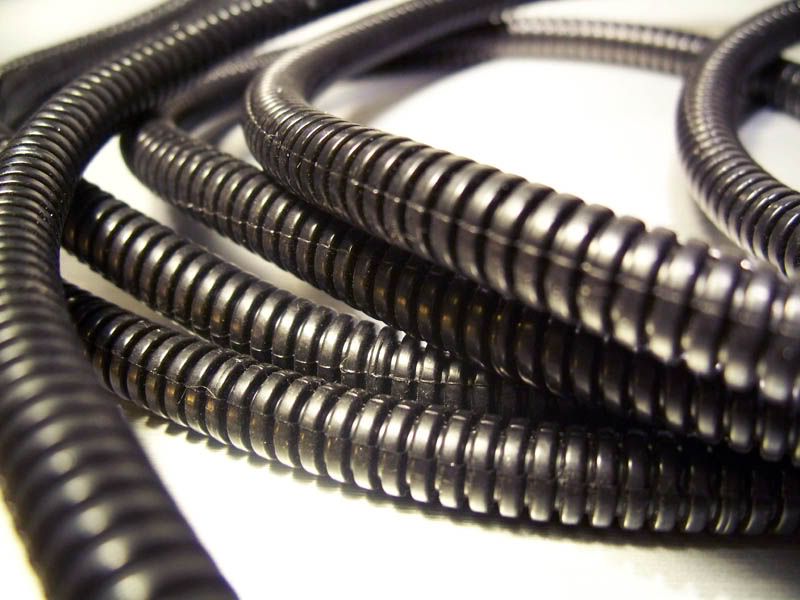
Also, 15' of 3/8" split loom tubing - this will be used on the Pico watercooling tubes, and on a couple wires that wont be seen.
I also started bending my prototypes, and as expected I don't have the tools to do this to the level that I desire.
In light of this I've taken the liberty of sending the whole fabrication of these parts to China.
I will have a Chinese company fabricate these things to perfection from copper plate in the near future.
The parts that I have will work perfectly for what I intended them to do - these aluminum bits will be installed to allow me to continue fabrication of other parts. Also I've already made a couple of design changes that will be applied to the final copper bits.

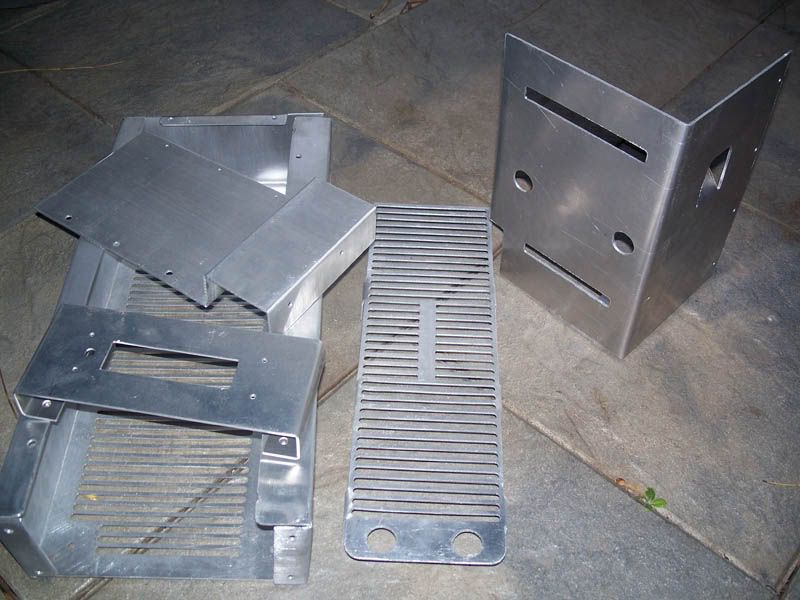
Thanks for reading, more to come very soon.
I also started bending my prototypes, and as expected I don't have the tools to do this to the level that I desire.
In light of this I've taken the liberty of sending the whole fabrication of these parts to China.
I will have a Chinese company fabricate these things to perfection from copper plate in the near future.
The parts that I have will work perfectly for what I intended them to do - these aluminum bits will be installed to allow me to continue fabrication of other parts. Also I've already made a couple of design changes that will be applied to the final copper bits.
Thanks for reading, more to come very soon.
")
Langer
Member
- Joined
- Sep 20, 2008
- Messages
- 221
- Reaction score
- 0
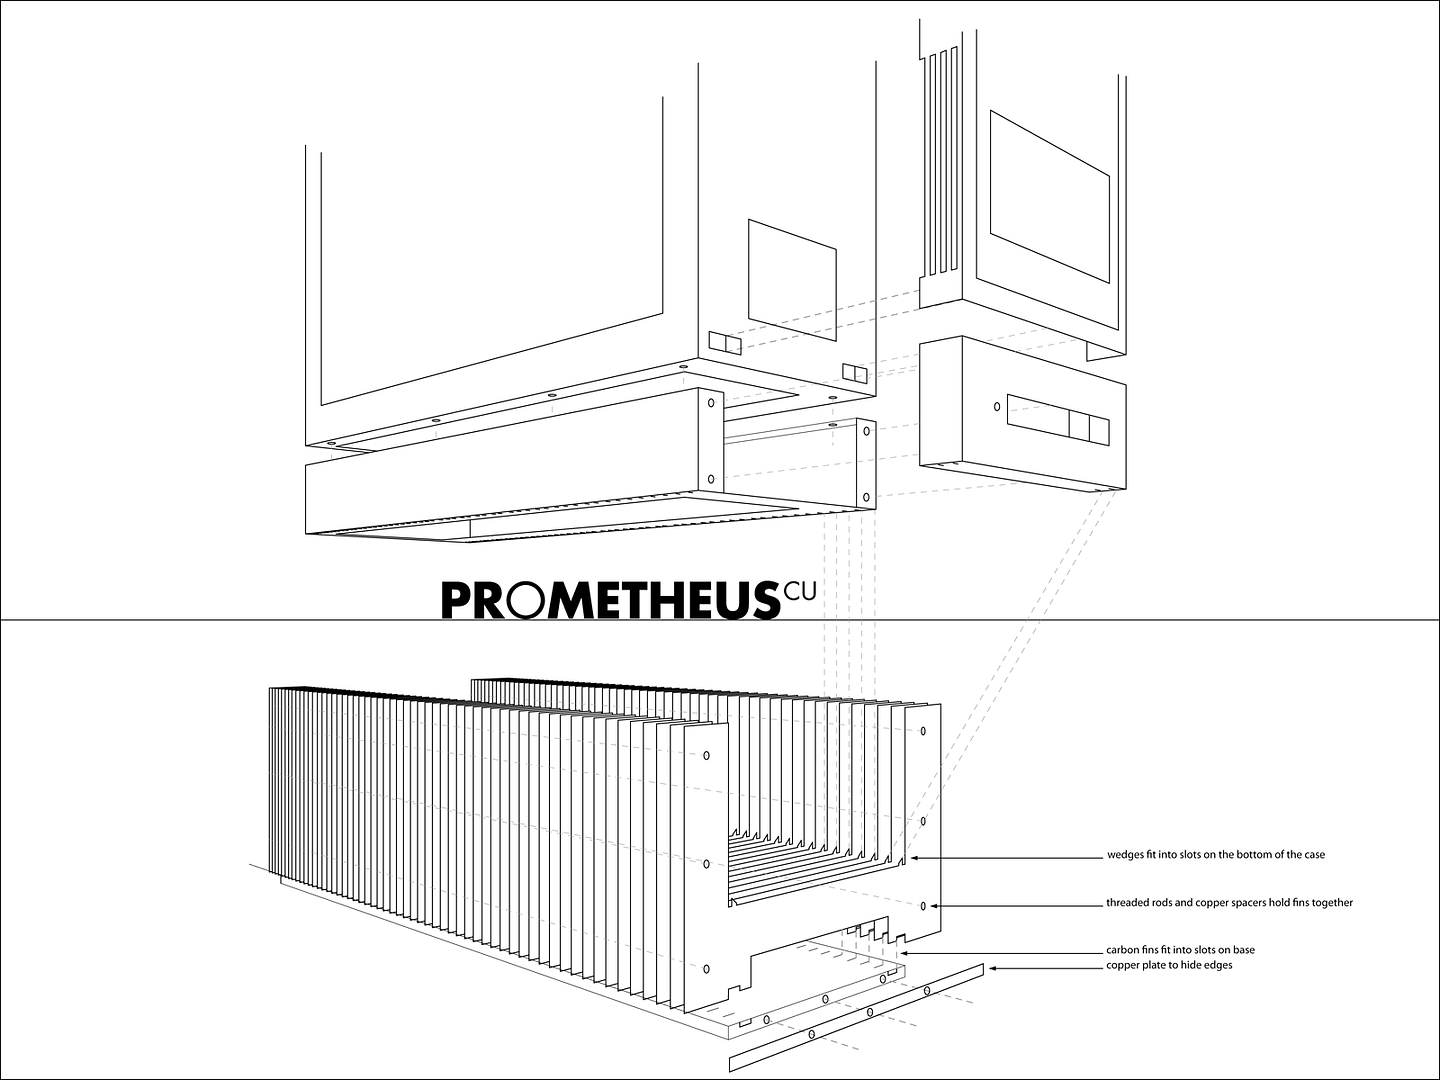
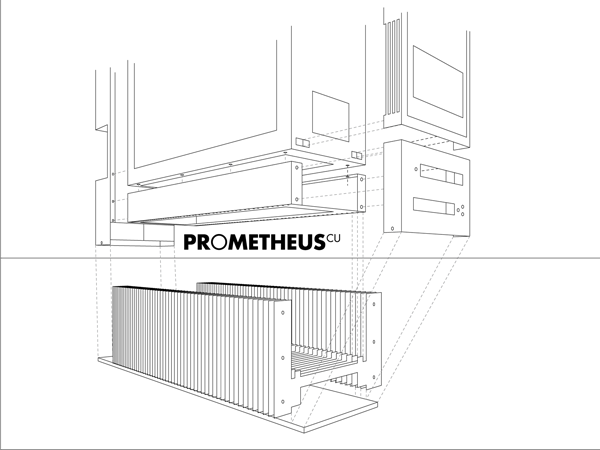
Since I want to minimize the airflow resistance on the main radiator mounted on the bottom of the unit I'll need to construct some feet that are 2.5-3" tall.
Aesthetically this is no easy task, and not something that I've addressed to date.
I've spent the past few hours in Illustrator trying to solve this large dilemma.
I've come up with the image below.
The intent here is to use a bunch of carbon fiber panels spaced ~0.5" apart to make a sort of skeletal base structure.
*click for big*
I've come up with a few extra surprises to go with this base design.
However...I'd like to ask what you all think of the concept first.
Note:
I've already devised a way of incorporating the PROMETHEUSCU logo into the mix - it was simply too complicated for me to be bothered drawing in perspective (at this time).
My intent is to put and LED in between every layer to allow crazy lighting effects
The flat part seen at the very bottom of the illustration acting as a flat base will be the uber carbon panel, shown earlier.
I'd love to hear your opinions and suggestions on how to add feet to this rig.
Thanks for helping and reading!
Aesthetically this is no easy task, and not something that I've addressed to date.
I've spent the past few hours in Illustrator trying to solve this large dilemma.
I've come up with the image below.
The intent here is to use a bunch of carbon fiber panels spaced ~0.5" apart to make a sort of skeletal base structure.

*click for big*
I've come up with a few extra surprises to go with this base design.
However...I'd like to ask what you all think of the concept first.
Note:
I've already devised a way of incorporating the PROMETHEUSCU logo into the mix - it was simply too complicated for me to be bothered drawing in perspective (at this time).
My intent is to put and LED in between every layer to allow crazy lighting effects
The flat part seen at the very bottom of the illustration acting as a flat base will be the uber carbon panel, shown earlier.
I'd love to hear your opinions and suggestions on how to add feet to this rig.
Thanks for helping and reading!
Langer
Member
- Joined
- Sep 20, 2008
- Messages
- 221
- Reaction score
- 0
I don't feel that these feet totally fit into the theme of the whole thing - that's why I'm asking for your aid.
I'd like to fabricate something along these lines - and I had planned on incorporating carbon throughout the case so I know the material will blend. It's the design that doesn't blend for me.
The carbon panels used would be fairly thick so I know the structure is there. There is also a fair bit of engineering that would go into these fins that you don't see in my rough concept illustration (I'll do another sketch to show this area - I'll post it later). So I'm certain that structural integrity wont be an issue.
I need the case elevated off the ground to maximize airflow to the rad, the case needs to be ~6CM off the ground.
My worst nightmare is to have the feet ruin the whole aesthetic - having the case sit on 4black aluminum popcan style feet is not an option for me.
Trying to develop a foot that holds the system ~2.5"-3" in the air is proving very very tricky.
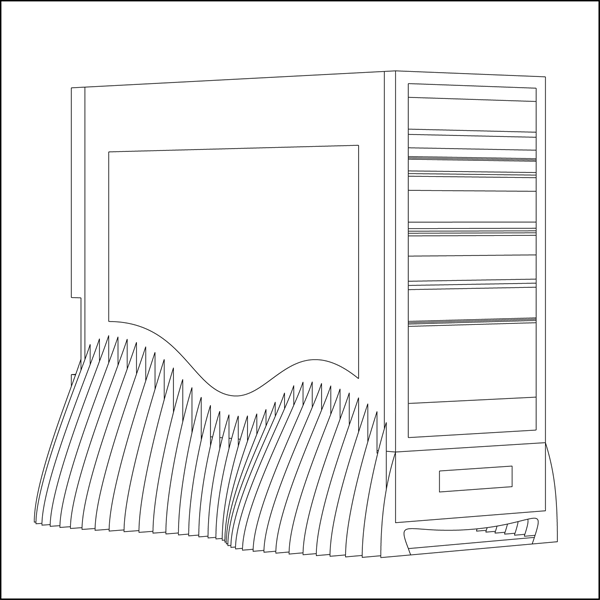
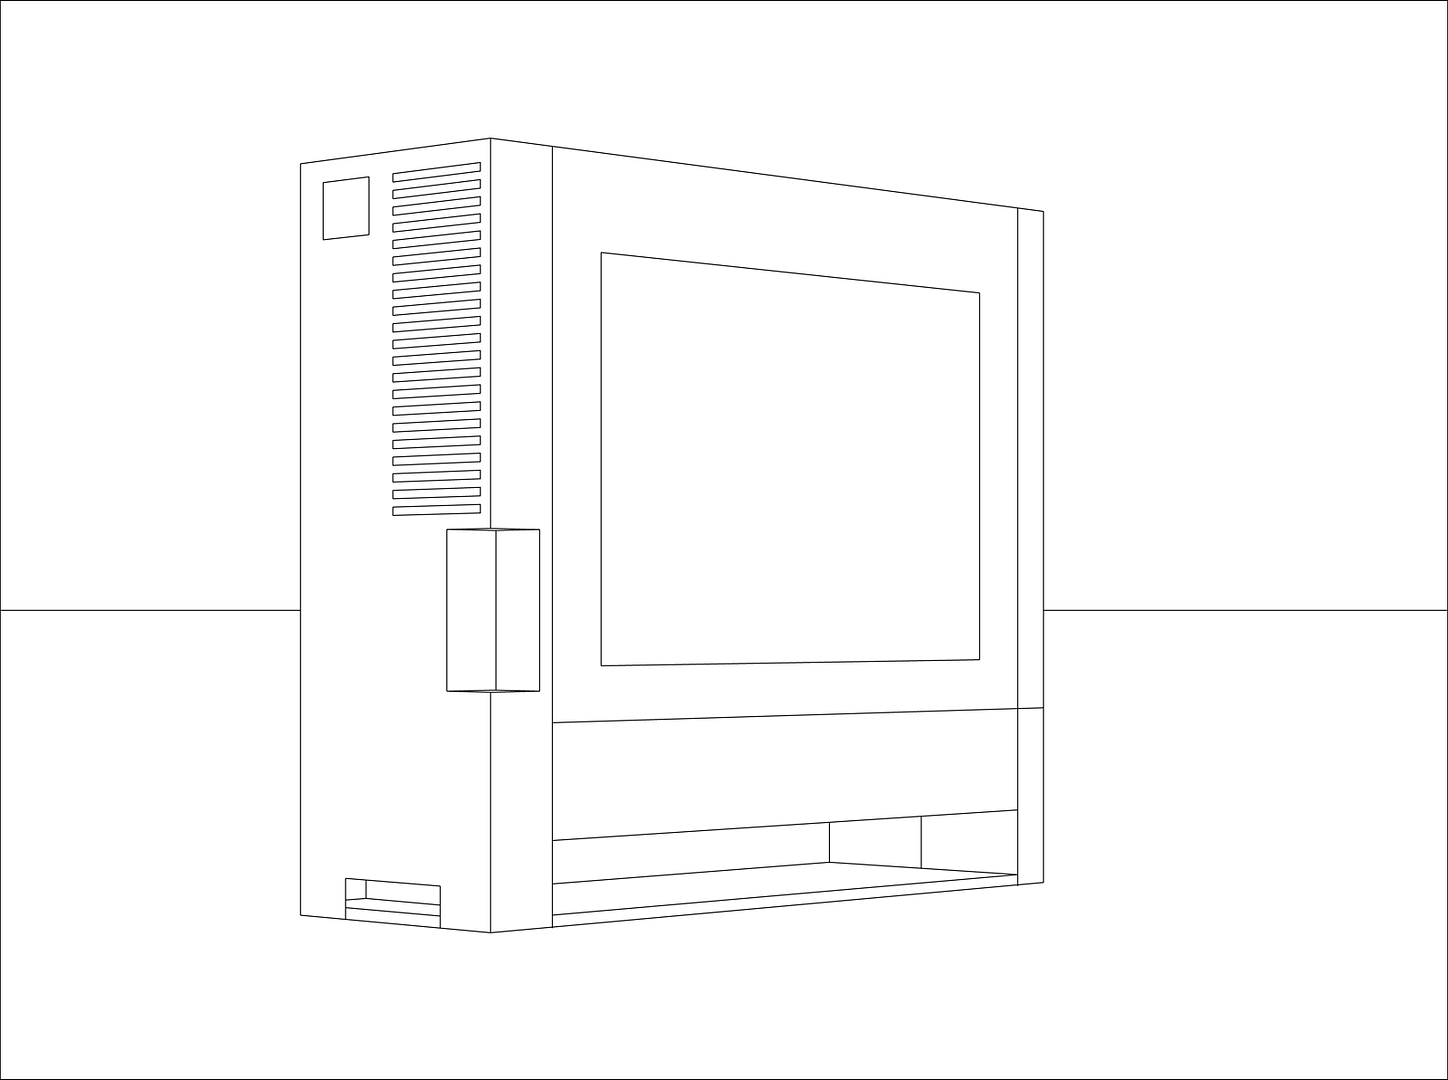
What I don't want to happen is something like this:

Because I'll be making a stealthing plate/cable management system for the back end I have another concept that would give me a look something like this:

What I can do for this look is, extend the back stealthing plate and the front of the rad tray - there is very little extra work needed for this design.
I'd like to fabricate something along these lines - and I had planned on incorporating carbon throughout the case so I know the material will blend. It's the design that doesn't blend for me.
The carbon panels used would be fairly thick so I know the structure is there. There is also a fair bit of engineering that would go into these fins that you don't see in my rough concept illustration (I'll do another sketch to show this area - I'll post it later). So I'm certain that structural integrity wont be an issue.
I need the case elevated off the ground to maximize airflow to the rad, the case needs to be ~6CM off the ground.
My worst nightmare is to have the feet ruin the whole aesthetic - having the case sit on 4black aluminum popcan style feet is not an option for me.
Trying to develop a foot that holds the system ~2.5"-3" in the air is proving very very tricky.
What I don't want to happen is something like this:
Because I'll be making a stealthing plate/cable management system for the back end I have another concept that would give me a look something like this:
What I can do for this look is, extend the back stealthing plate and the front of the rad tray - there is very little extra work needed for this design.
noiseloops
Member
- Joined
- Dec 1, 2004
- Messages
- 114
- Reaction score
- 0
just finished reading this entire thread, sooper wicked!
definitely excited to follow further developments!
definitely excited to follow further developments!
Langer
Member
- Joined
- Sep 20, 2008
- Messages
- 221
- Reaction score
- 0
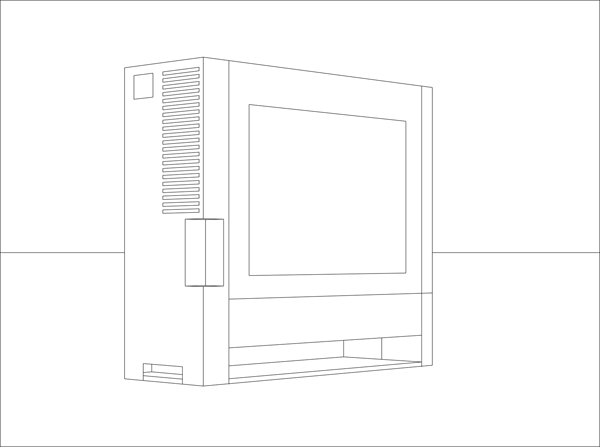
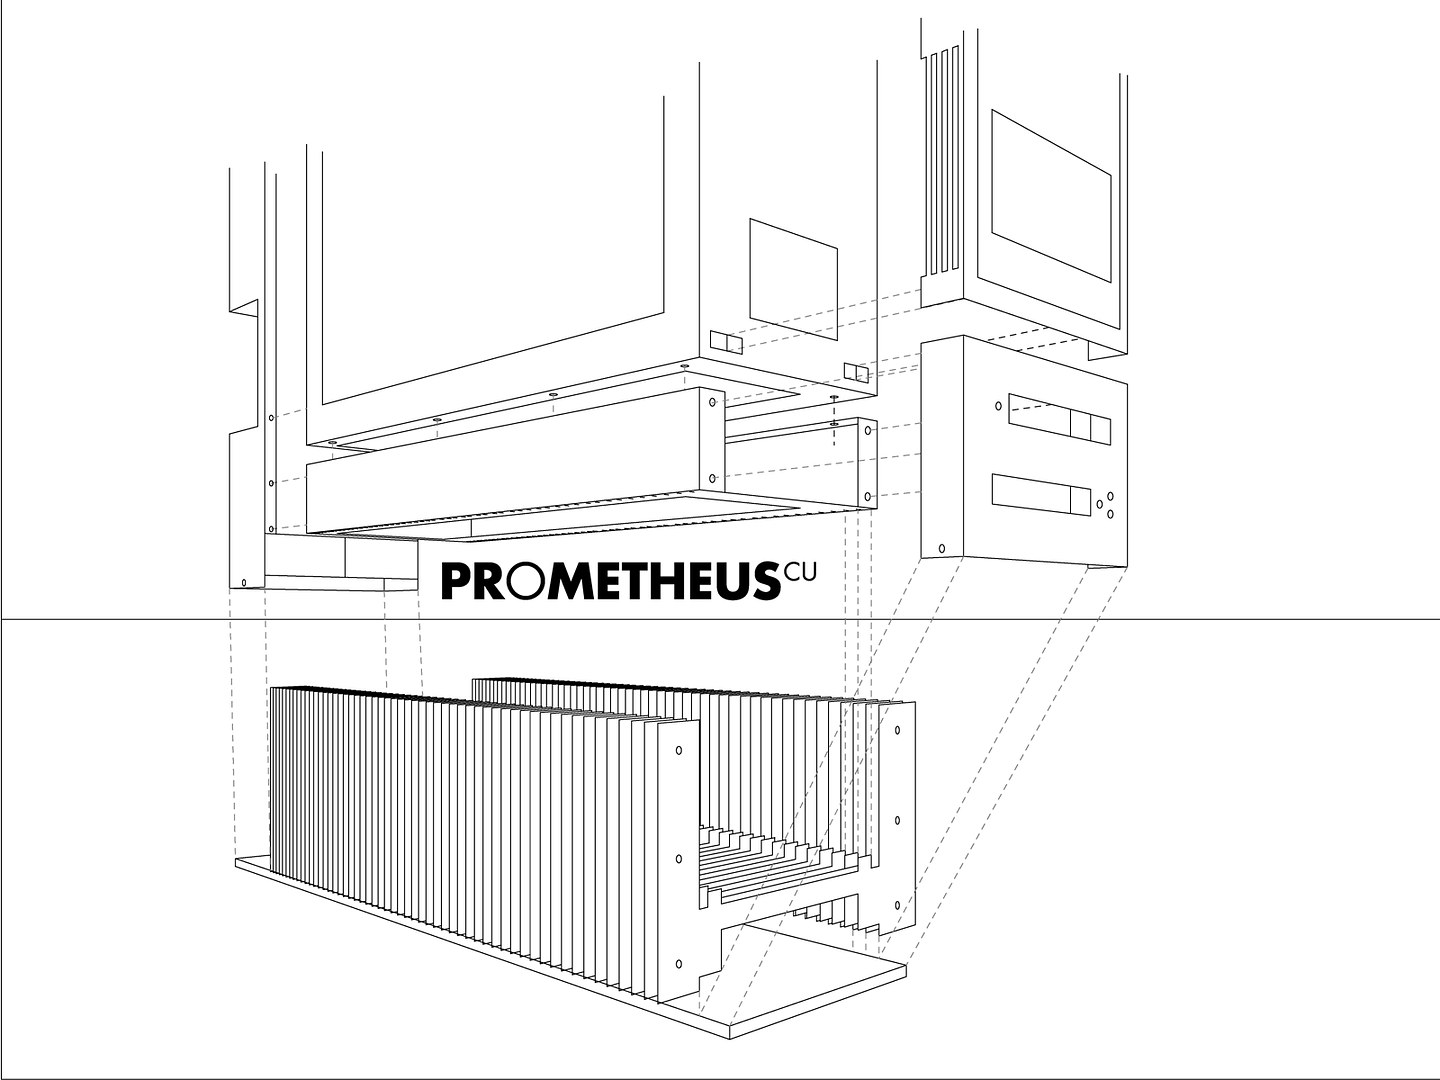
Here is another idea for feet, inspired by the Omen.
All the concepts have a cable management back like the one featured in the picture below - the chunk removed from one corner is for the rear mounted AquaComputer Multiswitch.
In this design we extend the height of the back tray and the front Matrix Orbital Housing.
This also helps by offering a location for the Aquaero to be installed, below the Matrix Orbial Typhoon.
A hybrid of rev2 and rev3:
It's been sometimes since i checked in this part of the forum and boy was I rewarded....
Will follow the updates faithfully.!!!
All the best and what you get in the end will be a masterpiece and reputation that will exceed your 10 grand ..
Will follow the updates faithfully.!!!
All the best and what you get in the end will be a masterpiece and reputation that will exceed your 10 grand ..
Important Forum Advisory Note
This forum is moderated by volunteer moderators who will react only to members' feedback on posts. Moderators are not employees or representatives of HWZ Forums. Forum members and moderators are responsible for their own posts.
Please refer to our Community Guidelines and Standards and Terms and Conditions for more information.