Google / Android Apps New Features, Tips & Tricks

limmk

High Supremacy Member
Joined
Jul 5, 2001
Messages
43,307
Reaction score
8,365


After abandoning the previous design a few months ago, Google Messages is back with another redesign of the text field.

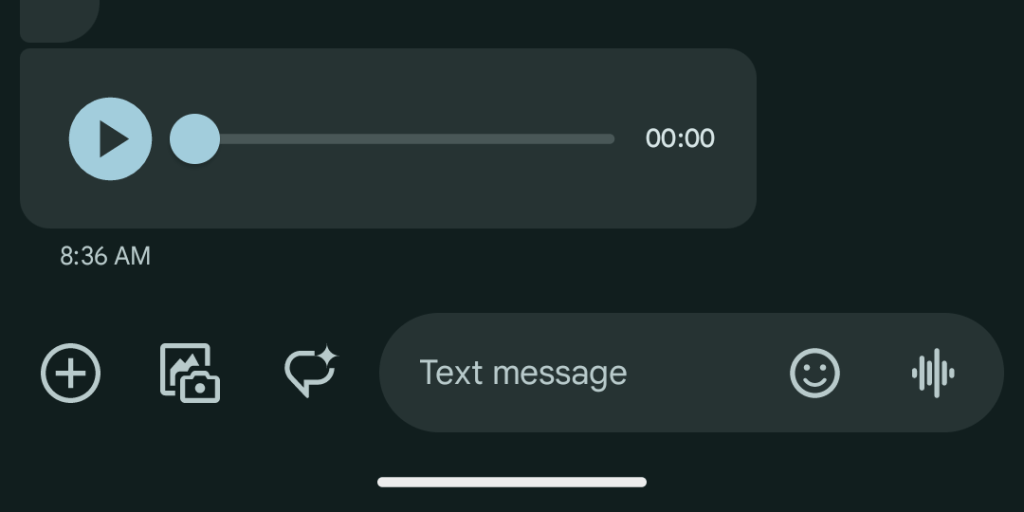
At the start of 2024, it seemed that Google was set on a pill-shaped compose field with buttons for (from left-right): emoji, Magic Compose, Gallery, and the ‘plus’ menu. Voice Messages was a separate circle to the right, which would change to the Send button once text was entered.

Google Messages compose redesign

google-messages-compose-old.png


This change was then reverted after rolling out to stable users, with Google returning to the old design that had three side-by-side buttons for the Plus, Gallery, and Magic Compose. The text field was right-aligned with emoji and voice memo shortcuts. This design looks incredibly cramped, especially at the left.

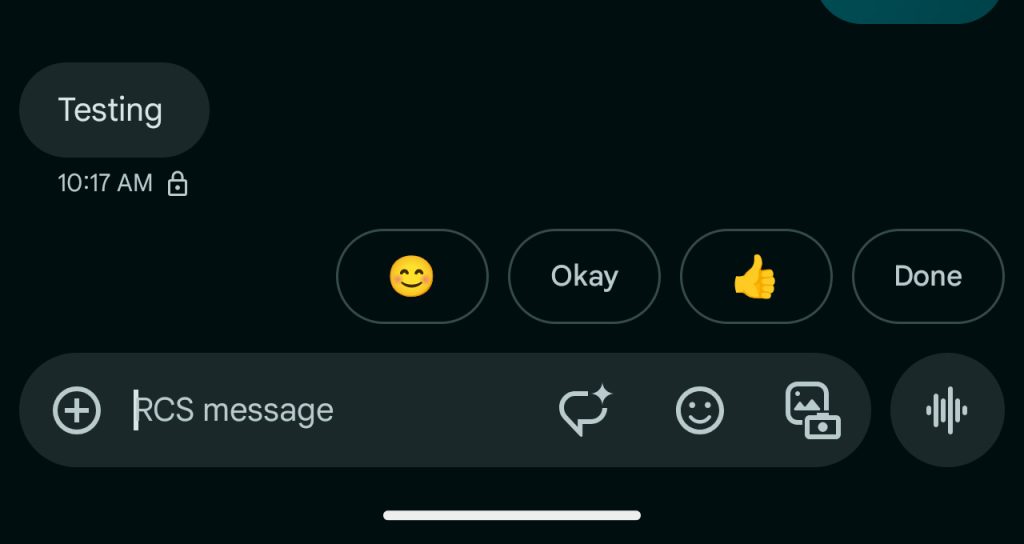
Today, with the latest Google Messages beta, we’re seeing a left-aligned text field but with buttons in a new order. The Plus remains at the left (which is nice for muscle memory), while it’s then Magic Compose, Emoji first, and Gallery last. Voice Memo/Send is still outside.

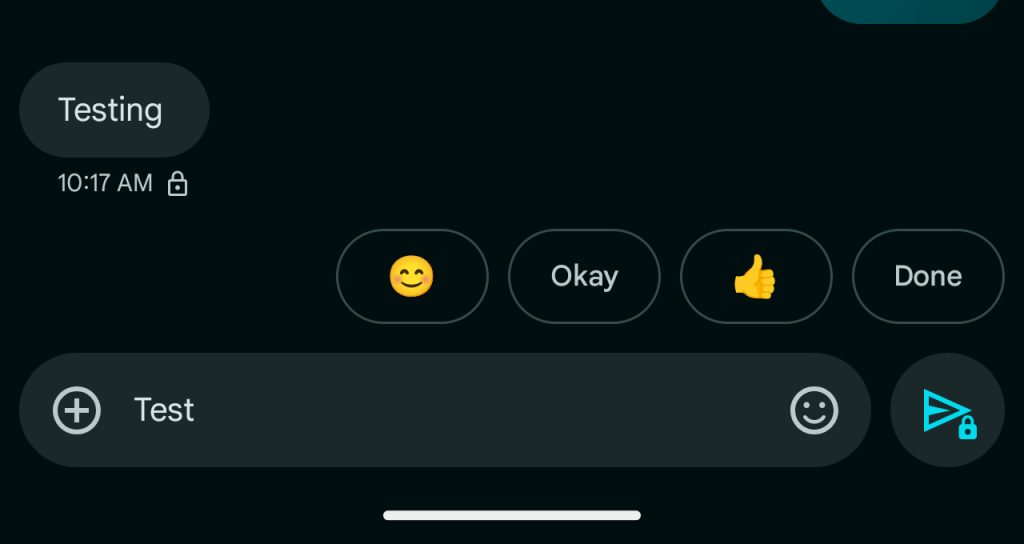
After text is entered, you’re down to the Plus and Emoji.

Google Messages text field redesignÃÂ

Google Messages text field redesignÃÂ


Hopefully, Google Messages has settled on this text field redesign. It would be nice if Google brought back Magic Compose/Rewrite shortcut in the row of smart reply suggestions to clean up the pill.

We’re seeing this after updating to beta version 20241202_01_RC00 (and a Force stop from App info after that). It’s not yet widely rolled out.

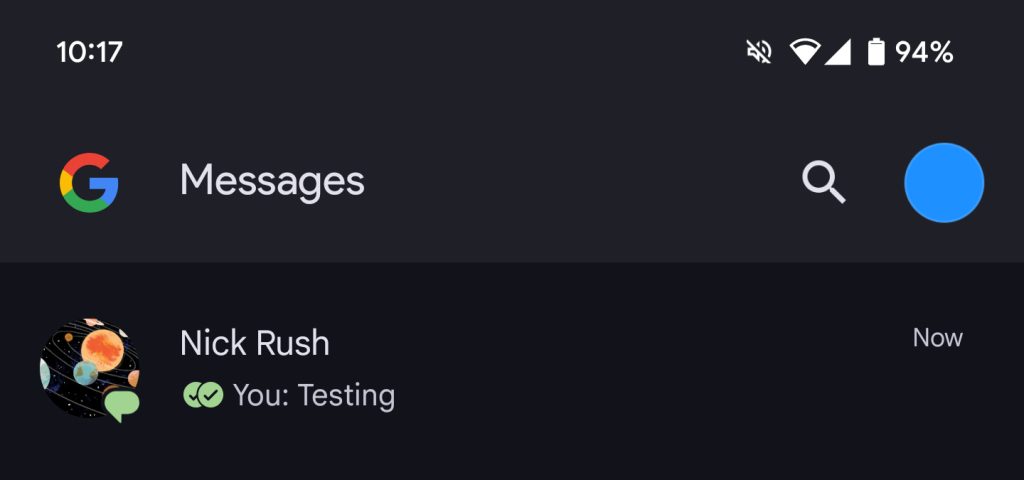
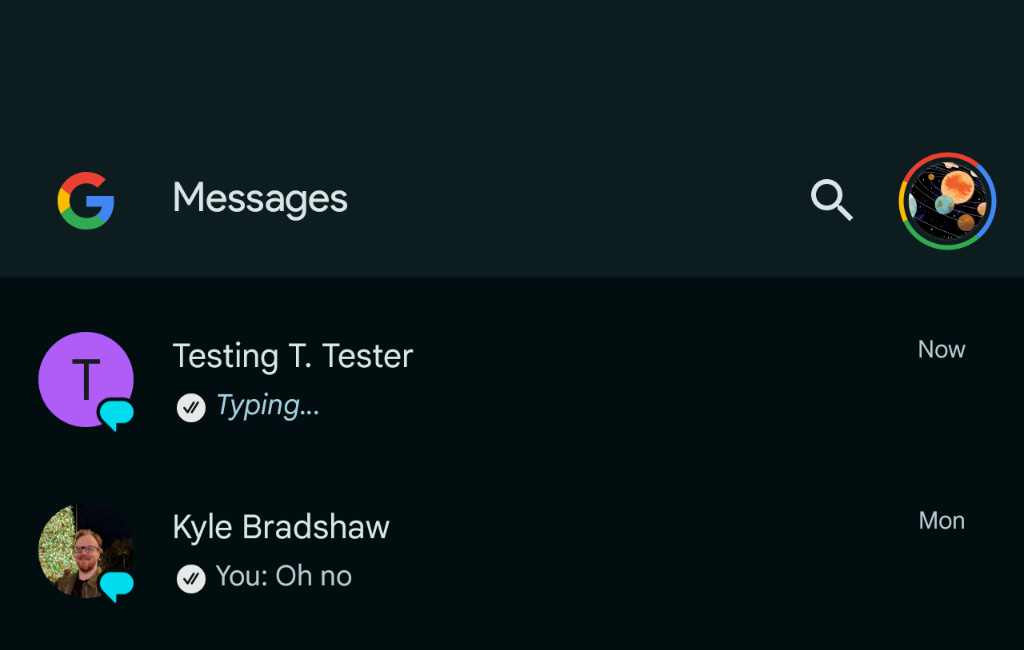
This update is also showing the redesign of read receipts, but only in the main message list. It does not appear inside conversations, and might be a bug.

Old vs. new

google-messages-list-read-Receipts.jpg

google-messages-list-read-Receipts-new.jpg
 

limmk

High Supremacy Member
Joined
Jul 5, 2001
Messages
43,307
Reaction score
8,365


With the December 2024 Feature Drop, Pixel Camera 9.7 is rolling out “Quick access controls.”


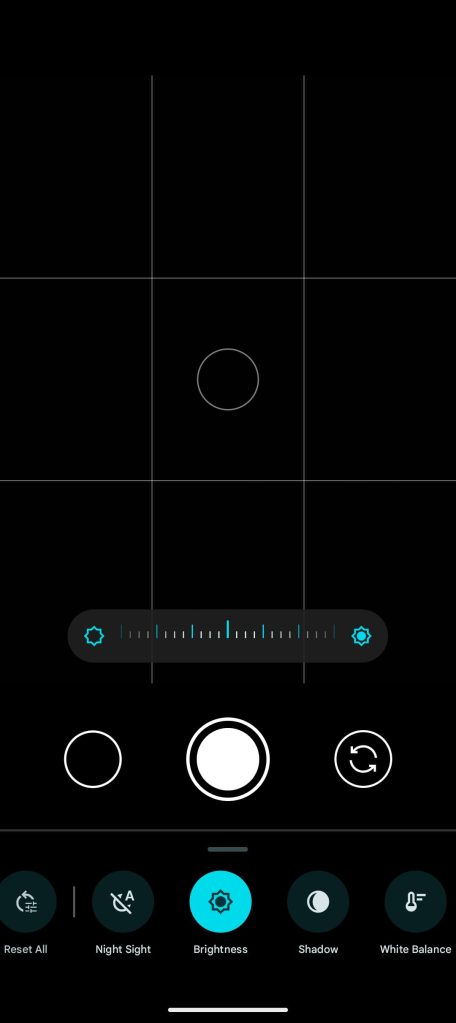
With the last redesign, Pixel Camera placed Brightness, Shadow, and White Balance — as well as Night Sight and Pro options like Focus, Shutter Speed, and ISO — in a sheet that first requires tapping a button in the bottom-right corner and then the desired control before you could start sliding. Some users did not like what Google did to get a cleaner interface.

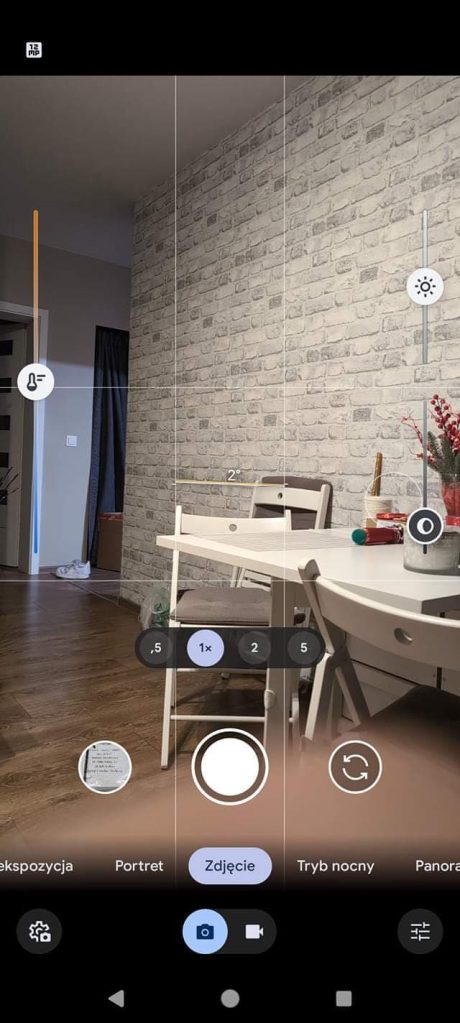
As hinted in version 9.6, a new “Quick access controls” preference live in Pixel Camera 9.7 lets you “Adjust white balance, brightness, and shadows by tapping the viewfinder.” Go to Settings to enable.

This is a return to the previous Camera UI that placed those sliders on the left (WB) and right (Brightness + Shadow) edges of the screen.

Pixel-Camera-9.6-original.jpg

Pixel-Camera-9.7-Quick-access-controls-1.jpg

Before vs. after (credit: Over_Firefighter_510)

Meanwhile, the Pixel Fold and Pixel 9 Pro Fold are getting Dual Screen Portrait Mode that lets the subject preview the shot.

Made You Look, which shows kids a fun character on the external display, is coming to last year’s foldable. However, only the Pixel 9 Pro Fold is getting Joy from “Inside Out.” This will be available until December 3, 2025, with the Pokemon Soli experience on the Pixel 4 also having an expiration date.

Outside of the Pixel Camera, the Feature Drop lets you use the Instagram viewfinder to capture in Ultra HDR. (Version 2.1 of Pixel Camera Services is rolling out.) Meanwhile, Snapchat is now making use of the system Photo Picker.

Pixel Camera 9.7 is rolling out via the Google Play Store, or you can sideload here.


limmk

High Supremacy Member
Joined
Jul 5, 2001
Messages
43,307
Reaction score
8,365


In addition to the bigger Pixel Recorder, Screenshots, and Studio updates, Google has updated the Thermometer icon with a new-ish icon.

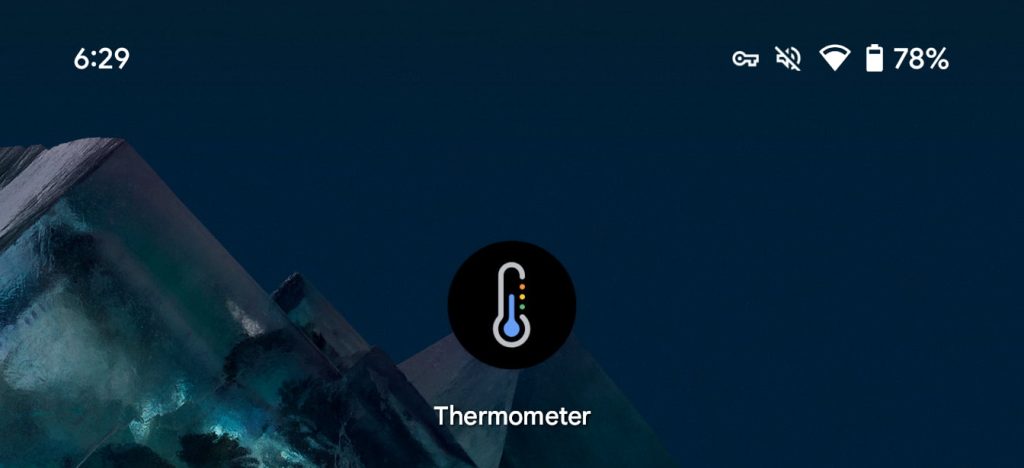
Previously, the icon was a rather detailed depiction of a thermometer in the four Google colors against a black background. The mercury is blue, while the container is white save for three dots in red, yellow, and green.

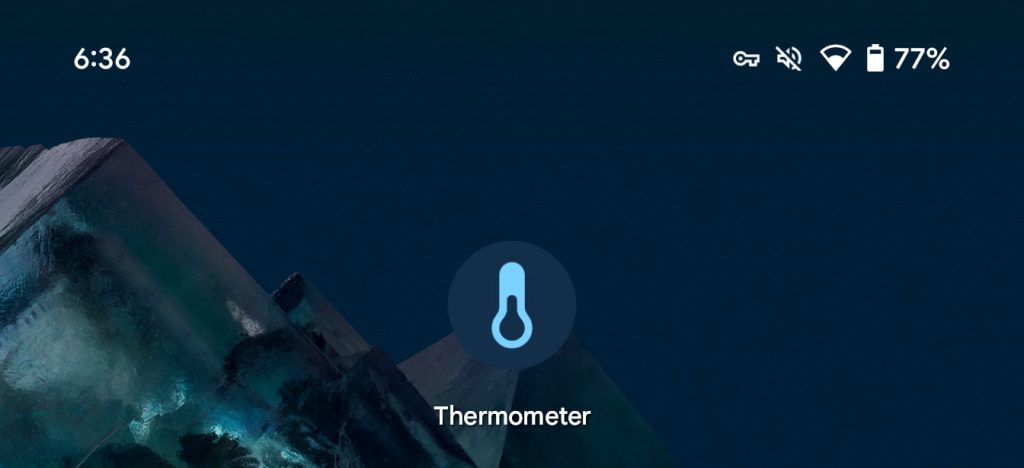
This has been replaced by a white thermometer against a light blue background. One thing to note though is that this “new” icon shape was previously the Themed icon. There are no changes to that version today.

Pixel-Thermometer-old-icon.jpg

Pixel Thermometer new icon

Pixel-Thermometer-new-icon-2.jpg

L-R: Old, new, Themed (unchanged)

It’s a more generic design, but the blue is inline with other Google Pixel-exclusive apps like Magnifier, Tips, and Weather, as well as Screenshots to a lesser degree. Meanwhile, no other app in that family has a black background.

Pixel-Screenshots-Studio-Weather.jpg


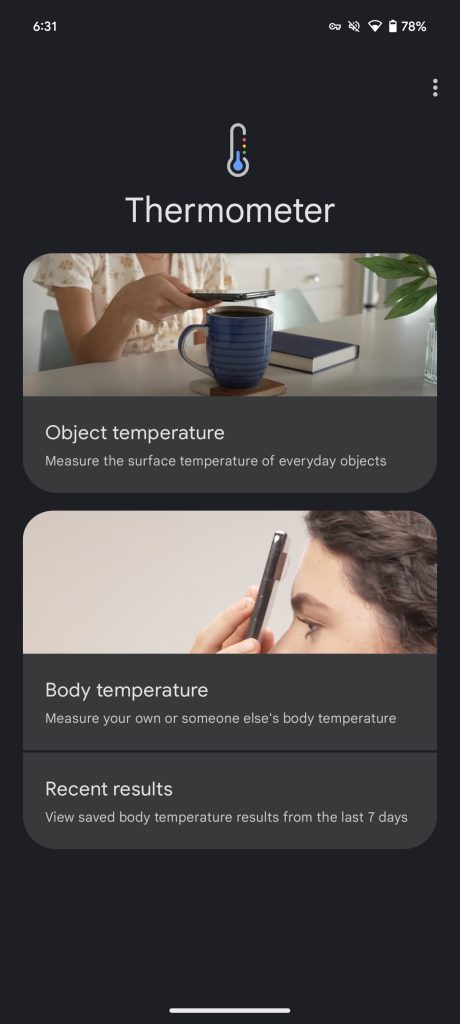
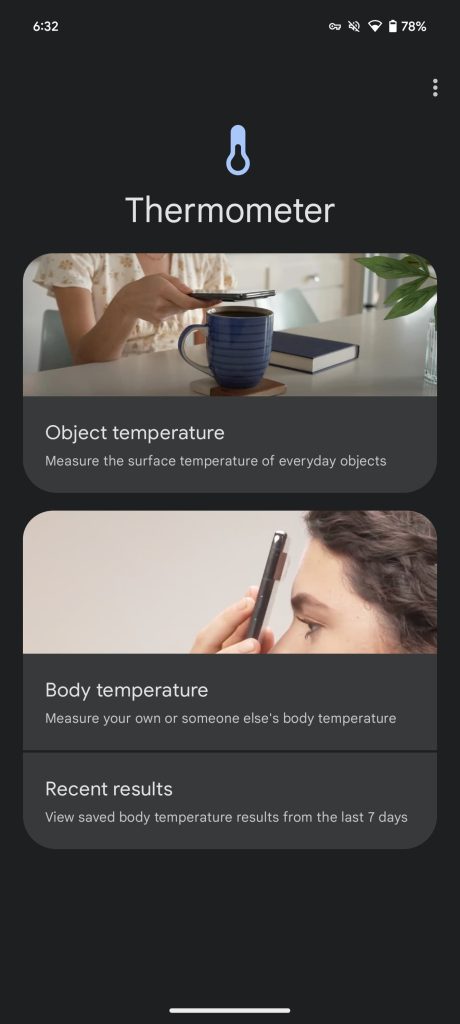
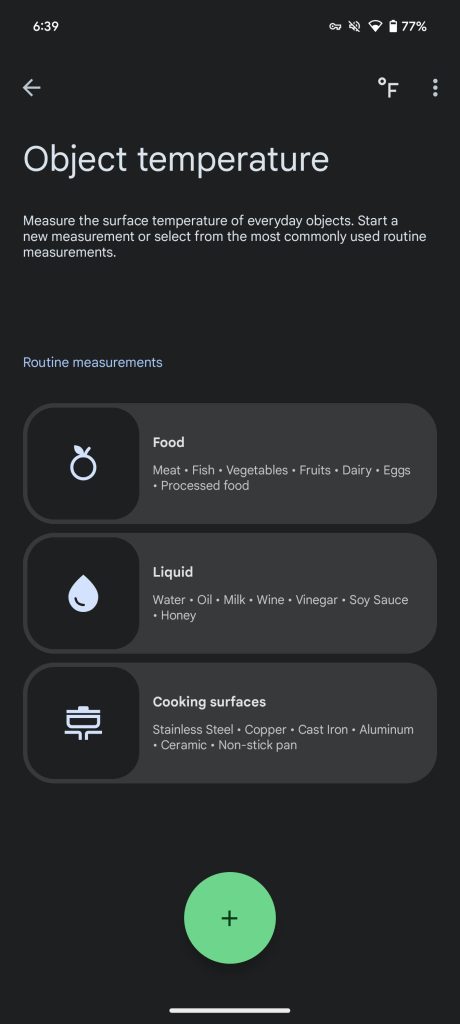
This new icon is also visible on the homepage at the top, while Google made one tweak to the FAB used to launch the Object temperature UI. It’s now a bright green instead of blue.

The in-app Software release notes list “Color updates, bug fixes.” It would be nice if Pixel Thermometer gained a Quick Settings Tile in the future.

Pixel-Thermometer-old-icon-2.jpg
Pixel Thermometer new icon

Pixel Thermometer new icon


Version 1.0.700924790 of Pixel Thermometer with this new icon is not yet widely rolled out to the 8 Pro, 9 Pro, and 9 Pro XL.
 

limmk

High Supremacy Member
Joined
Jul 5, 2001
Messages
43,307
Reaction score
8,365


With the December 2024 Feature Drop, Pixel Camera 9.7 is rolling out “Quick access controls.”


With the last redesign, Pixel Camera placed Brightness, Shadow, and White Balance — as well as Night Sight and Pro options like Focus, Shutter Speed, and ISO — in a sheet that first requires tapping a button in the bottom-right corner and then the desired control before you could start sliding. Some users did not like what Google did to get a cleaner interface.

As hinted in version 9.6, a new “Quick access controls” preference live in Pixel Camera 9.7 lets you “Adjust white balance, brightness, and shadows by tapping the viewfinder.” Go to Settings to enable.

This is a return to the previous Camera UI that placed those sliders on the left (WB) and right (Brightness + Shadow) edges of the screen.

Pixel-Camera-9.6-original.jpg

Pixel-Camera-9.7-Quick-access-controls-1.jpg

Before vs. after (credit: Over_Firefighter_510)

Meanwhile, the Pixel Fold and Pixel 9 Pro Fold are getting Dual Screen Portrait Mode that lets the subject preview the shot.

Made You Look, which shows kids a fun character on the external display, is coming to last year’s foldable. However, only the Pixel 9 Pro Fold is getting Joy from “Inside Out.” This will be available until December 3, 2025, with the Pokemon Soli experience on the Pixel 4 also having an expiration date.

Outside of the Pixel Camera, the Feature Drop lets you use the Instagram viewfinder to capture in Ultra HDR. (Version 2.1 of Pixel Camera Services is rolling out.) Meanwhile, Snapchat is now making use of the system Photo Picker.

Pixel Camera 9.7 is rolling out via the Google Play Store, or you can sideload here.


limmk

High Supremacy Member
Joined
Jul 5, 2001
Messages
43,307
Reaction score
8,365


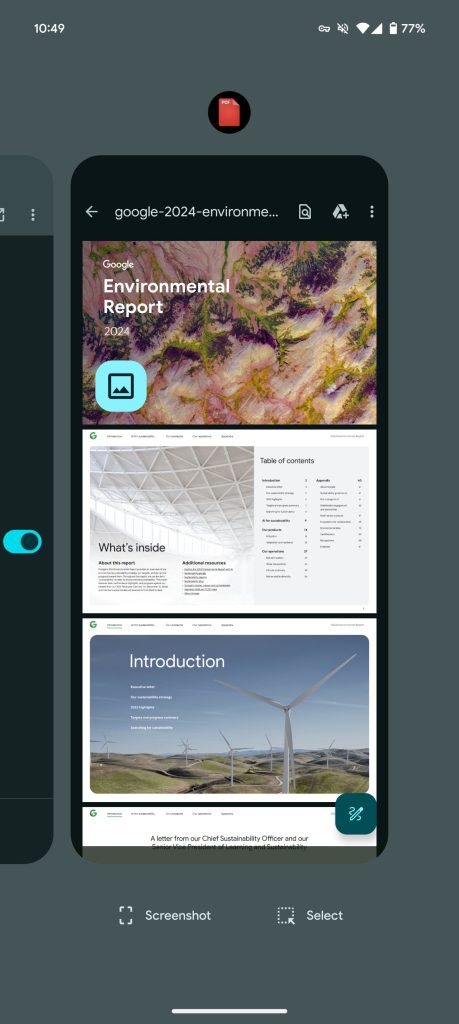
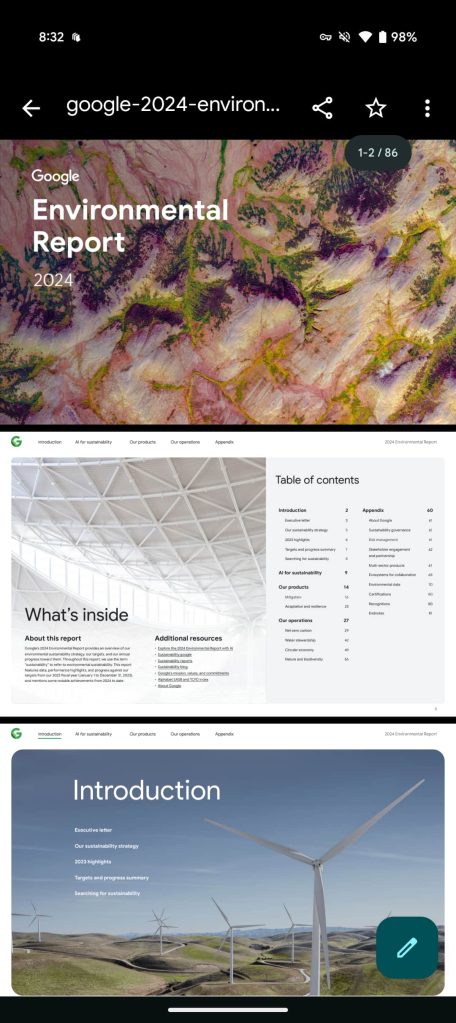
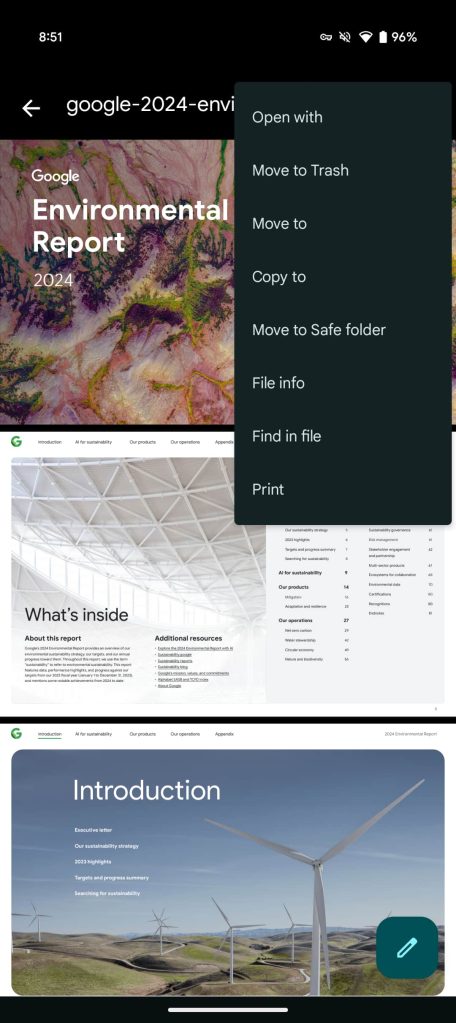
Files by Google has rolled out a new PDF viewer after previously relying on Google Drive.

Primarily, this new PDF viewer provides a more integrated experience with the rest of Files by Google. In the top bar, you have the ability to star a document, as well as share.

The overflow menu houses: Open with, Move to trash, Move to, Copy to, Moved to Safe folder, File info, Find in file, and Print. Some of those actions, like Safe folder and info, were previously only accessible outside of the viewer by long-pressing on the overflow menu in the list view.

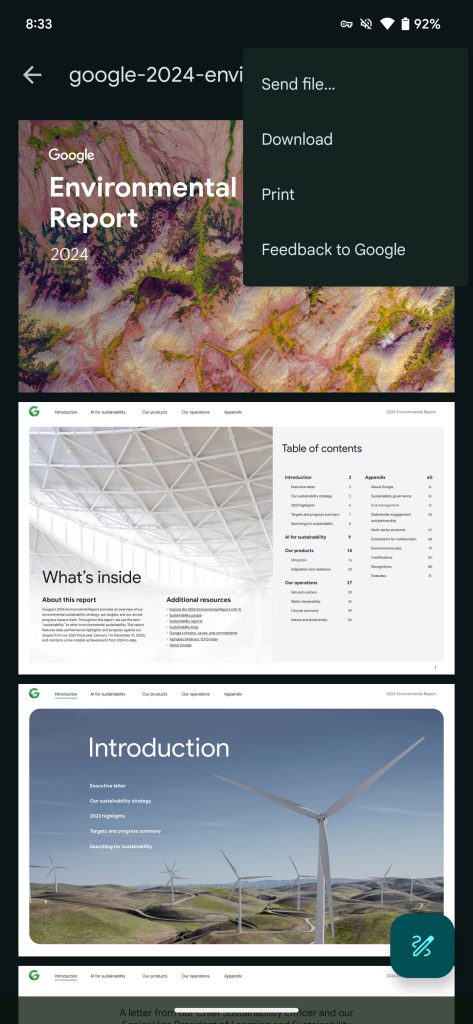
Old vs. new

Files-by-Google-old-PDF-1.jpg
Files by Google PDF


Previously, your actions were just: Find, Save to Drive, Send file, Download, Print, and Feedback to Google.

The Play Store changelog describes the change as such: “Over the next few weeks, we’re rolling out improvements to your experience with PDF files. Print, find content, or access markup tools whenever you open a PDF in the Files app.”

The editing FAB (floating action button) has a new icon, but the functionality is unchanged.

We’re seeing this rolled out with version 1.5687.x following a server-side update.

Files-by-Google-old-PDF-2.jpg
Files by Google PDF
 

limmk

High Supremacy Member
Joined
Jul 5, 2001
Messages
43,307
Reaction score
8,365


As previewed last month, the Google Home app is rolling out Member access with the Public Preview program.

Google Home is now offering two access levels. Admin is for “trusted partners or people who co-manage the home with you.” Meanwhile, the new Member access is more limited and has two tiers, with both allowing Basic device controls (like live view of cameras) and Personal settings (Assistant, personal presence, and linked media services).

Giving a Member “Settings” access lets them have:

  • Full device control and device settings
  • Manage home-wide settings (household automations, home address, Nest Wifi device network and features, Nest Aware and Nest Renew features)
Activity” access allows them to:

  • Check device and home-wide history (camera, lock, Nest Wifi, home presence history)
PermissionAccess Level
AdminMember
Add, manage, and remove people
Delete the home
Add and remove devices
Share devices and data with partner services
Link a subscription to the home
Set up or manage presence sensing for the home or shared devices
Full device control and device settingsOnly with Settings access
Manage home-wide settings (household automations, home address, Nest Wifi device network and features, Nest Aware and Nest Renew features)Only with Settings access
Use the home’s devices in the Nest app
Check device and home-wide history (camera, lock, Nest Wifi, home presence history)Only with Activity access
Check or manage camera clip-lending for devices in the home
Deletion of any history in the home
Basic device controls (ex. live view of cameras)
Personal settings
* Assistant features like Voice and Face Match
* Sharing linked media services
* Managing personal presence

This Member access is rolling out now with the Google Home Public Preview. Those enrolled in the test program “can send invitations for the new access levels.” However, recipients don’t have to be part of the beta and just need to be on the latest Google Home app.

To add, go to the Settings tab > Household & access > Add > Home member to enter their name and email address. They will receive an email to proceed.
 

limmk

High Supremacy Member
Joined
Jul 5, 2001
Messages
43,307
Reaction score
8,365
TL;DR
  • Google is preparing to add more granular controls for the size of the clock on the lock screen.
  • We spotted a new UI that lets you customize the weight, width, roundness, and slant of the current clock style on the lock screen.
  • This feature isn’t live yet in the latest Android beta, but we managed to partially activate it to get a glimpse at what’s coming.


Last year’s Android 14 update introduced some exciting new customization features for Pixel users: the ability to customize the lock screen. Android 14 added the ability to not only customize the two shortcuts at the bottom of the lock screen but also change the style of the clock. Google currently offers 9 clock styles that can be lightly customized in terms of color and size, but the company looks to be working on much more granularity for those size options in a future release of Android.

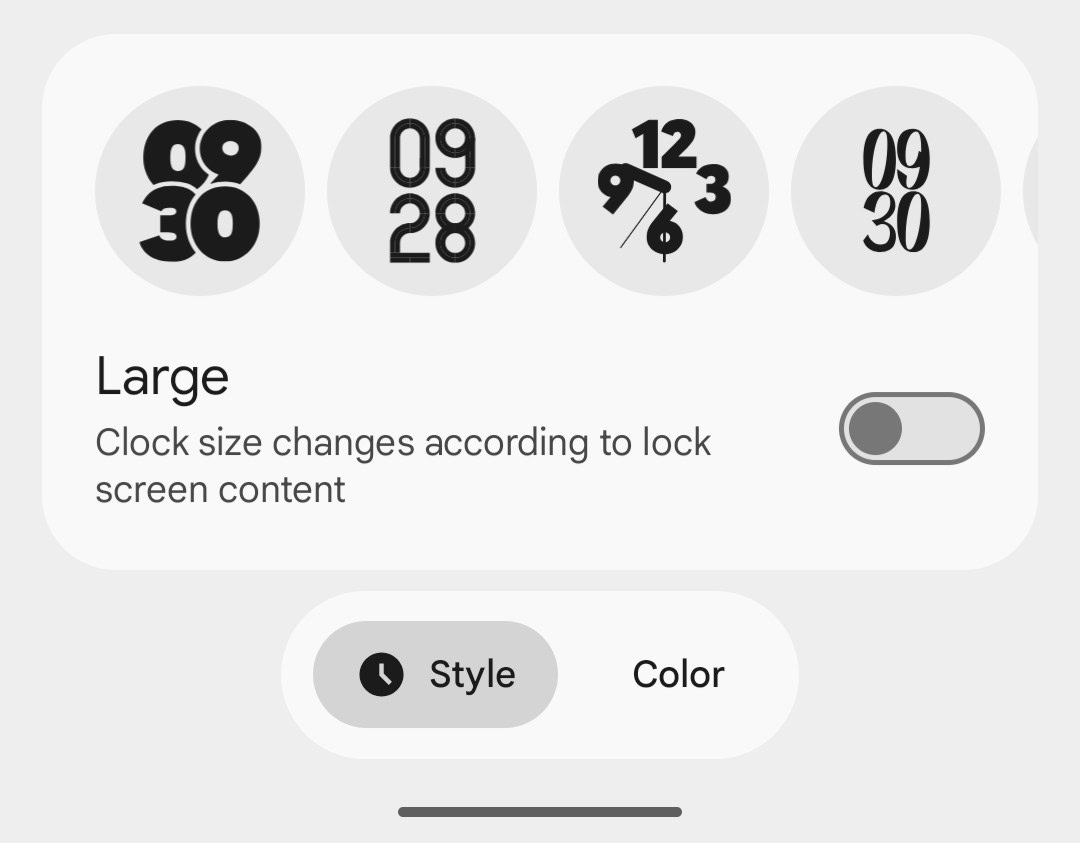
We’re currently digging through the second beta for the next quarterly release of Android 15 that Google just released. While looking through the update, we noticed that Android 15 QPR2 Beta 2 continues work on the new version of the Pixel wallpaper app that we first spotted back in August. The new version of the Pixel wallpaper app is still not live yet in the latest beta, but Google has made some progress that brings it closer to launch. For example, we noticed that the clock style options are now properly populated in the new version of the app, as shown below.

New lock screen clock picker UI 1
New lock screen clock picker UI 2


However, the ability to change the size of the lock screen clock is still missing in this release. This is because Google is preparing to add a new page for customizing the lock screen clock size, one that lets you tweak the weight, width, roundness, and slant. This page will be accessed by tapping a new pencil/edit button shown on top of each lock screen clock style card. While we weren’t able to get this pencil/edit button to appear, we were able to manually launch the new lock screen clock size page, as shown in the video below:

Although some of the options aren’t working (notably the roundness and slant toggles), this demonstrates that Google is preparing to provide much more granular controls over the size of the lock screen clock. In contrast, the current version of the Pixel wallpaper app only lets you choose between two different lock screen clock options:
  • Dynamic: Clock size changes according to lock screen content
  • Small: A small clock shows in the corner of your lock screen
One thing we don’t know is whether these new clock size options will be available for all available clock styles. It’s very likely that these options will only be available for the relatively simpler designs, but we don’t know for sure.

We also don’t know when Google plans to roll out this new version of the Pixel wallpaper app, but it’s looking more and more like it’s not just going to be a total visual overhaul but also a major upgrade in customizability. We previously spotted that the new version of the app will also bring back icon shape customization, a feature that also isn’t live yet in the latest release.
 

limmk

High Supremacy Member
Joined
Jul 5, 2001
Messages
43,307
Reaction score
8,365


Google Keep users this week are being prompted to “reload” their notes, while there’s also a small design tweak on Android that curves corners.

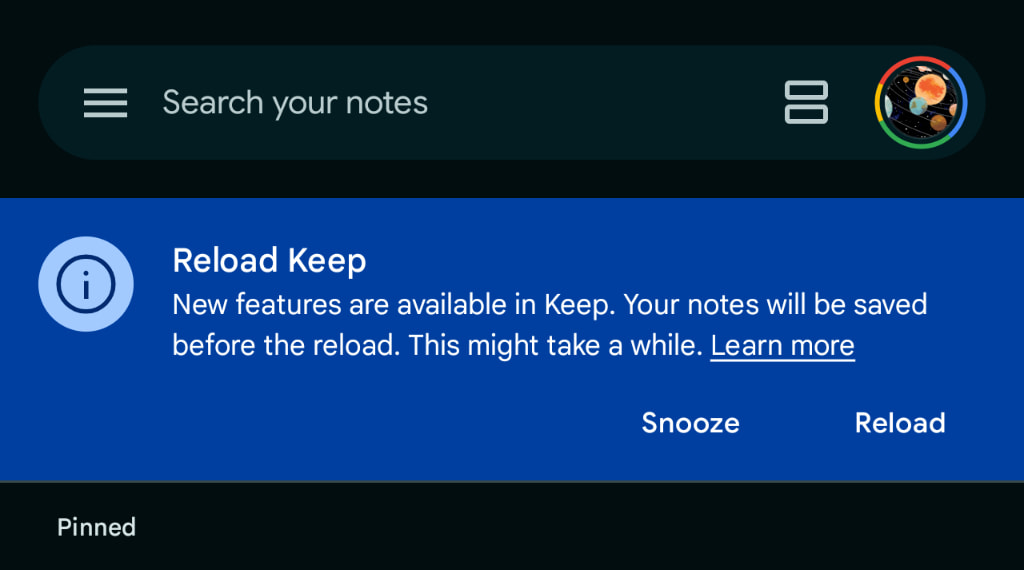
Opening the Android or iOS app over the past day shows a blue “Reload Keep” banner: “New features are available in Keep. Your notes will be saved before the reload. This might take a while.”

All your notes are first saved to the cloud and then removed from your device. It takes a few minutes for this download process to complete, especially if you have a lot of images. You can tap “Snooze” to hide the message temporarily, like if you’re not on Wi-Fi.

There are no obvious changes after this update. So far, we’ve seen this message on all our mobile devices. Reload is not a new action/prompt, but It seems like all Google Keep users have received it in the past 24 hours or so.

Google Keep reload


Meanwhile, version 5.24.492.x of Google Keep for Android makes a small tweak to sheets in notes. All of them now feature rounded top corners. This includes the plus, color + background, and overflow menus, as well as Remind me later.

The update is widely rolling out today. This follows the big FAB (floating action button) redesign last month, which has not come to the iOS app.

Old vs. new

Google-Keep-corners-old.jpg
Google-Keep-corners-new-1.jpg
Google-Keep-corners-old-2.jpg
Google-Keep-corners-new-2.jpg
 

limmk

High Supremacy Member
Joined
Jul 5, 2001
Messages
43,307
Reaction score
8,365
TL;DR
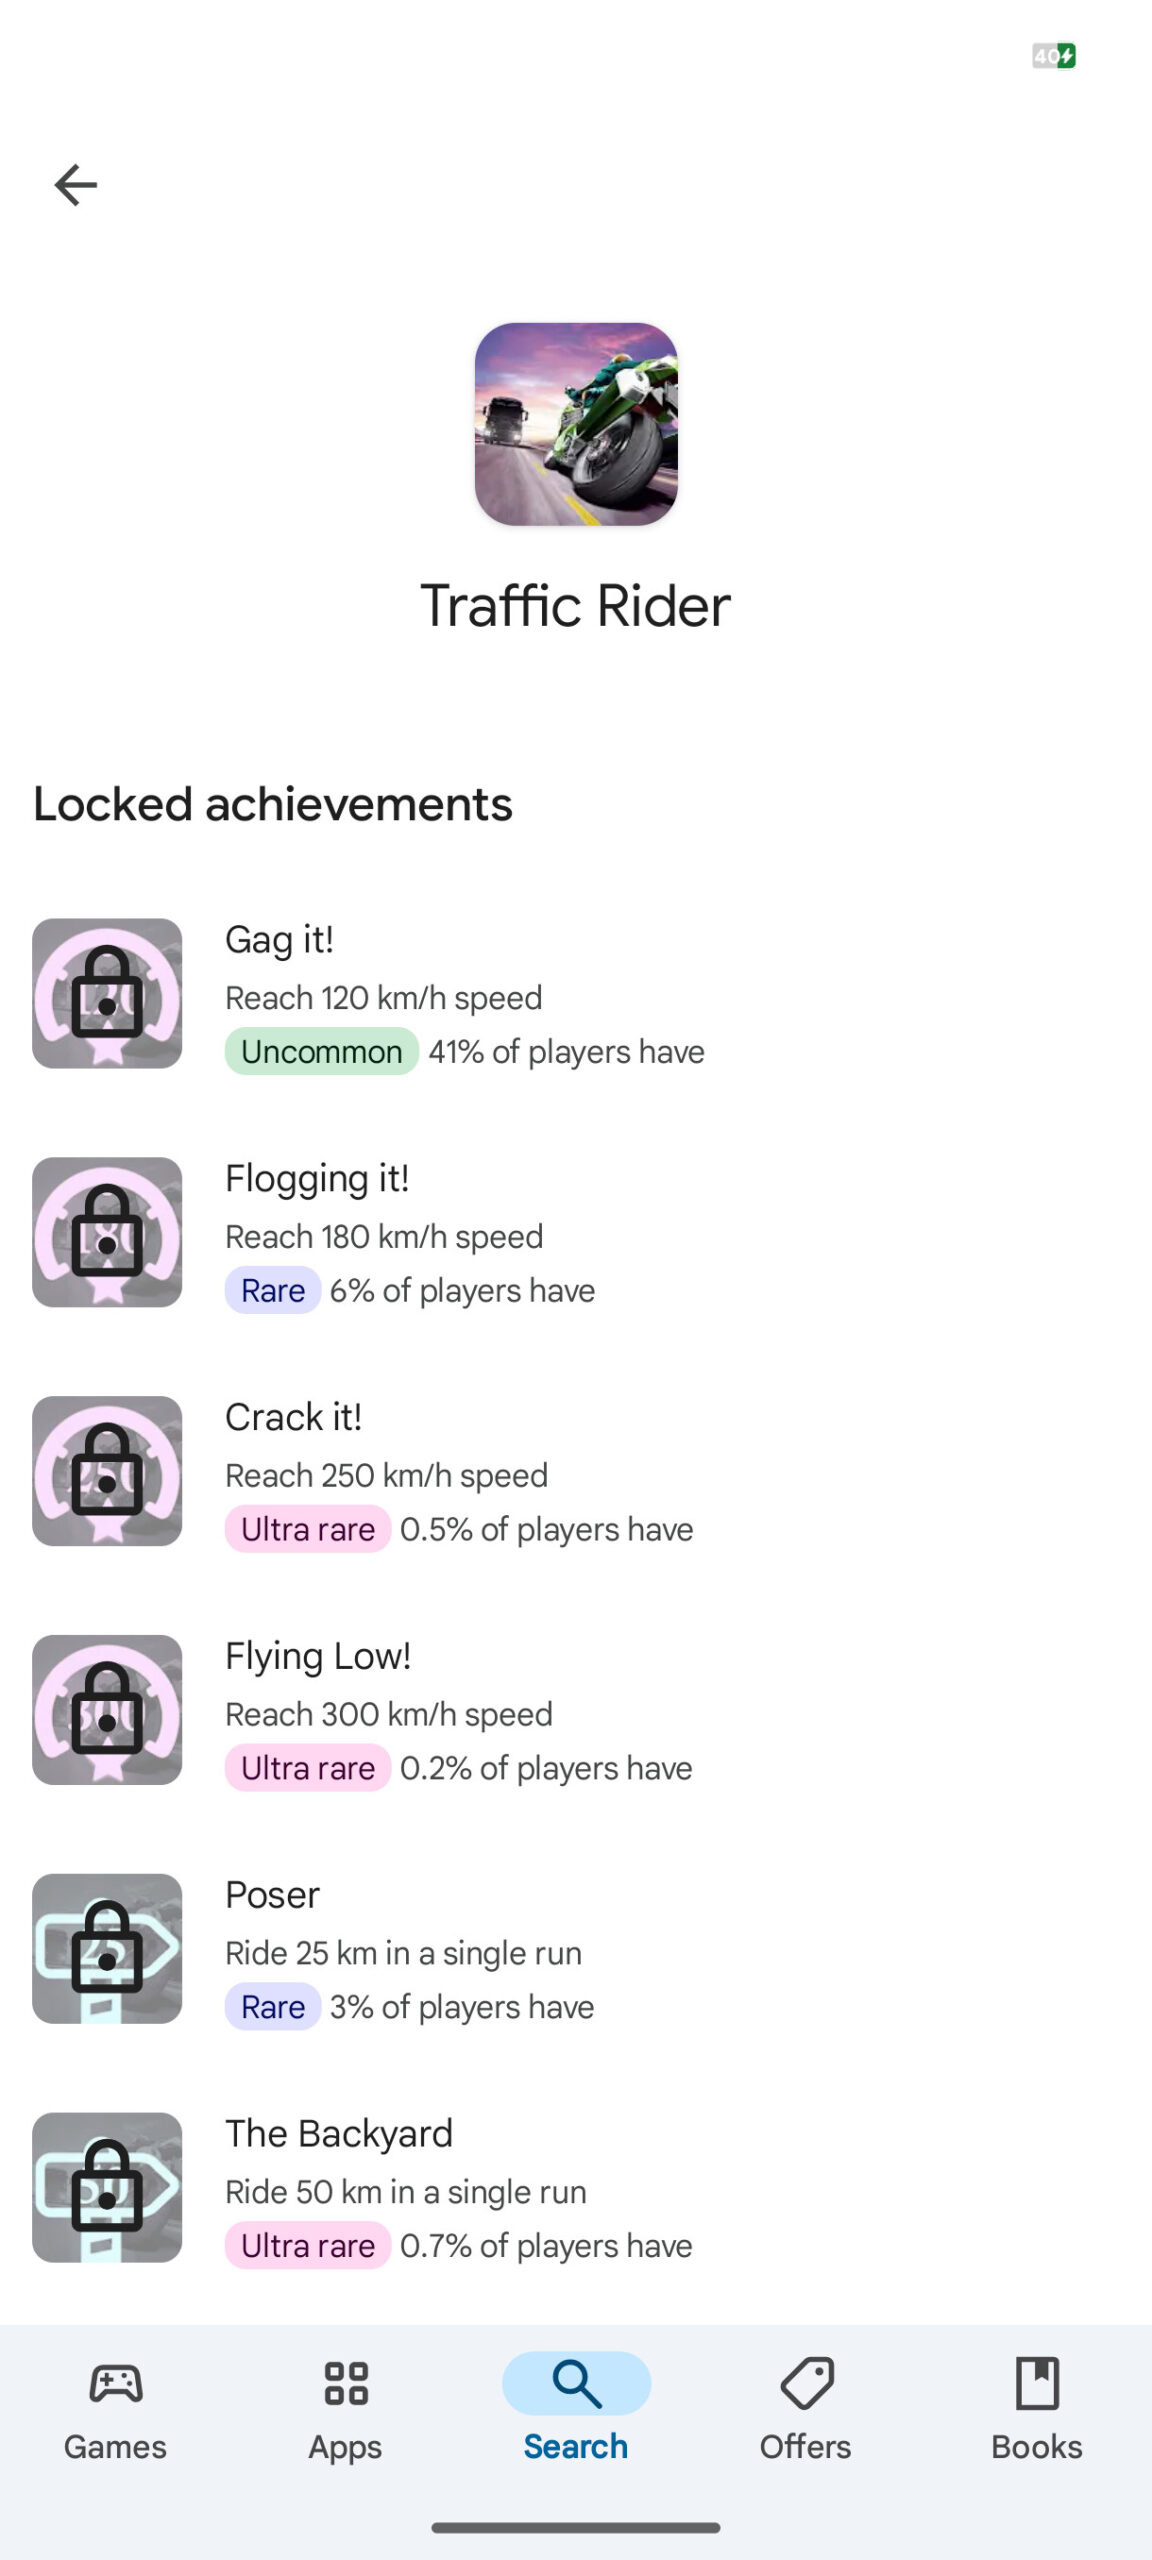
  • The Google Play Store will soon show gaming achievements on game listings.
  • Google Play Games — which is a separate app — has achievements, but soon, you’ll be able to see them right from the game’s main page on the Play Store, assuming you have a Play Games profile.
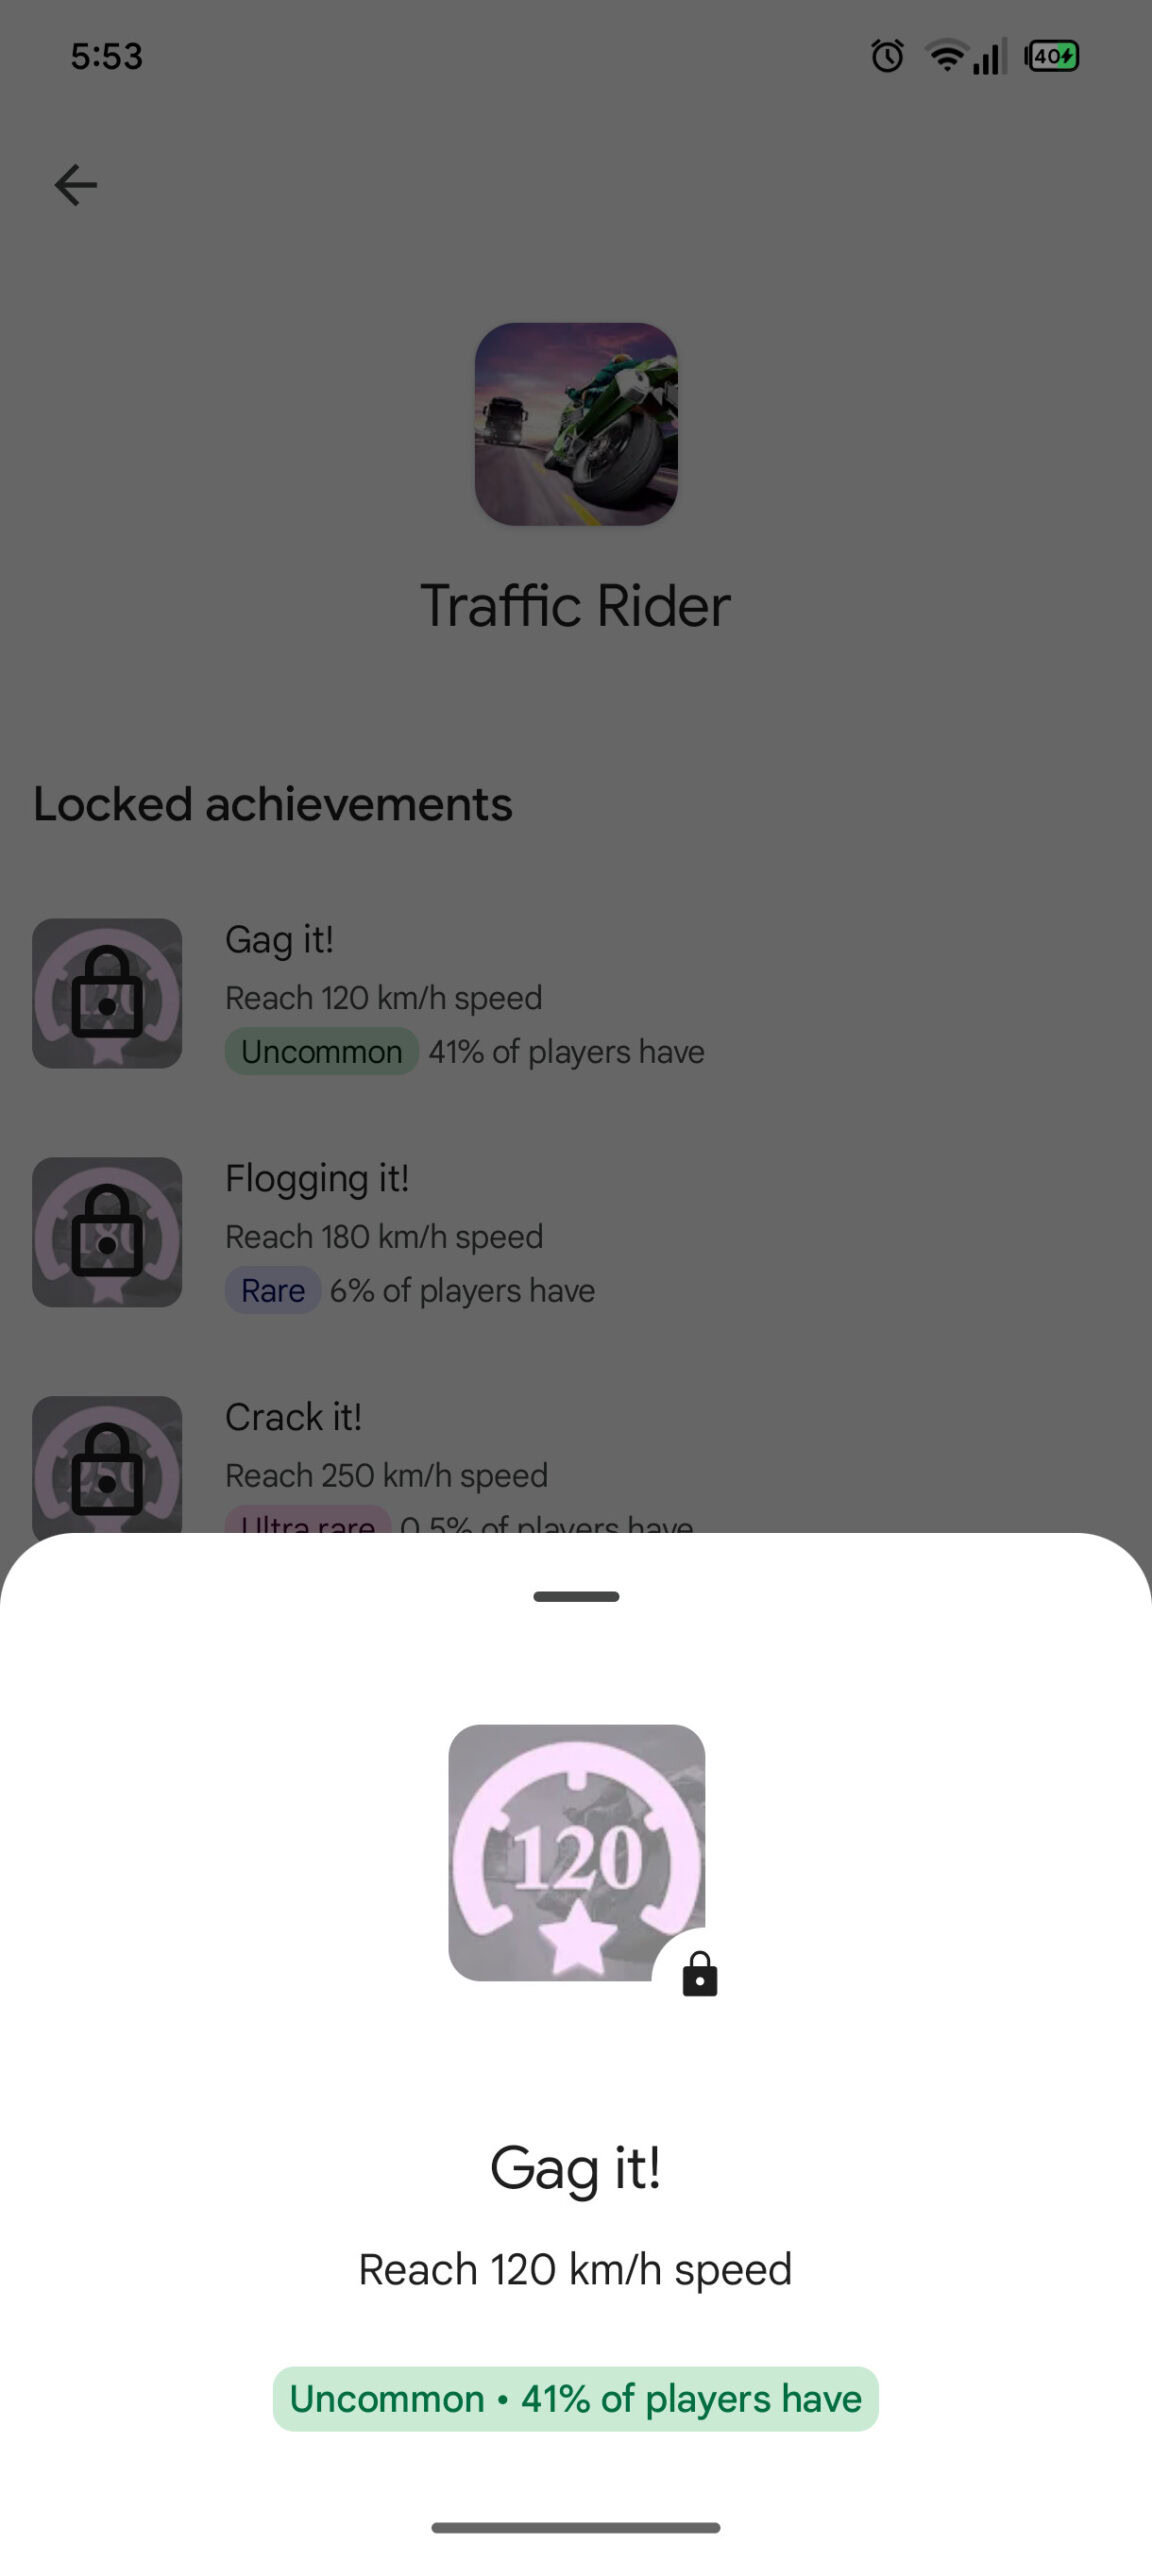
  • Through an APK teardown, we can see what these achievements will look like.


Back in October, a Google Play system update landed, including a new Play Store alert that would encourage users to create a Google Play Games profile. Having a profile allows you to sign in to supported Android games automatically, save your progress, and earn achievements, but the fact that this alert would come from the Play Store, not the Play Games app, was certainly interesting. Now, thanks to an APK teardown, we’ve got a first look at what gaming achievements will look like through your Play Games profile on the Play Store.

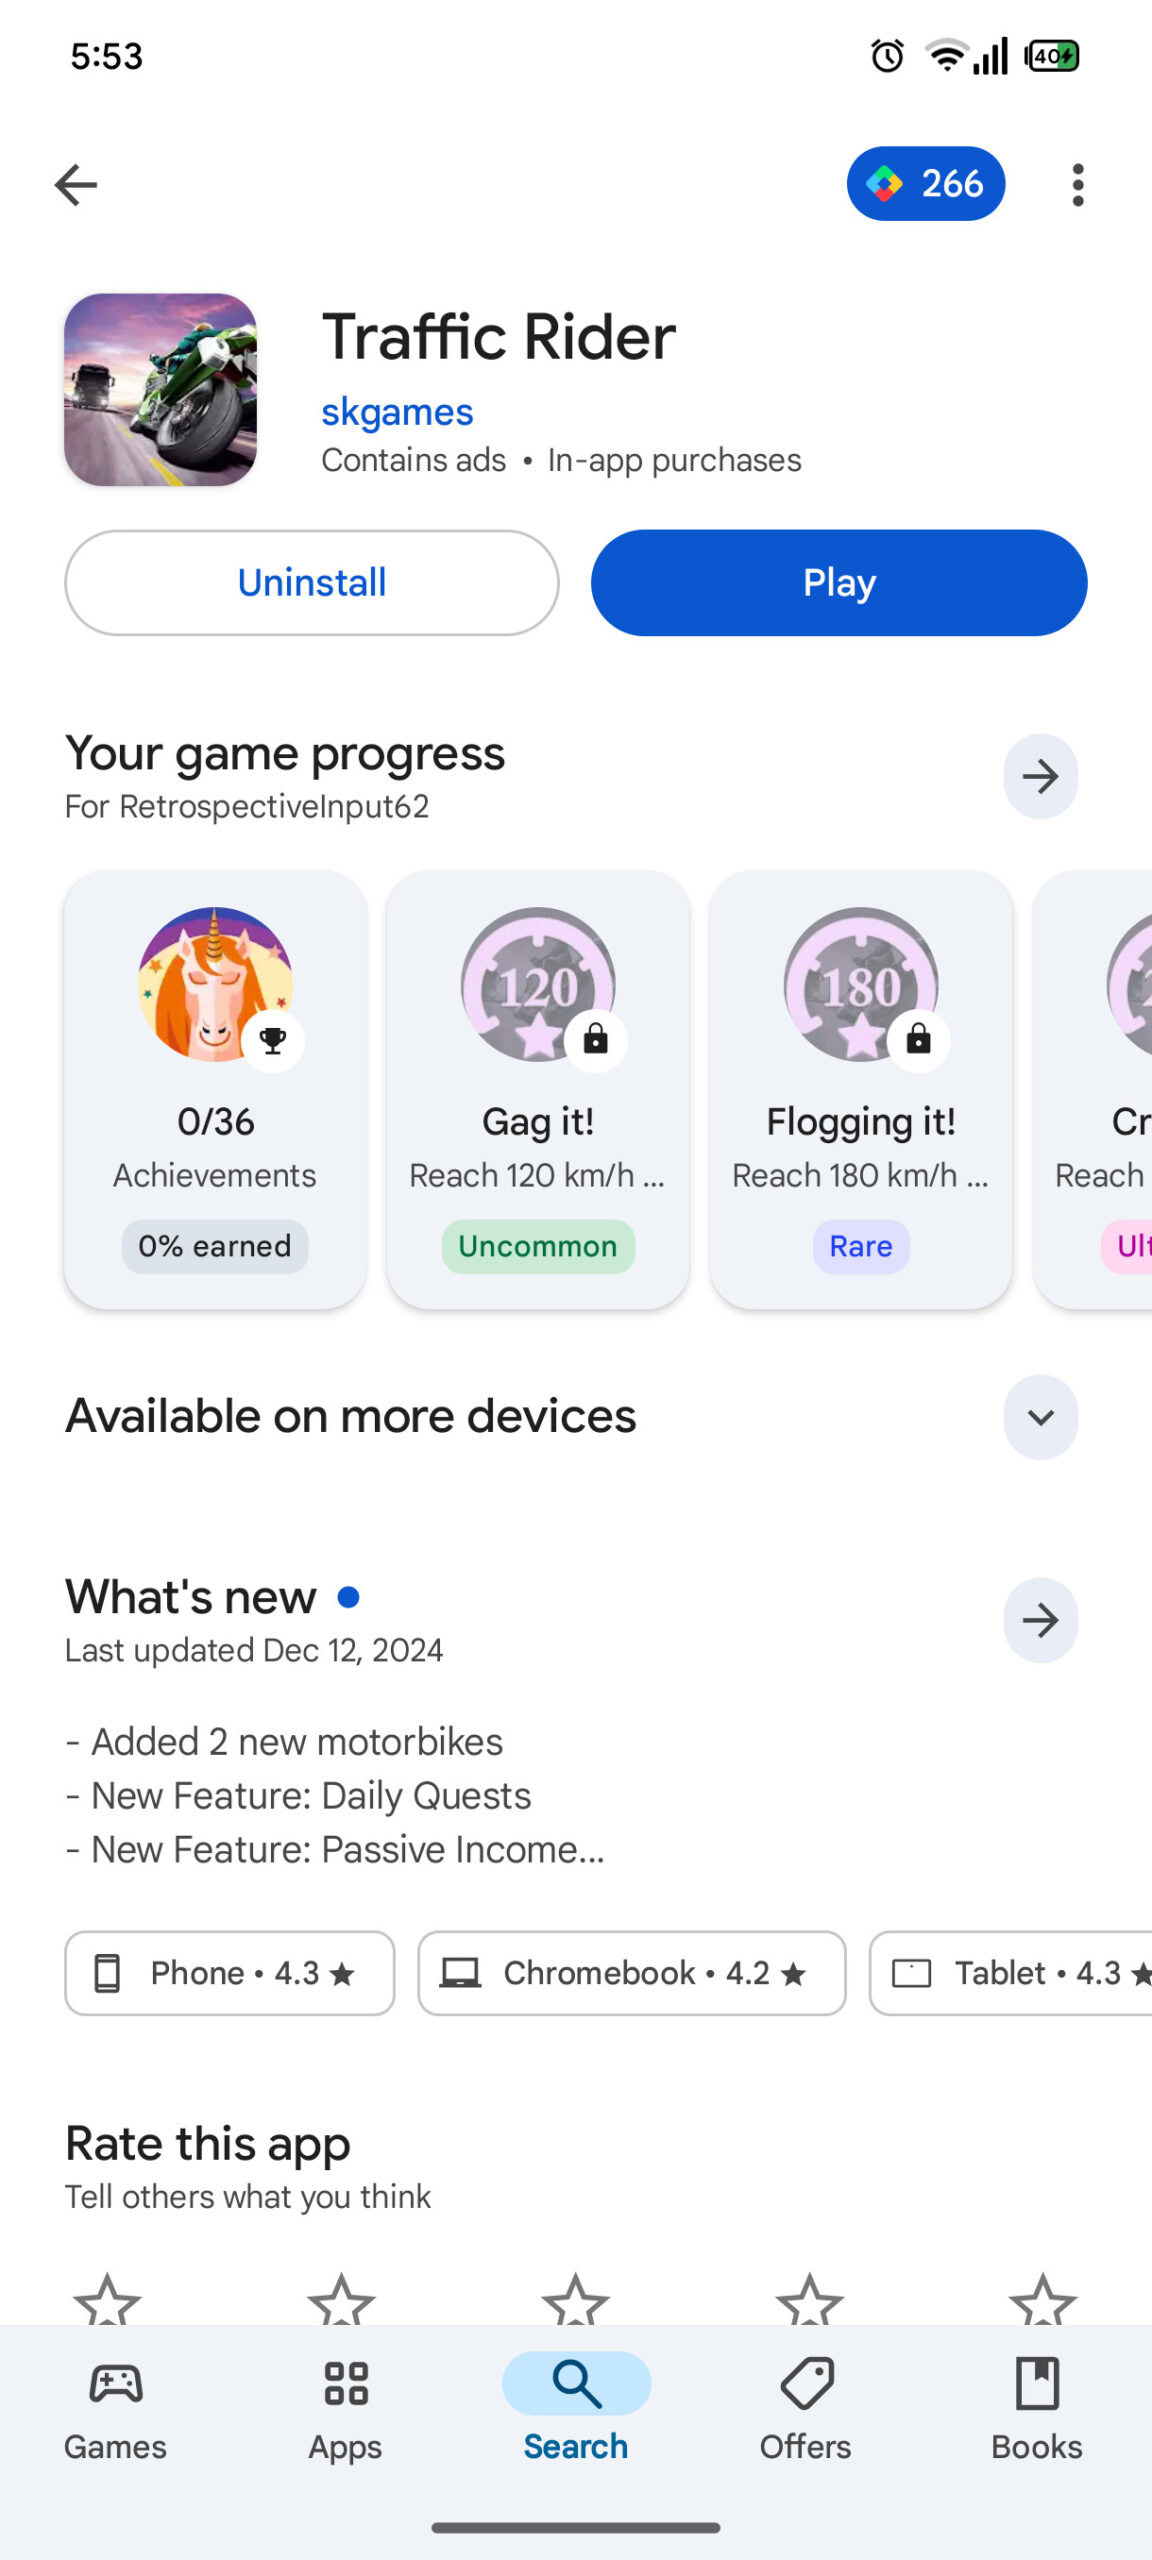
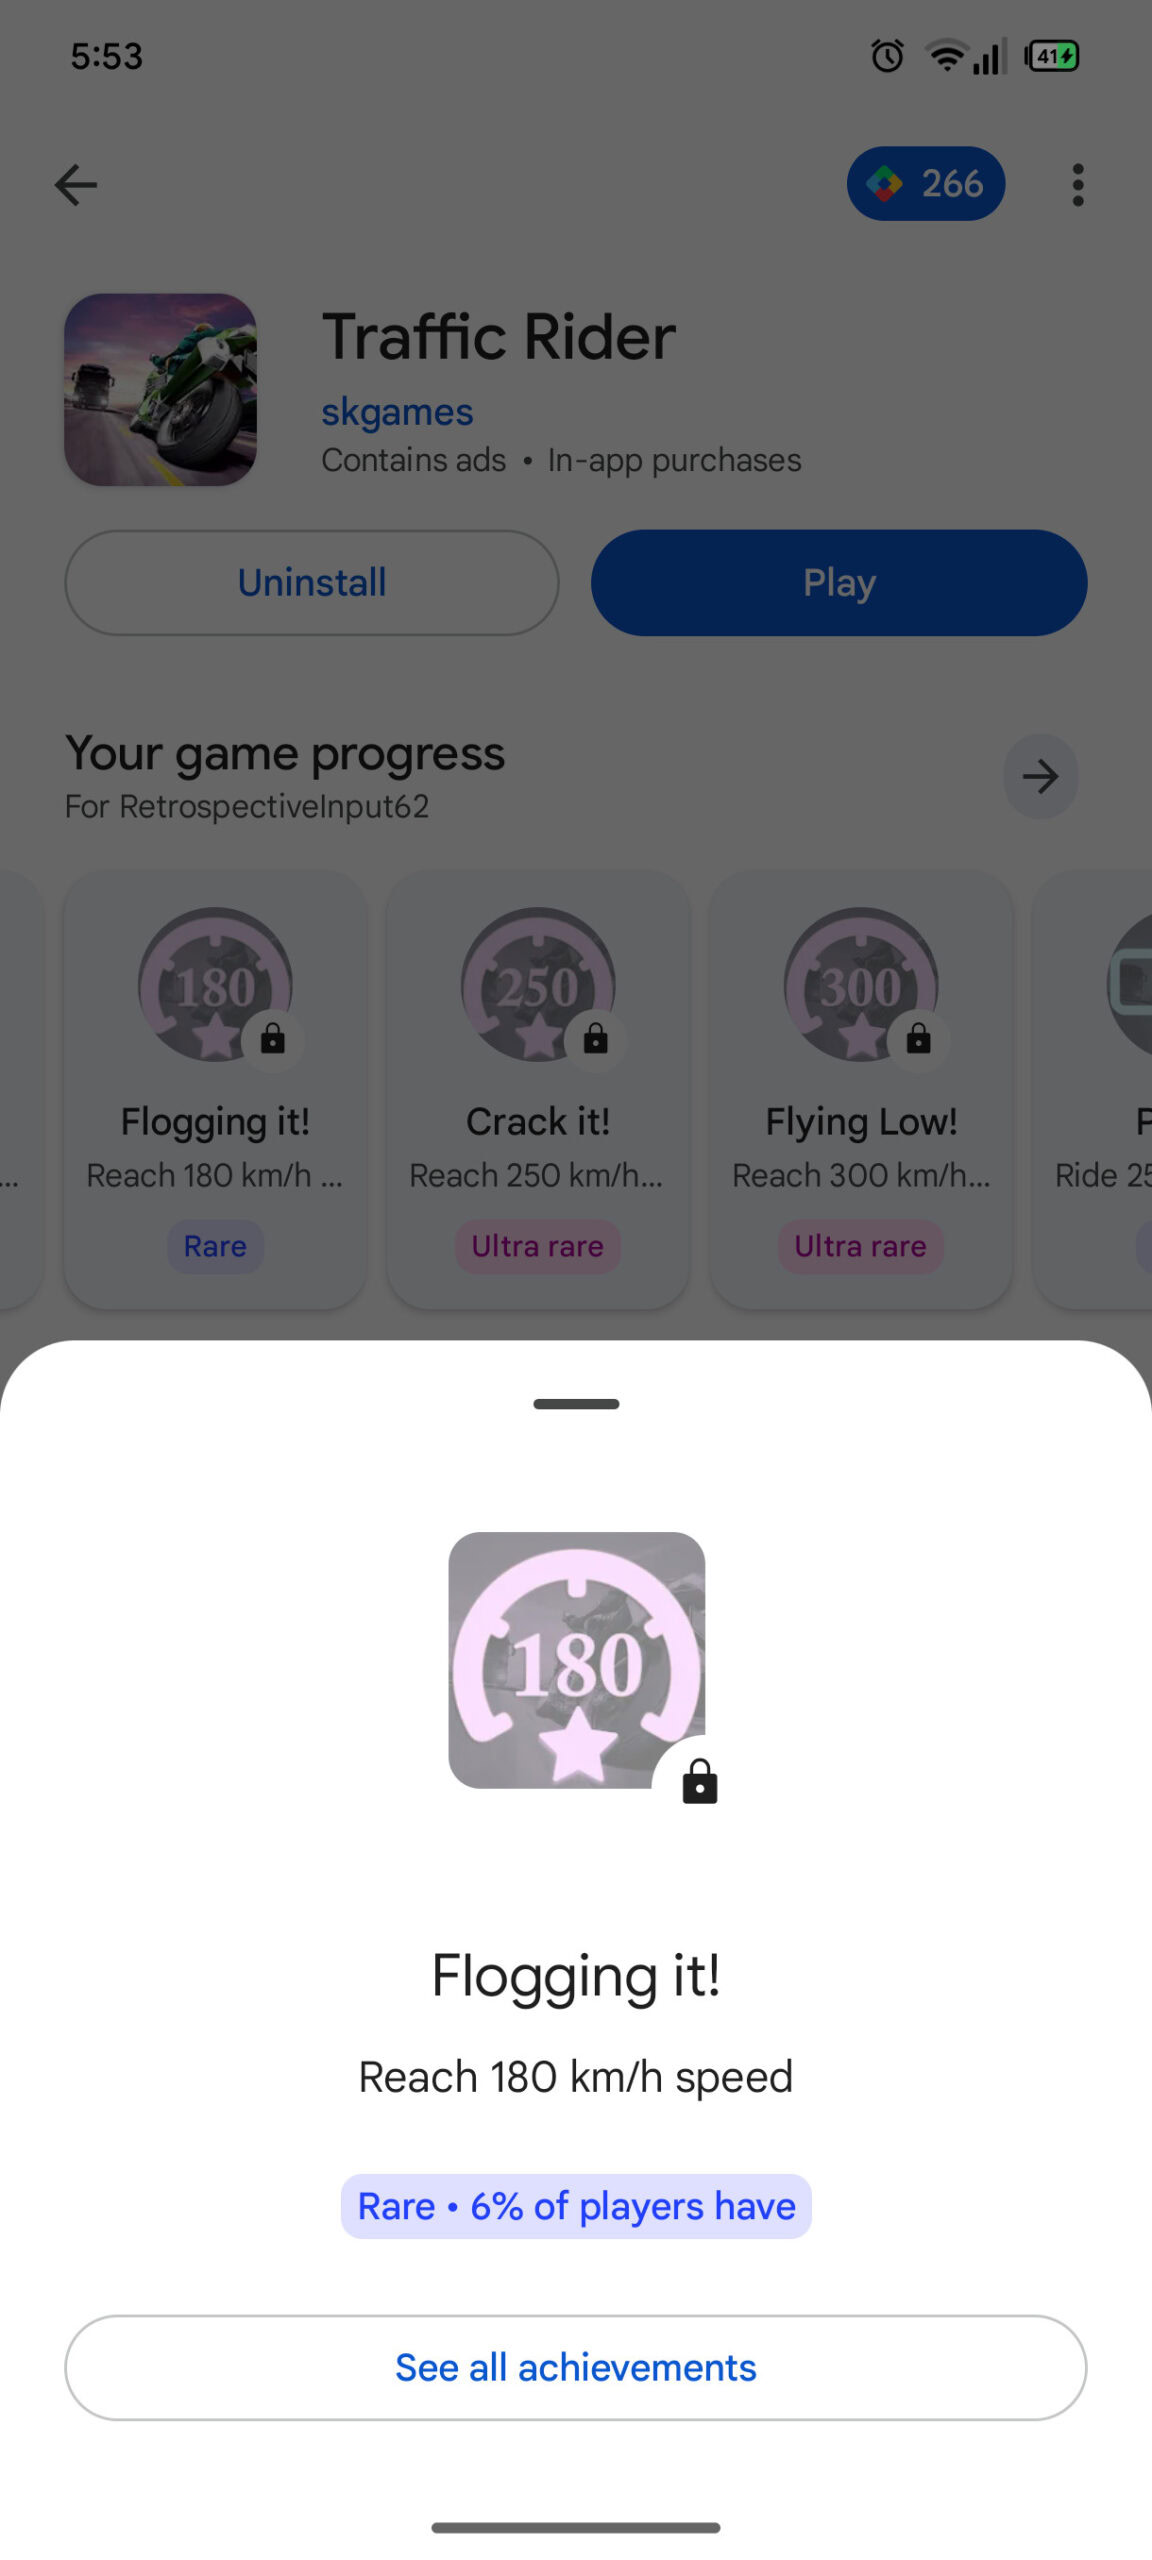
Today, when you search for a game on the Play Store, you don’t see anything about achievements. In the future, though, there will be a section for achievements very prominently on a game’s Play Store page. If you have a Play Games profile — which the Play Store has been encouraging you to create since October — you’ll even see some of the achievements you’ve earned for that title.

Check out how this will look:

Google Play Store Achievements APK Teardown December 2024 (1)
Google Play Store Achievements APK Teardown December 2024 (2)
Google Play Store Achievements APK Teardown December 2024 (3)
Google Play Store Achievements APK Teardown December 2024 (4)


As you can see, the achievements appear right under the buttons to install/play/uninstall a title, which is prime real estate. You can scroll through available achievements and see how far you’ve come along on them. You can also see how rare it is to earn a particular achievement.

Really, this just saves you from needing to go to the Play Games app to see this information. But hey, that’s a nice perk for folks out there who don’t use/like the Play Games app for whatever reason.
 

limmk

High Supremacy Member
Joined
Jul 5, 2001
Messages
43,307
Reaction score
8,365


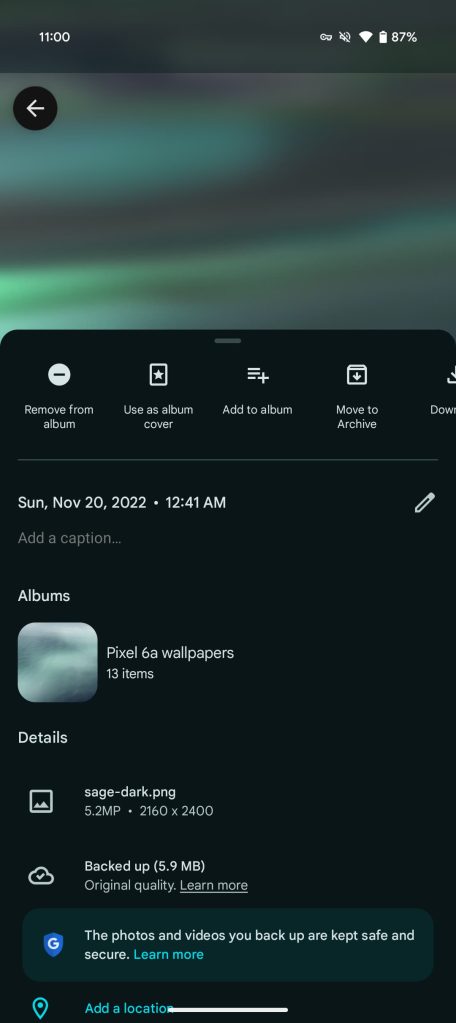
A nice quality-of-life improvement to Google Photos for Android (and the web) shows “Albums” status in the Info panel.

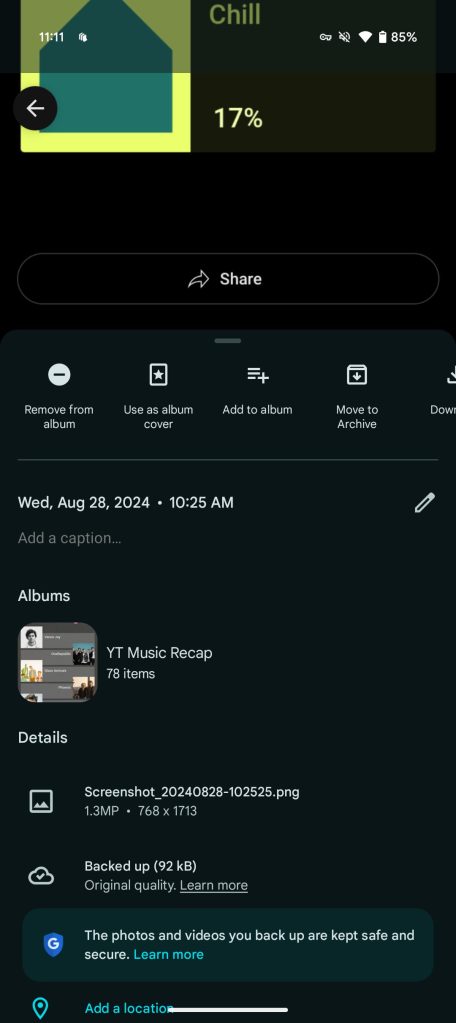
Upon swiping on a fullscreen image or video, Google Photos on Android now shows an “Albums” section that lists where you have cataloged it. It appears below People & pets and before Details. More than one album can appear, with the number of “items” also noted.

Previously, you didn’t have a good indicator about whether you already grouped something. Adding content that’s already in an album would just return a “0 items added” ******** with “View” button.

Google Photos Albums


Favorites are unfortunately not treated as an album and would make for a useful shortcut.

This Albums section is also available on the web’s Info panel, but it’s not appearing on iOS. We’re seeing Albums with Google Photos 7.11 for Android today (via Artem Russakovskii).


limmk

High Supremacy Member
Joined
Jul 5, 2001
Messages
43,307
Reaction score
8,365


Google has adjusted how the Pixel can be customized for those with color blindness. The color correction tool lets you choose a range of colors and intensity on Google’s Pixel devices, fully fine-tuning the Pixel’s display to your preference.

Accessibility features have been a big part of Android phones for a long time, and deservedly so. Tools like color correction offer a device that works better for the user, depending on their personal situation. This extends to users who are hard of hearing and deaf with Google’s AI captioning advancements, and so on.

Color correction is essentially an option category that allows the user to change the set of colors seen on the display. The ranges include Deuteranomaly, Protanomaly, and Tritanomlay, as well as grayscale. Each of these offers strengths for the colorblind user. If the correct settings are selected, it might be easier to focus since redundant colors can be removed from view.

In the latest Android update, the color correction tool now comes with an intensity slider on Pixel devices. Instead of simply offering the user a choice between scales, they can now adjust how strong the representation of colors is on the display itself. The less intense, the more it looks like the base color scale. The higher the slider goes, the stronger the colors shift into that set of colors.

How to turn on and adjust color correction​

Below is a step-by-step guide for turning on color correction and changing the intensity of the accessibility feature. The process is very easy, and the final result depends on the users themselves and their preferences.

  1. On your Pixel, open the settings.
  2. Find and tap Accessibility.
  3. Hit color and motion.
  4. Tap Color correction.
  5. Toggle the feature on and then choose your scale between the three options.
  6. Use the intensity slider to adjust the strength of color correction.
Color-Correction-Pixel-3.jpg
Color-Correction-Pixel-2.jpg
Color-Correction-Pixel-1.jpg


As mentioned, this might take some playing around to figure out what strength works for you.
 

limmk

High Supremacy Member
Joined
Jul 5, 2001
Messages
43,307
Reaction score
8,365


Google Messages is becoming one of the most feature-rich messaging clients on mobile with tons of features. The RCS app’s selection of settings makes it a fantastic default messaging app for the Google Pixel or any Android phone. This guide will take you through everything we think you should set up in Google Messages on your Android device.

From RCS to message reactions and even audio transcriptions, there’s more to Google Messages than just sending and receiving SMS and MMS. With the iPhone getting RCS support after iOS 18, Android’s default messaging service is becoming a great alternative to services like WhatsApp, Facebook Messenger, Telegram, and much more.


This isn’t a complete guide to everything you can do in Google Messages. We’ve created this mini guide to give you a shortlist of the features we think you should go and set up right away to get the optimum experience with Google Messages.

RCS messaging​

google messages set up

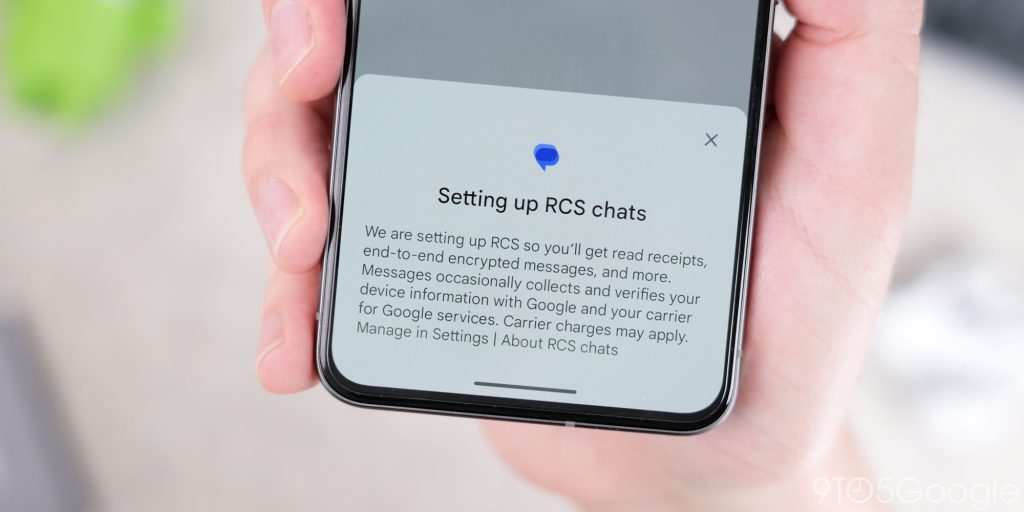
The most obvious and important component of Google Messages should be set up right away when you launch it for the first time. RCS messaging is “RCS Chats” in Messages. It’s the bedrock for all the features that make this a solid default messaging client.

We’re not going to get into every single feature of RCS, but now that iOS 18 has added RCS for support carriers on iPhone devices, you can have a better messaging experience across borders. The core features are things like typing indicators, better group chats, less reliance on MMS, and way more.

Not everyone has RCS working right away, so it’s worth checking.

  1. Open Google Messages.
  2. Tap your profile photo and tap Messages settings.
  3. Select RCS chats.
  4. Tap Enable chat features and confirm.

Enable SMS fallback​

One of the biggest frustrations of any messaging platform is what happens if a text or photo fails to send. It’s not as straightforward as hitting “send” again. That said, there is a way to ensure that your message or image gets sent regardless of whether RCS messaging is working as intended or not.

There is a toggle to ensure that if your message or photo fails to send, it will revert to a good old SMS or MMS message. This is the Google Messages equivalent of the popular iMessage “SMS fallback” and works in much the same way. It’s disabled by default but is found within the RCS settings in Google Messages.

  1. Open Google Messages.
  2. Tap your profile photo and tap Message settings.
  3. Select RCS chats.
  4. Toggle Automatically resend as text (SMS/MMS).
Please be aware that this might add extra charges to your cell plan if you do not have unlimited SMS messaging or MMS messaging as part of your monthly payments.

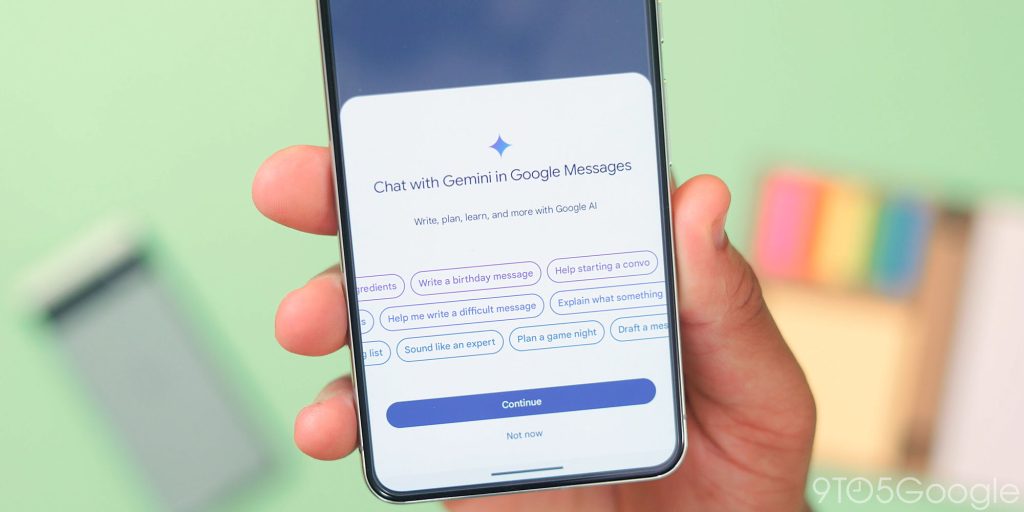
Disable Gemini in Messages​

Gemini-in-Google-Messages-2.jpg

I actually think 99.9% of people should disable this right away in Google Messages. While sending messages directly to Gemini might be useful, it’s better in the dedicated app or a web browser and out of place in the SMS app. It’s limited in Messages, too, so it feels like a pointless “value-added” attempt. Plus, it rids the message view of the annoying Gemini button above the “Start chat” button making it clutter free.

  1. Open Google Messages.
  2. Tap your profile photo and tap Message settings.
  3. Select Gemini in Messages
  4. Toggle “Show Gemini button

Send higher-quality photos​

If you have set up RCS messaging in Google Messages and sent photos to your contacts, you might not have noticed that they are compressed quite heavily once you hit the send button. By default, there is a setting that optimizes media to help send the content faster so that your contacts don’t have to wait around for large files to arrive.

That means you need to disable the “Send photos faster” setting so that only the best-quality images reach those all-important contacts. Sure, these files will take up more space, but the visual uplift is quite noticeable so it’s worth making the change now.

  1. Open Google Messages.
  2. Tap your profile photo and tap Message settings.
  3. Toggle off Send photos faster.

Automatic OTP deletion​

Auto-delete-OTP-in-Google-Messages.jpg
google messages set up

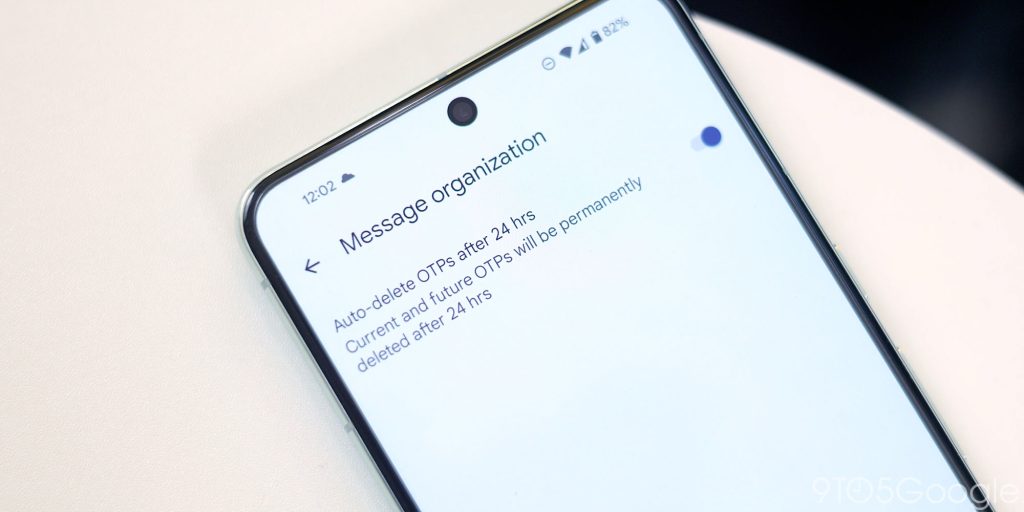
One of the best things that Google Messages can do is automatically delete OTP – one-time passwords – after 24 hours. OTPs can clog up your inbox, and it becomes difficult to see important conversations. The only annoyance is that this isn’t available in all regions, but is great for people that can access it.

  1. Open Google Messages.
  2. Tap your profile photo and tap Messages settings.
  3. Hit Message organization.
  4. Toggle on Auto-delete OTPs.

Turn on voice transcription​

Voice messages come in handy all too often, but they can prove frustrating if the receiving party can’t exactly listen to them at the time. Fortunately, Google Messages can automatically transcribe those voice messages. This makes it easy for both sender and receiver so one doesn’t have to worry about typing and the other doesn’t need to put in earbuds in a crowded space.

  1. Open Google Messages.
  2. Tap your profile photo and tap Messages settings.
  3. Select Voice message transcription.
  4. Toggle the feature on.
Depending on your phone, the text transcription can sometimes take a few seconds to process, but most of the time, it’s instant. Processing takes place locally on the device, too, so there’s no need to upload to a server. Just tap the “View transcript” button under the voice note to see the full text output of the messages you’ve sent or received.

Enable rich previews​

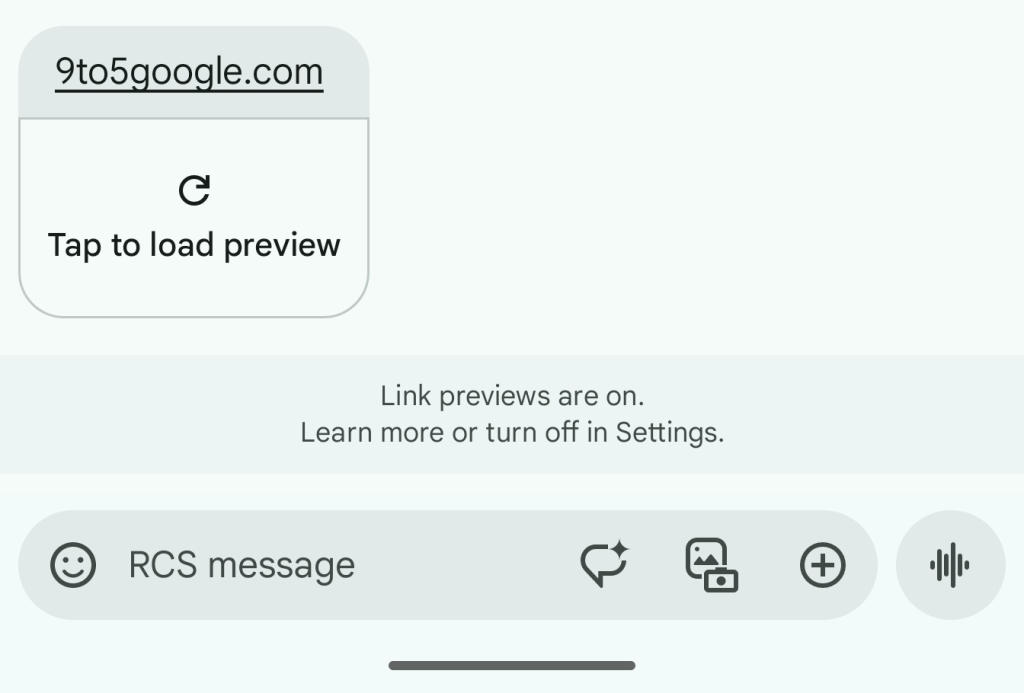
A multimedia messaging app needs to work well with lots of message type and if you send lots of links or webpages you might want to set up the Automatic preview function in Google Messages. In basic terms this gives you a visual card preview of the link that has been sent or received with any images or other rich visual media. It works with websites, Google Maps and other services, but is especially useful for YouTube and other video links and looks better than a text hyperlink.

  1. Open Google Messages.
  2. Tap your profile photo and tap Messages settings.
  3. Select Automatic previews.
  4. Toggle Show all previews.

Turn on Suggestions​

google messages set up

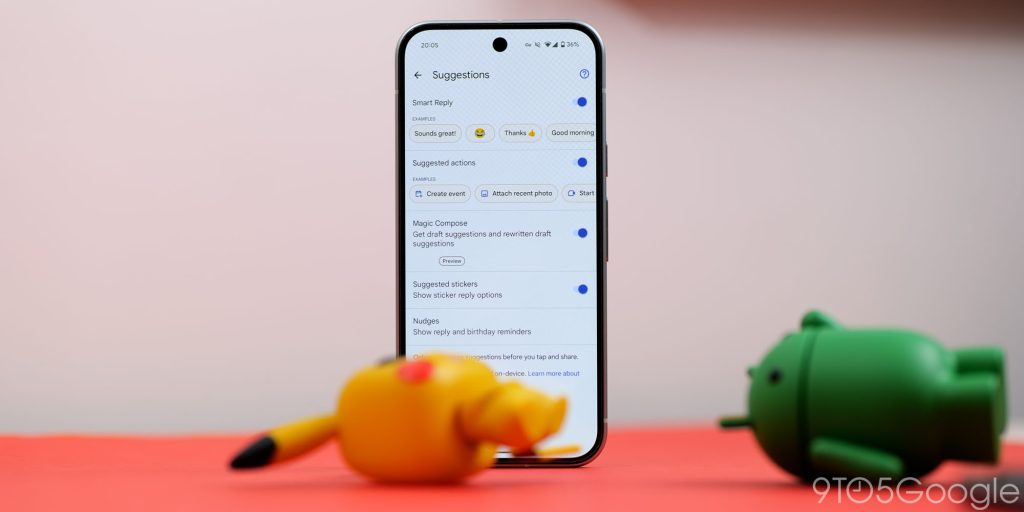
Google Messages leverages AI to offer a variety of helpful suggestions, including smart replies, suggested actions, stickers, and nudges. These features are designed to streamline your messaging experience by providing relevant options when you need them most.

For example, if you mention a location, the app might suggest sharing your current location. By automating common tasks and uncovering hidden features, Google Messages empowers you to communicate more effectively. All of the options are just nice quality-of-life additions that can be super helpful.

  1. Open Google Messages.
  2. Tap your profile photo and tap Messages settings.
  3. Tap Suggestions.
  4. Toggle on the type of suggestions you want to be enabled.

Turn on iPhone message reactions​

Sometimes, the quickest way to let someone know that their message has been understood is to send an emoji or, better still, a message reaction. This function has been around for a while, with some impressive workarounds by Google that allow it to work at all. With RCS between iPhone and Android, we now have fully working message reactions.

  1. Open Google Messages.
  2. Tap your profile photo and tap Messages settings.
  3. Find and tap Advanced.
  4. Toggle on Show iPhone reactions as emojis.
It works nicely on Android, but on iOS, it sends another message to confirm the reaction. So you could spam your friends if you wanted…
 
Last edited:

limmk

High Supremacy Member
Joined
Jul 5, 2001
Messages
43,307
Reaction score
8,365


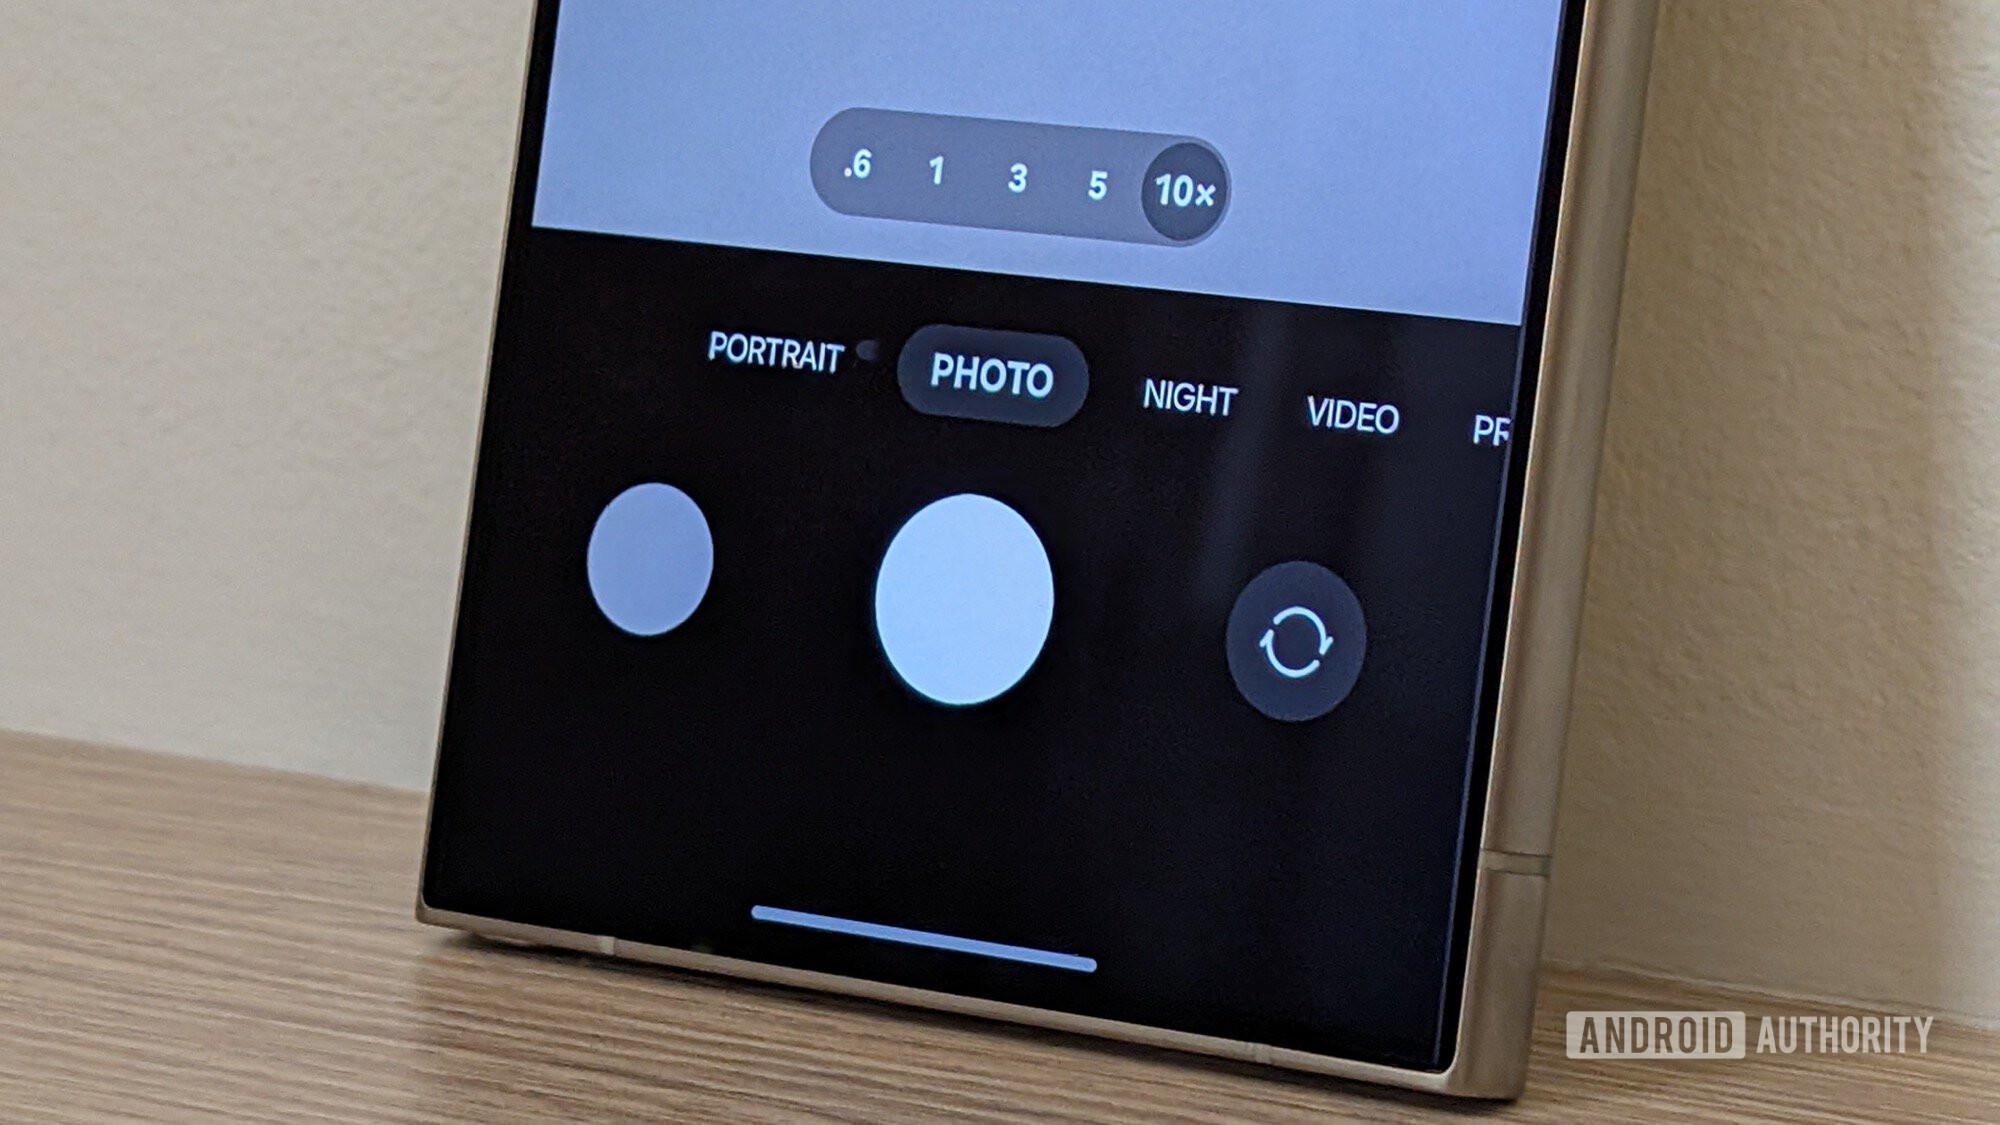
Ever since the Pixel 7 series was announced back in 2022, there’s one button I’ve wanted the Google Camera app to have: a 10x zoom. This was the first time a Pixel phone had a powerful enough 5x telephoto lens that was sufficient enough to crop out a smaller 10x shot without losing on quality and clarity. It simply made sense that Google, who was marketing this longer zoom range, would also make it more accessible in the Camera app, but it didn’t.

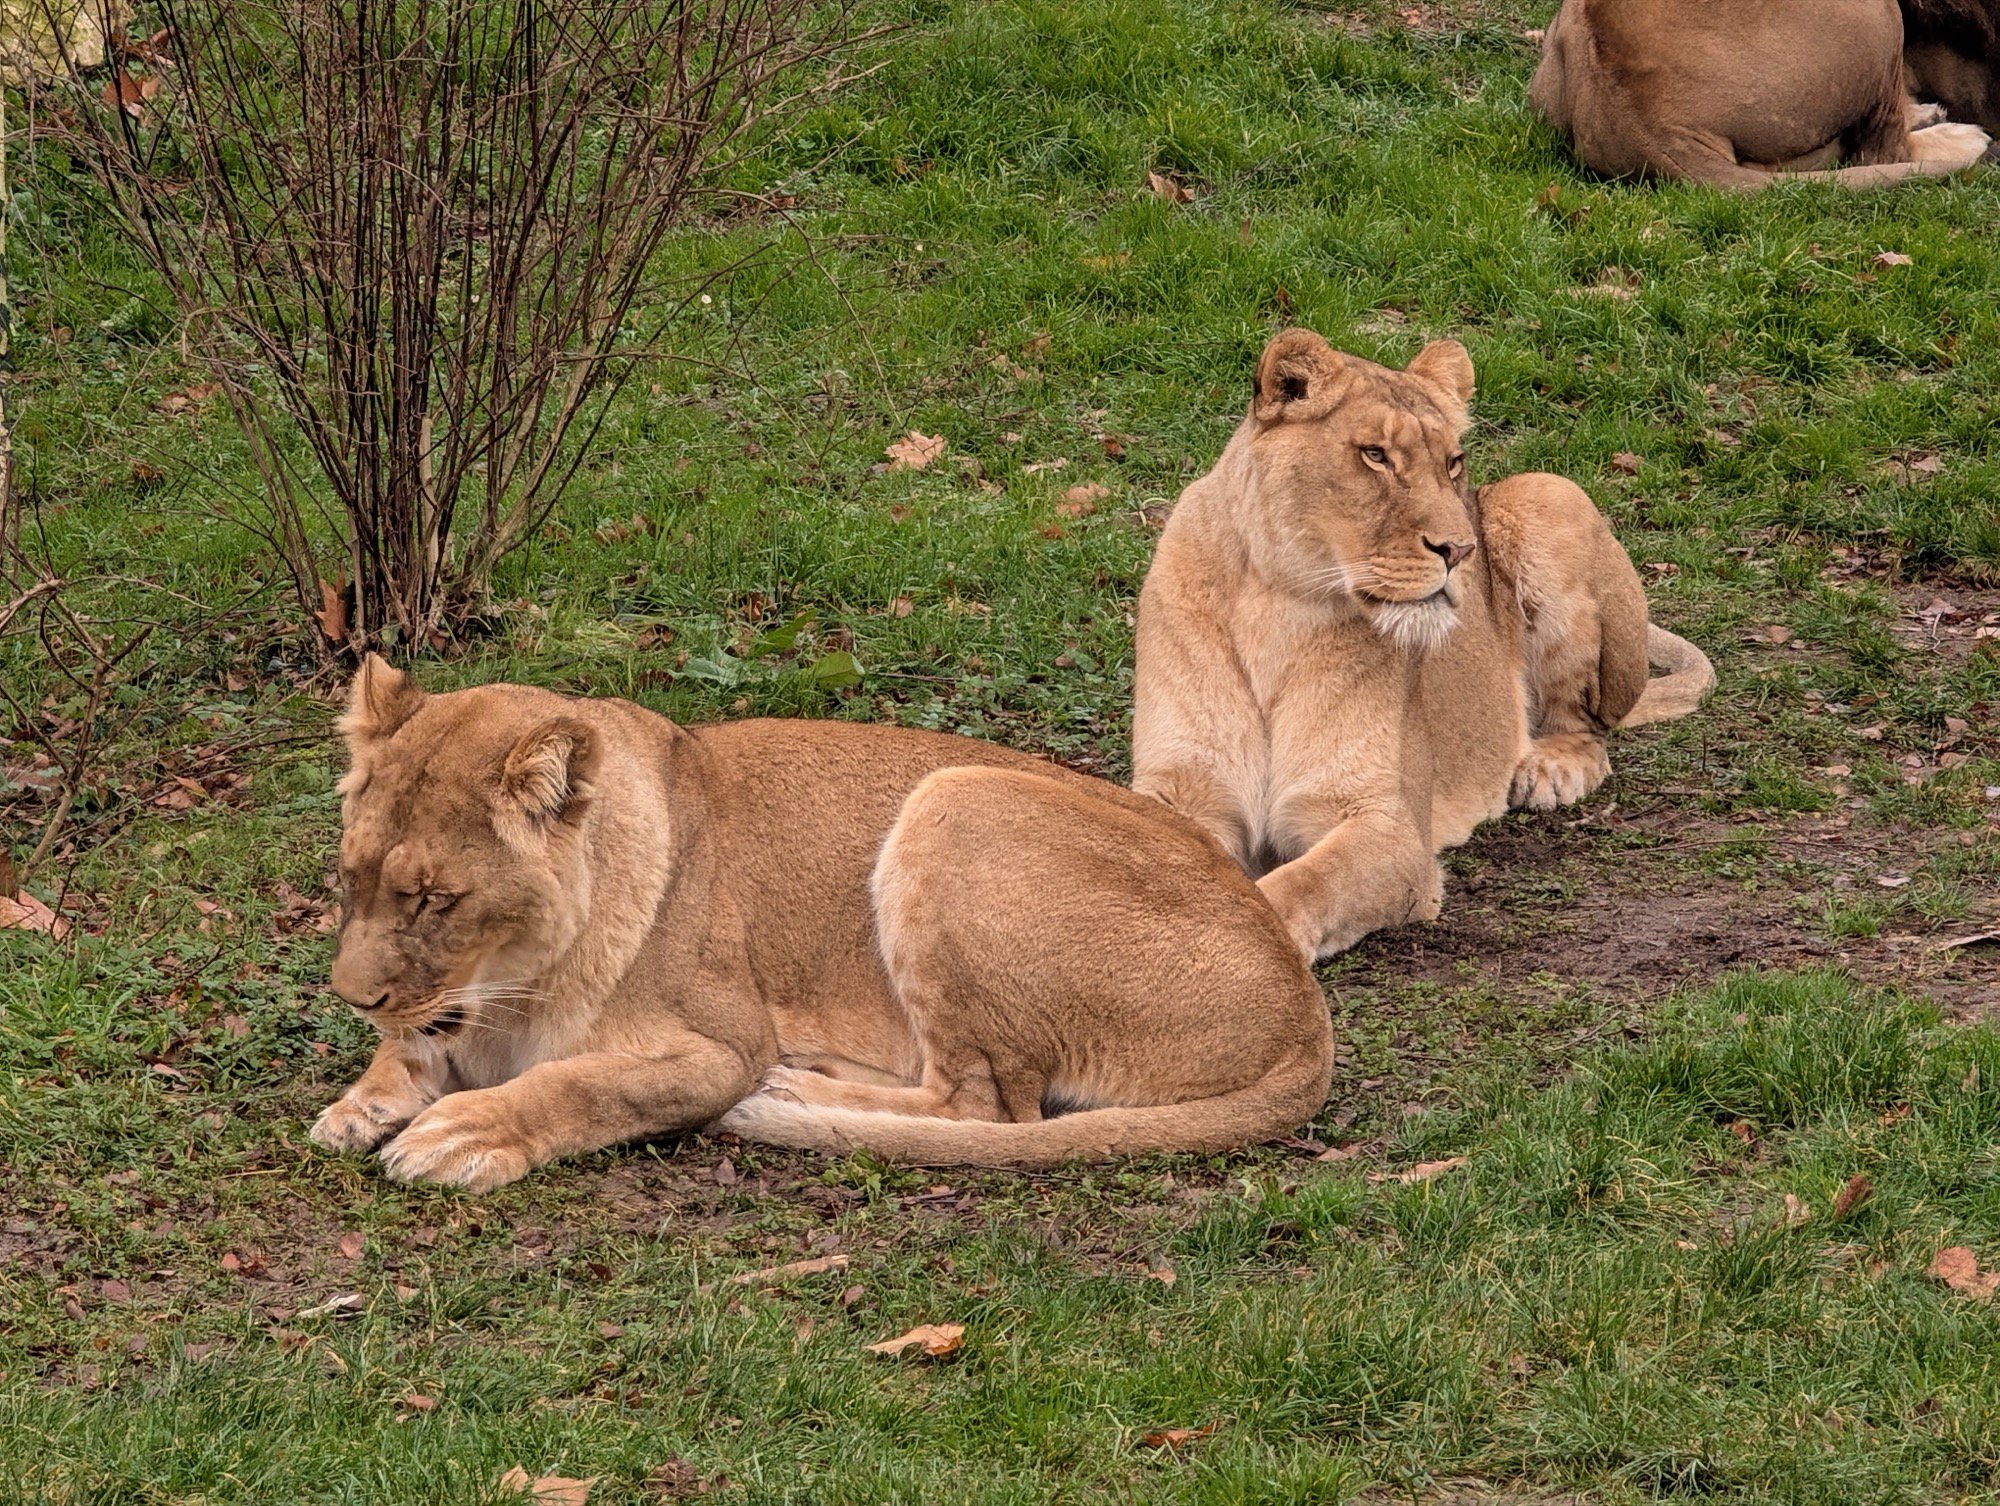
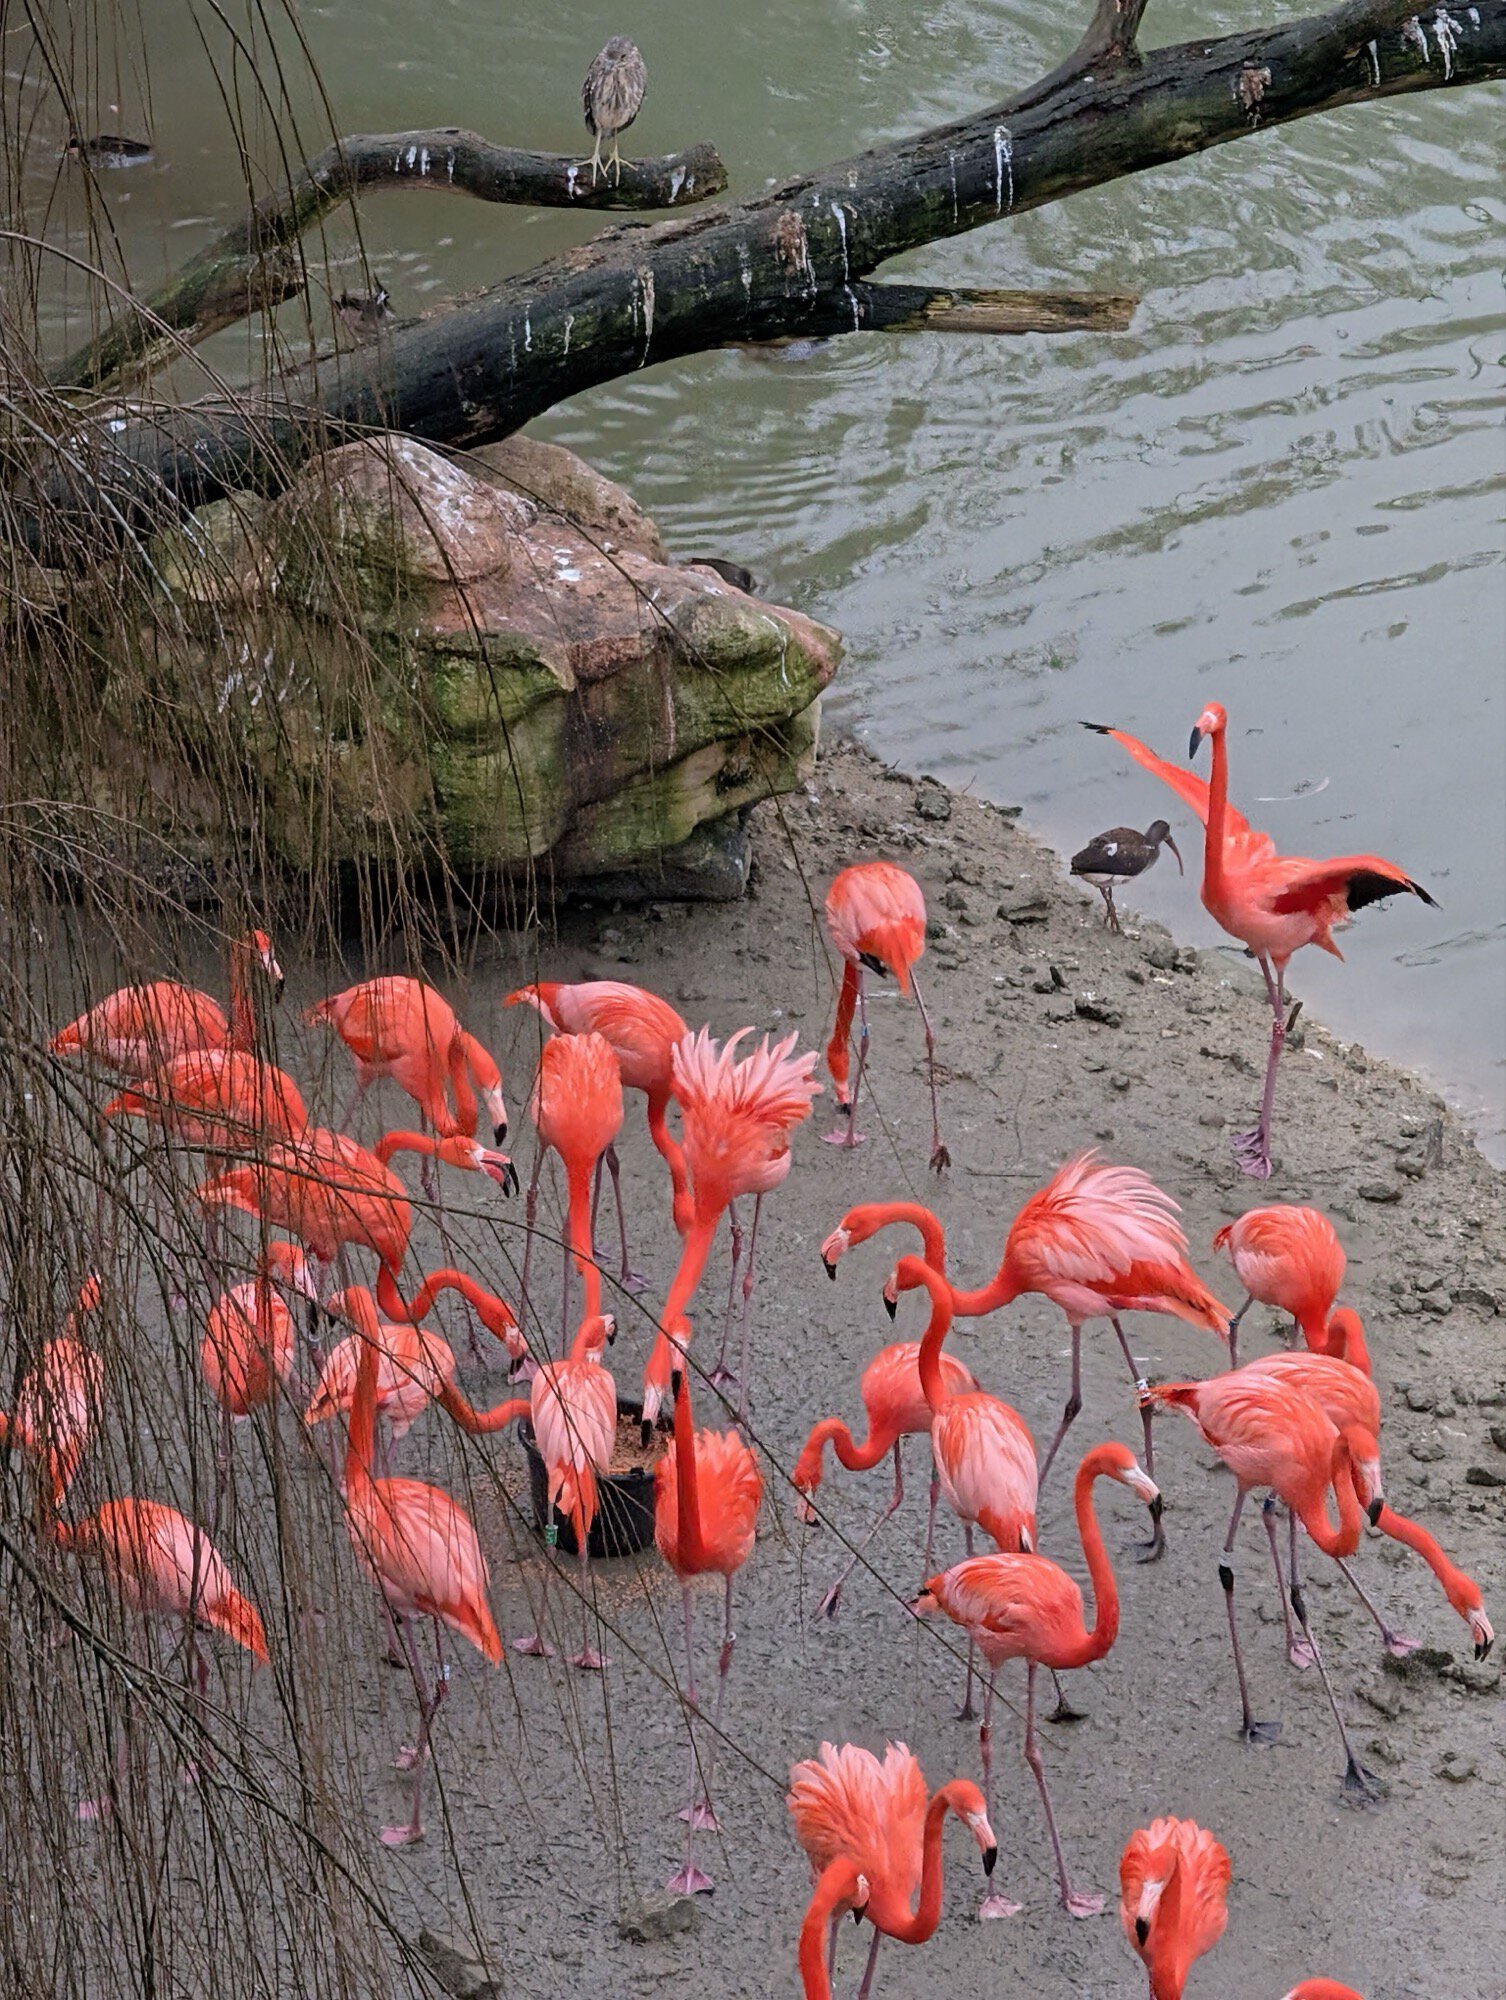
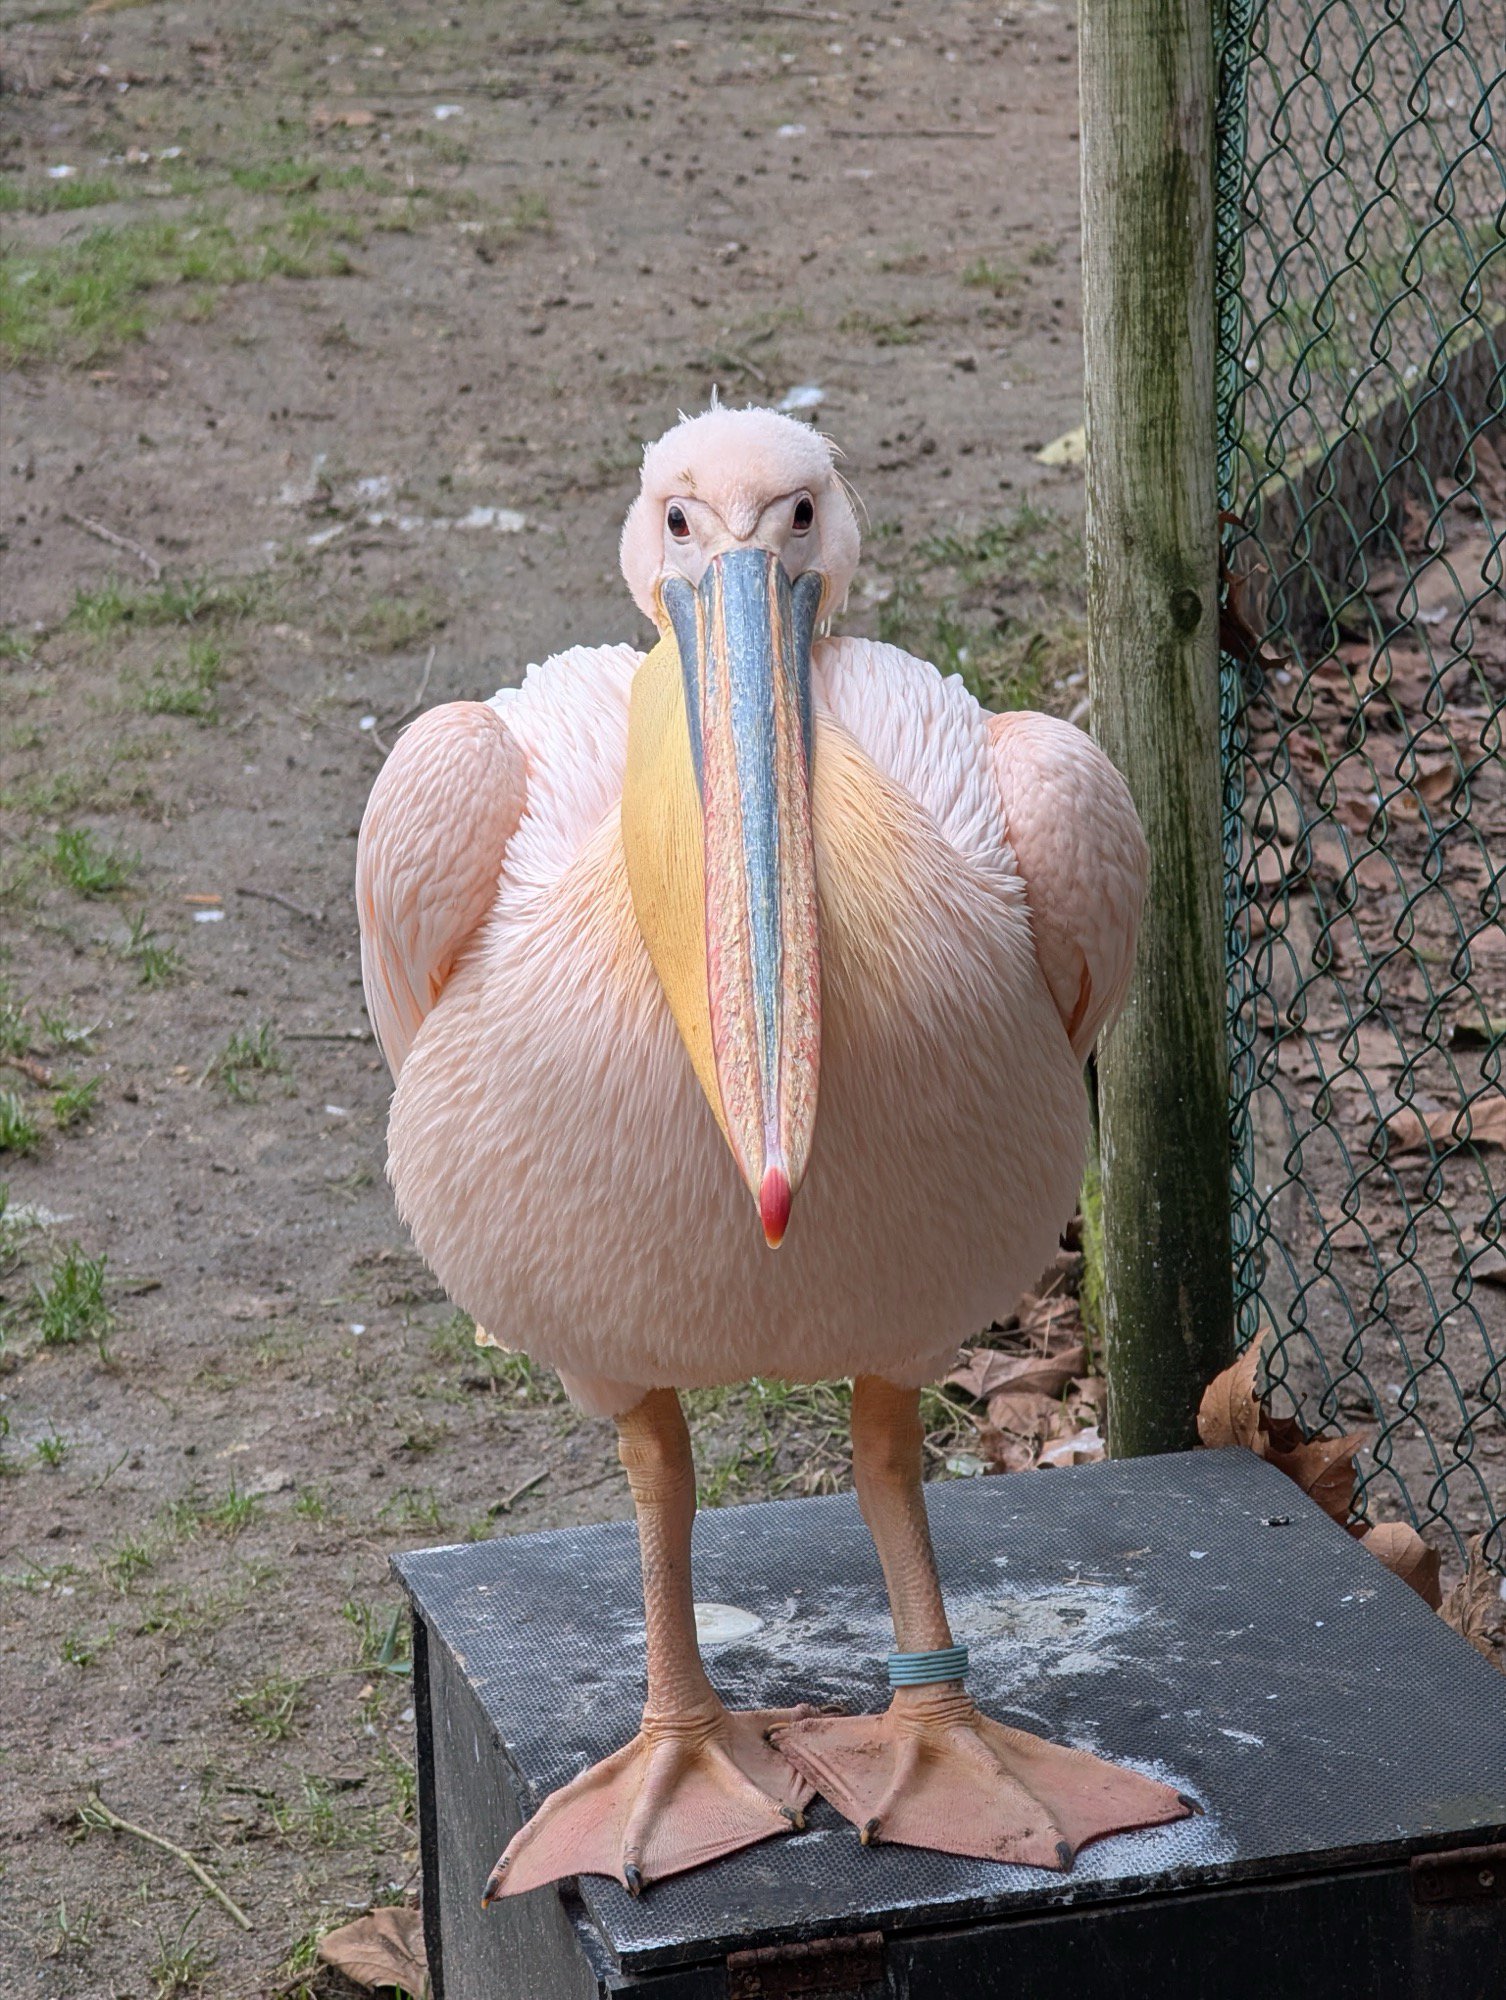
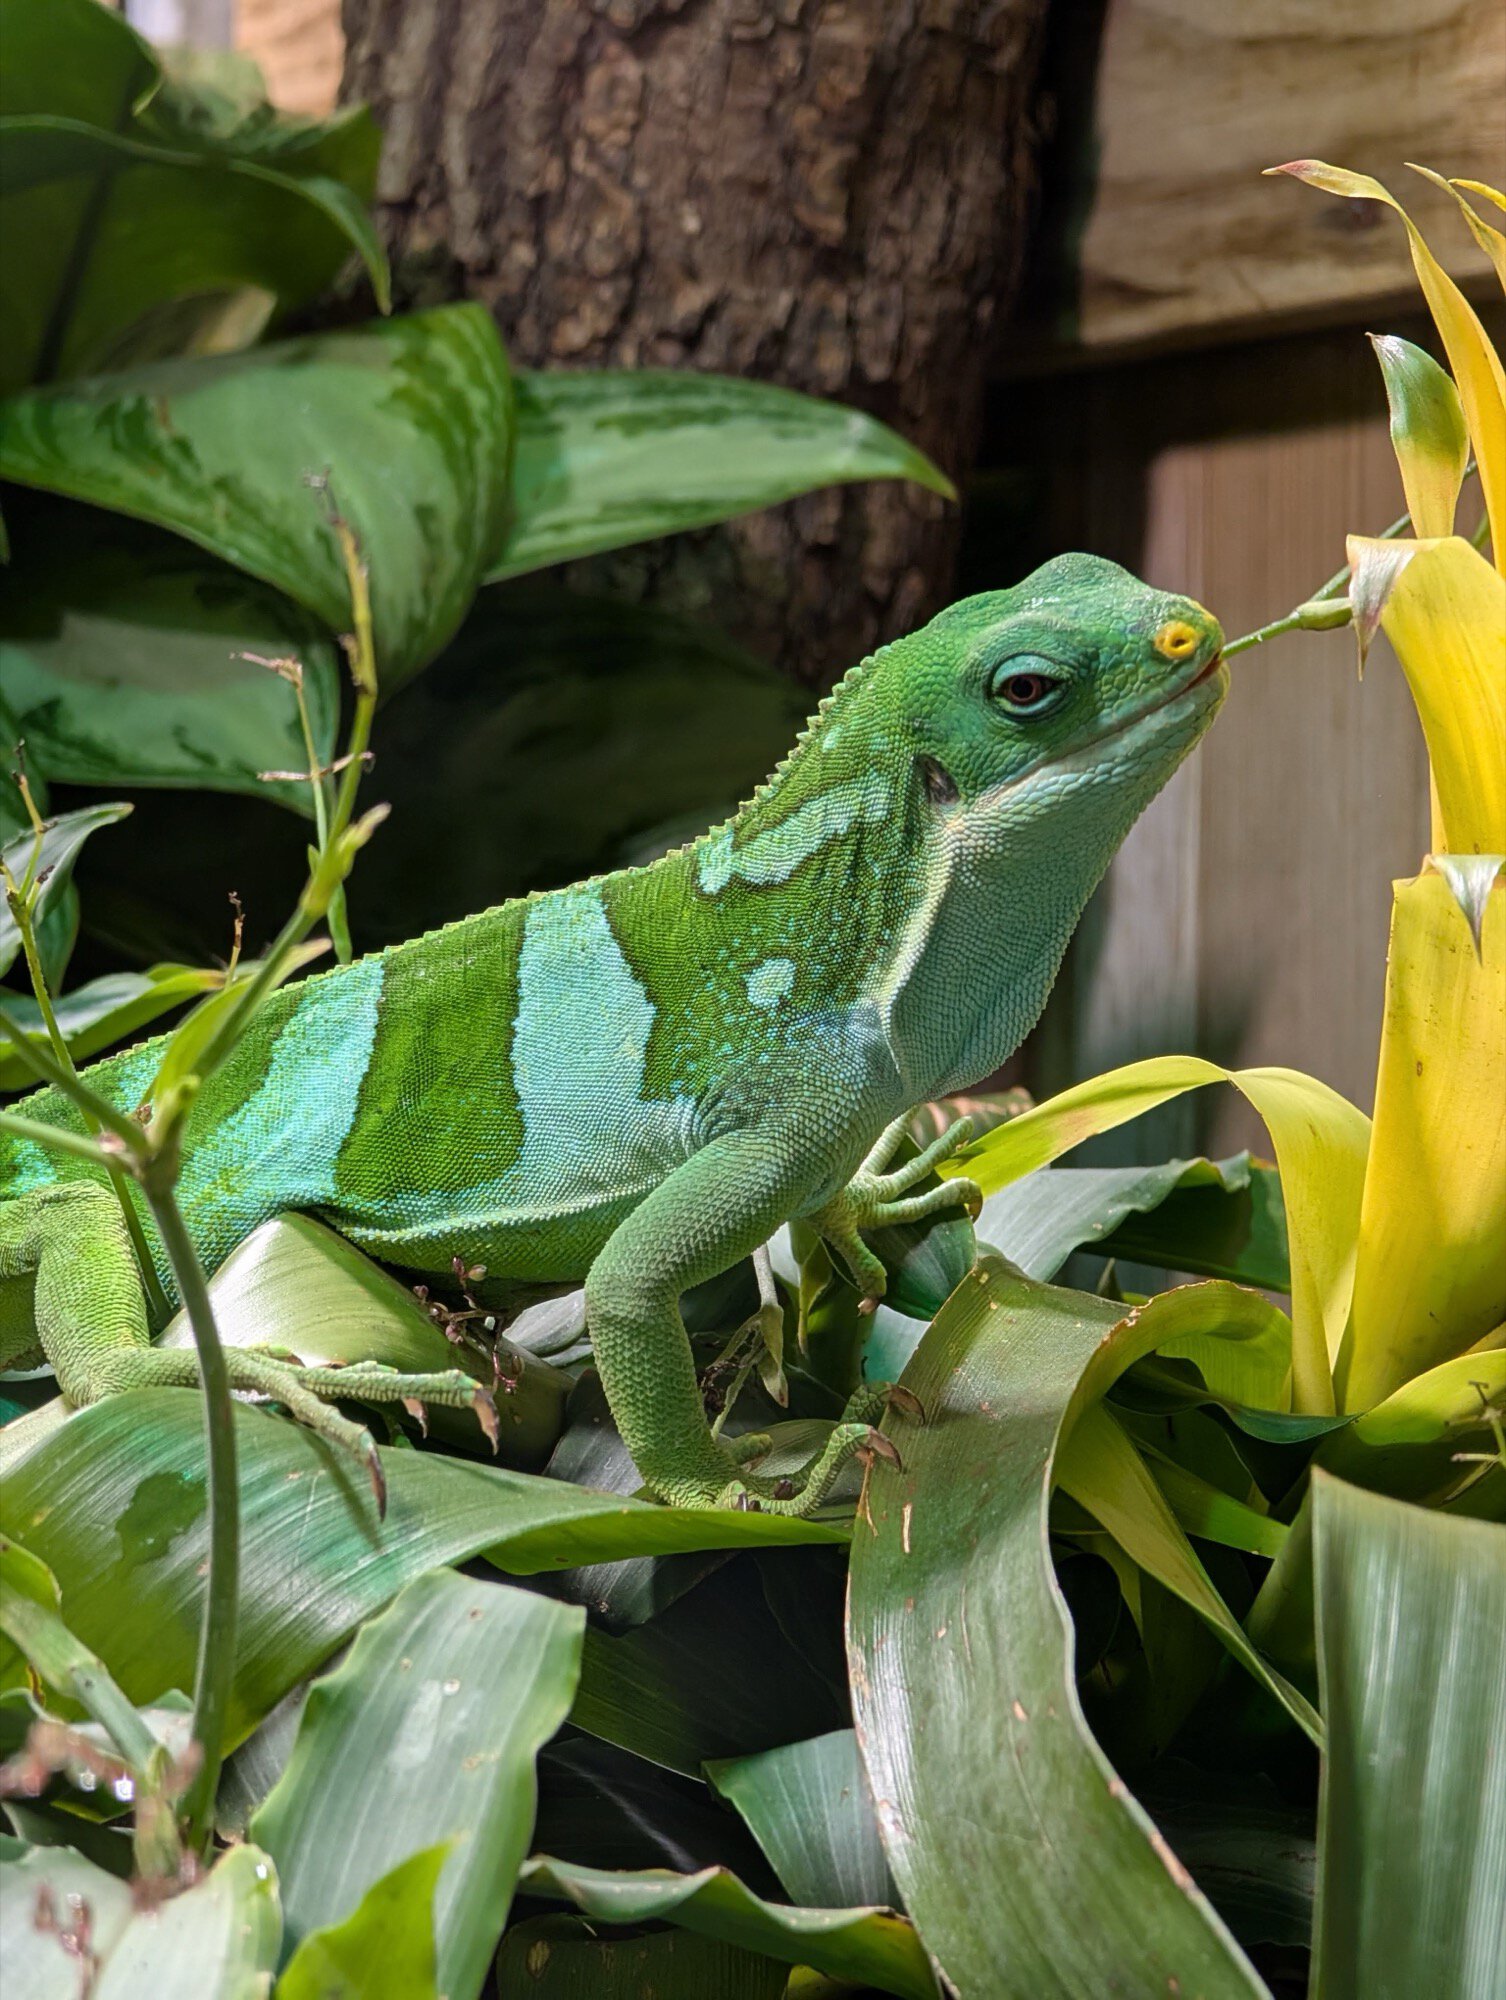
The Pixel 8 series and then the Pixel 9 series followed, and, as much as I hate to admit it, the 10x zoom is still nowhere to be seen in the Google Camera app. I thought I’d be over this by now and accepted this oversight as another “Google shrug” moment. Still, as I was walking around the Beauval Zoo last weekend, zooming in on the lions, tigers, and elephants, I kept lamenting the lack of this button over and over again.

google pixel 9 pro 10x zoom photo sample 1 copy
google pixel 9 pro 10x zoom photo sample 2 copy
google pixel 9 pro 10x zoom photo sample 3 copy
google pixel 9 pro 10x zoom photo sample 4 copy
google pixel 9 pro 10x zoom photo sample 5 copy
google pixel 9 pro 10x zoom photo sample 6 copy
google pixel 9 pro 10x zoom photo sample 7 copy
google pixel 9 pro 10x zoom photo sample 8 copy
google pixel 9 pro 10x zoom photo sample 9 copy


I managed to snap some awesome shots, but using the pinch gesture to zoom to 10x was as annoying and imprecise as ever. I had to pinch in, out, and readjust until I got it right. I don’t want 9.9x, nor do I want 10.1x; I want 10x because this is where I’m sure Google is taking the 5x 48MP shot and cropping a 12MP image from its center. It does this for both photos and videos, too.

Pro Pixel phones have a very capable 'optical-quality' 10x zoom, but without a dedicated button, it might as well not exist.

Google calls this “optical-quality zoom” because there are no (or very few) digital enhancements or Super Res tricks happening, so you don’t get any weird artifacts in the final image like you do when you punch into 3x using the main 1x lens or 20x from the 5x tele lens. Without a quick 10x button, though, this optical-quality zoom might as well not exist. Dialing in an exact 10x zoom level is a multi-second process, not a quick tap, and very few people will know that they can go this far without losing quality.

That’s especially more frustrating if you’re using the 10x to snap photos and videos over the course of multiple hours, like at a concert, at the zoo, while watching a sports game from the stands, or when traveling. Each time I closed and reopened the camera app during my zoo visit, I had to manually dial in the 10x zoom level; it just got tiresome at the end.

What annoys me is that the Samsung Galaxy S24 Ultra and several other Android camera phones have already fixed this. They just added a 10x zoom button, and there you go! Tap, snap, done. You don’t have to keep adjusting a pinch gesture or zoom slider to hit that exact 10x sweet spot. Whenever I’m carrying my Galaxy S24 Ultra, I find myself using the 10x zoom more because it’s so simple to trigger.

samsung galaxy s24 ultra camera 10x zoom


If you’re not a techie user, you see those zoom levels on the S24 Ultra (and other similar phones that have implemented this button) and think, “Hey, let me try this!” If you do, you get a nice photo. In contrast, with the Pixel, non-techies might zoom in to 13x, 17x, or 22x, get a half-decent, half-bad shot, and not be inclined to do it again. They may think their Pixel’s zoom isn’t all that good after 5x and never know that there’s a perfectly fine 10x level they can use when they want to get closer to their subject.

Pixel owners may erroneously think their phone's best quality zoom is at 5x and never know they can go up to 10x while retaining a quality shot.

Adding one button to the camera app shouldn’t be that difficult, but after three years, I’ve started to lose hope. Well, at least we know someone at Google is listening, though, because they just brought back the brightness and shadow sliders that were taken away from us with the Pixel 8 series. So, maybe that same developer is reading this and taking notes. I can only hope.
 

limmk

High Supremacy Member
Joined
Jul 5, 2001
Messages
43,307
Reaction score
8,365


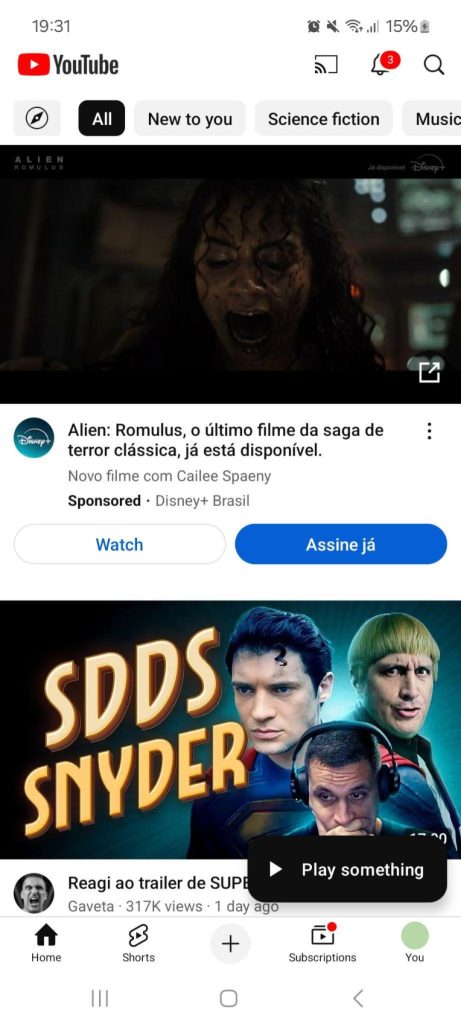
After rolling out a round of design updates and new features to the mobile app, YouTube is testing a “Play something” FAB.


This floating action button says “Play something” and has a play icon. It’s white text on a black background that stands out a great deal.

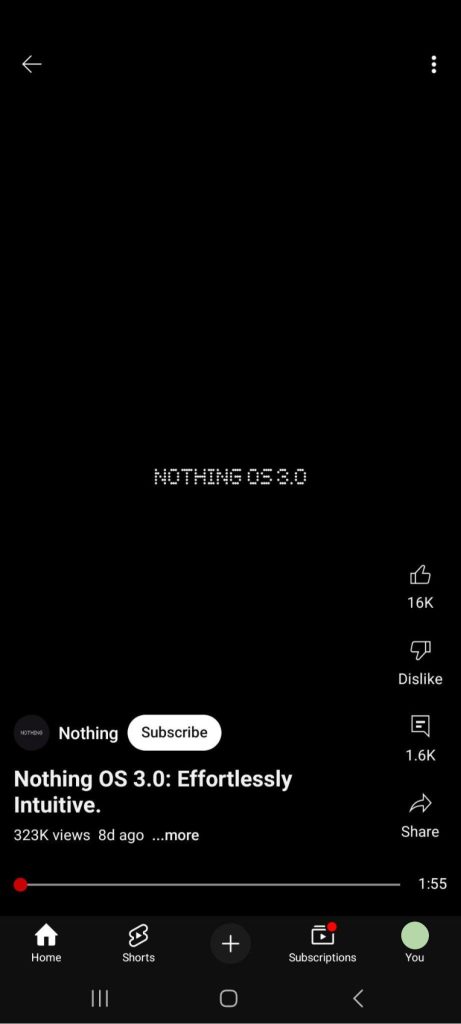
Tapping starts a video in the Shorts player. However, this is not exclusive to YouTube Shorts and will play regular content in that portrait interface with large buttons for like, dislike, comments, and sharing at the right, while you get a timeline scrubber at the bottom.

When the miniplayer is active, the Play something button does disappear.

YouTube Play something FAB


The use of a FAB is interesting, but does make thematic sense since it lets you initiate the main content consumption purpose of the app. It presumably takes into account your video preferences.

YouTube has been testing this feature since last year, but this most recent report of the Play something FAB comes from version 19.50 for Android.
 

limmk

High Supremacy Member
Joined
Jul 5, 2001
Messages
43,307
Reaction score
8,365


Android has a number of Developer options built in that allow you to go beyond the regular user-facing functionality to get even greater control over your daily experience. Here are some of our tips to get the most from your phone.


First and foremost, Developer options can sometimes be known as “Developer mode” on some Android phones and tablets. These added controls are somewhat obviously not available right out of the box and are designed to let developers (and, by extension, users) configure system behaviors to help profile and debug app and system performance.

Before we start, you will need to go to Settings > System > About phone > Tap “Build number” seven times > Enter PIN or pattern. To access the wider Developer options or Developer mode, you’ll need to head to Settings > System > Developer options. From here, we can start making tweaks.

One thing I always suggest that people do is enable USB Debugging and OEM unlocking while we’re in the vicinity. These are super useful if you want to manually flash updates and whatnot on your device. This step is totally unnecessary, but it might come in handy if something goes wrong with your phone at any point in the future.

Default USB configuration​

Default-USB-configuration-1.jpg


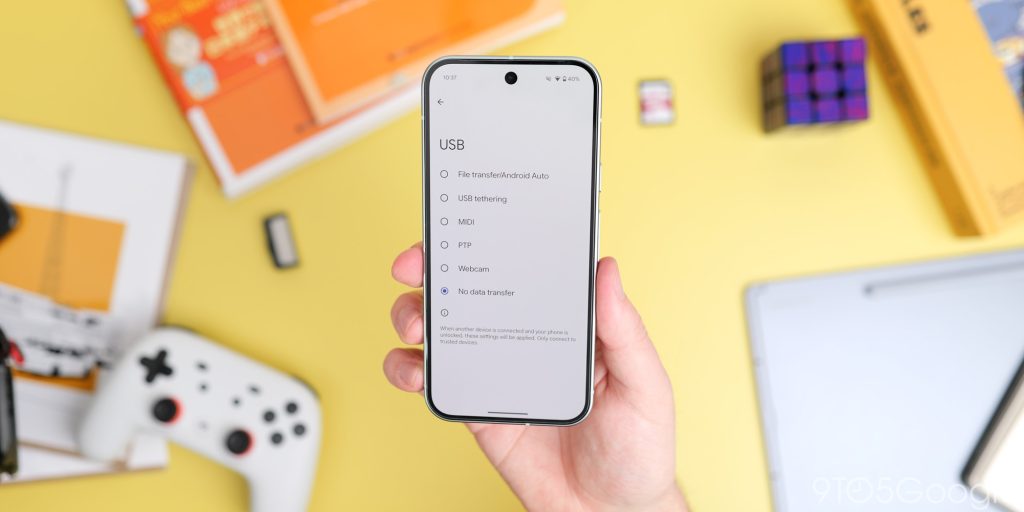
When you plug your Android phone into a PC or laptop, there is a predefined process that will run automatically. This can vary from phone to phone, but thanks to Android developer options, you can adjust this to suit your own personal preference.

You can choose between File Transfer mode, USB tethering, act as a digital interface for audio with MIDI, or picture transfer with PTP mode. You can also set it so your Android phone doesn’t transfer any data and will just charge if that is supported.

This is a real timesaver if you only plug your phone into a computer to remove files. It can be enabled by heading to Settings > System > Developer options > Default USB configuration. From here, just set up whatever option you prefer.

Enable freeform windows​

Desktop-mode-on-Pixel-Tablet-3.jpg
Desktop-mode-on-Pixel-Tablet-2.jpg


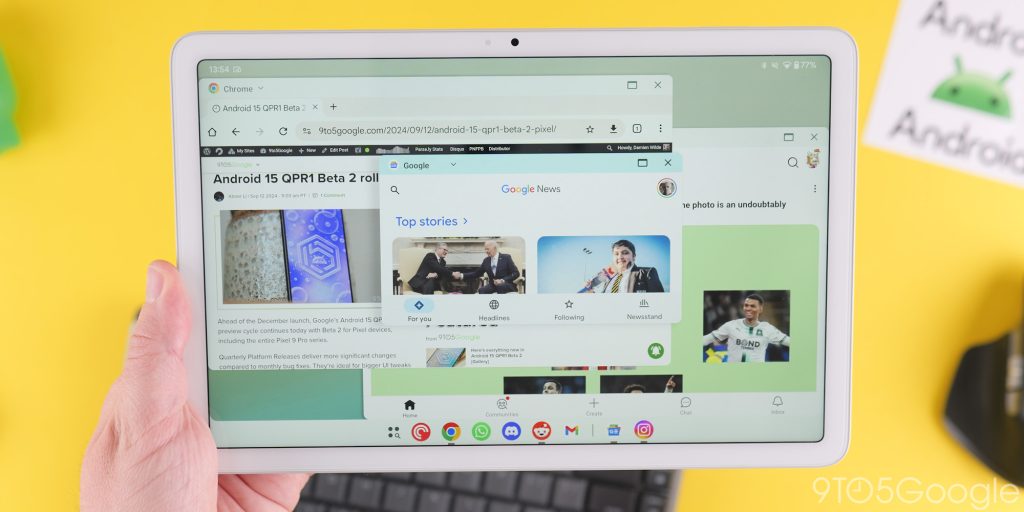
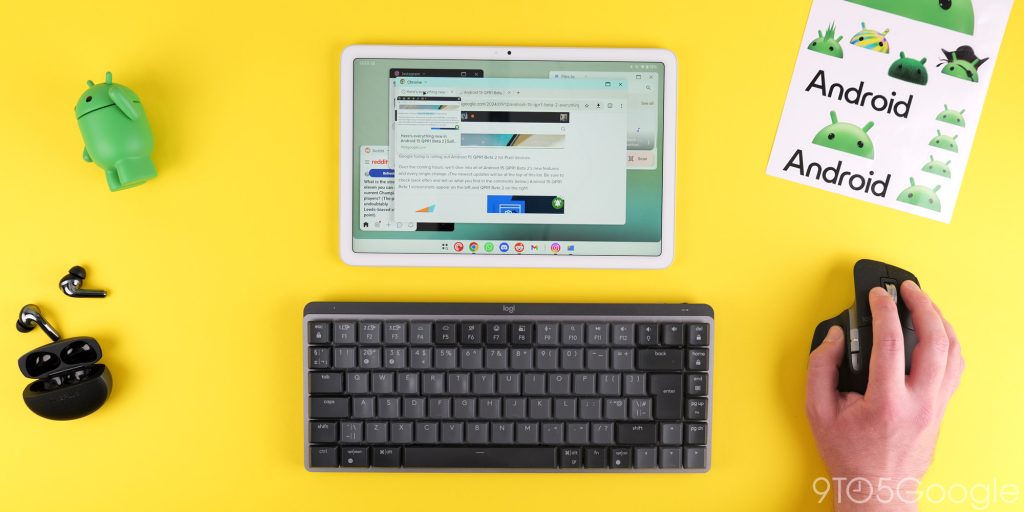
If you have a Pixel Tablet, I think you should at least try this function out. With the December Pixel Drop, Google added a basic desktop mode for the first-party Android tablet. Freeform windows are not new; they’ve been on other Android skins for a long time now. Samsung DeX still reigns supreme as a lite desktop replacement, but this is a neat extra solution that lets you run multiple Android applications in small windows on your tablet.

In tandem with another toggle, you can even get apps working in this pseudo-desktop mode that would ordinarily just crash. The “Force activities to be resizeable” option ties this all together. Sure, the Pixel Tablet isn’t objectively the best, but it can be a fun little productivity centerpiece if you pair it with a keyboard and mouse.

Head to Settings > System > Developer options > Then toggle “Enabled freeform windows” and “Force activities to be resizeable.”

Force split-screen mode​

The default split-screen mode in Android is excellent at allowing you to truly multitask on your phone. Sadly, it doesn’t work with every single application for one reason or another. Thanks to a toggle within the Developer options section added back in Android 12 you can force split-screen mode even for unsupported apps on your Android phone (or tablet).

You might encounter some issues with unsupported applications, but this is especially useful as most apps will scale according to your screen size anyway. To enable head to Settings > System > Developer options > Force activities to be resizable.

Force peak refresh rate​

Force-peak-refresh-rate.jpg


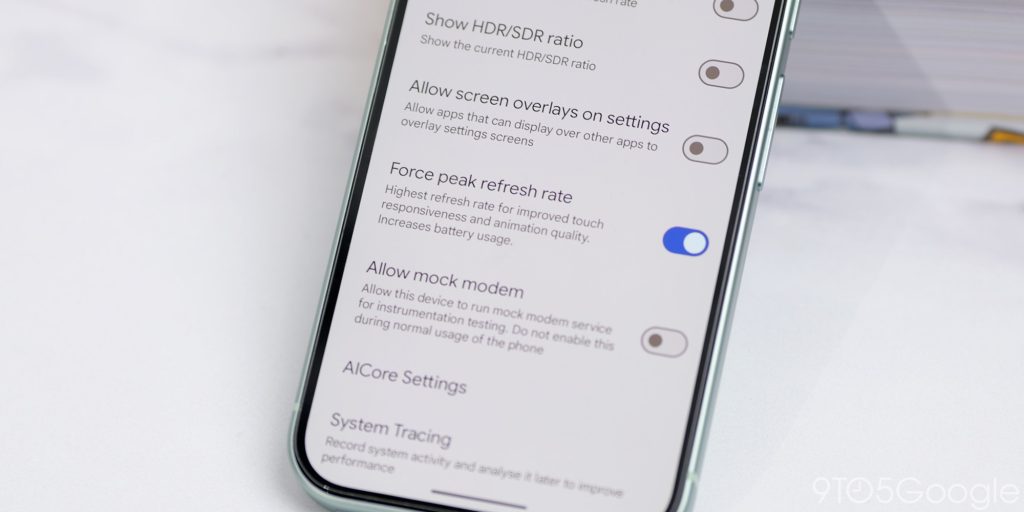
Even if your phone has a high refresh rate screen, it might not always be running at the maximum rate. You might notice frame drops or times where the refresh rate dips to lower speeds. Often this is limited by the applications on your device, but the Android system will do this to save battery or even improve performance.

That said, you might have a 90, 120Hz, or even higher refresh rate screen. Thanks to the Developer options section within Android, you are able to force your devices peak refresh rate to be used across every area of the system.

To enable this, head to Settings > System > Developer options > Force peak refresh rate > Toggle “On.”

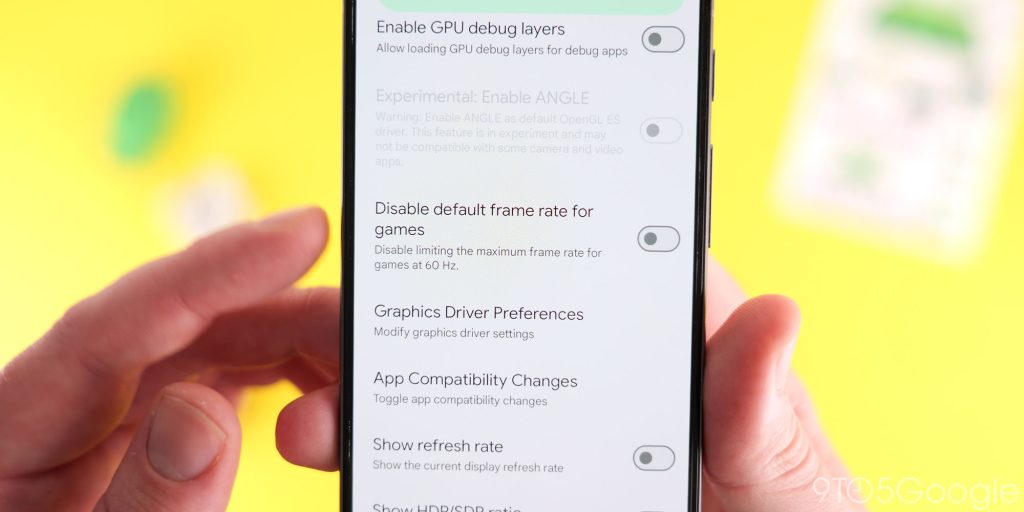
Disable framerate limit for games​

Disable-frame-rate-for-games.jpg
Disable-frame-rate-for-games-in-Android-15.jpg


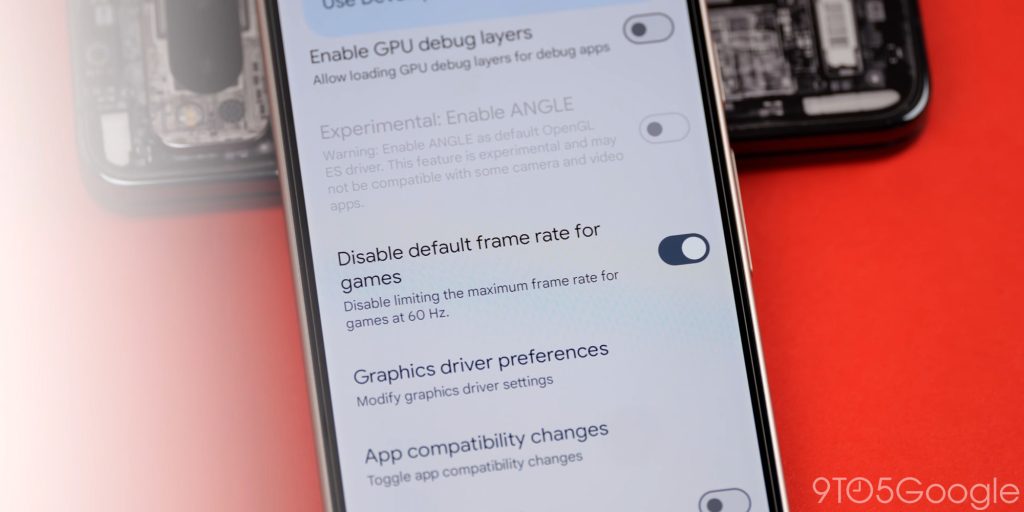
The jury is out on how much difference this developer toggle makes, but it can’t hurt to try in our opinion. Android 15 introduced a new toggle that lets you disable the “default” 60Hz frame limit for most Android games. Effectively if you have a 90Hz, 120Hz or higher refresh rate screen then games might not run at optimal settings.

By enabling the “Disable default frame rate for games” toggle you can see an uplift. In our testing it’s a bit hit or miss, but it could help improve some games as some do work without using this toggle. It can’t hurt to try, so we suggest enabling it if you’re a hardened mobile gamer.

Just head to Settings > System > Developer options > Disable default frame rate for games.

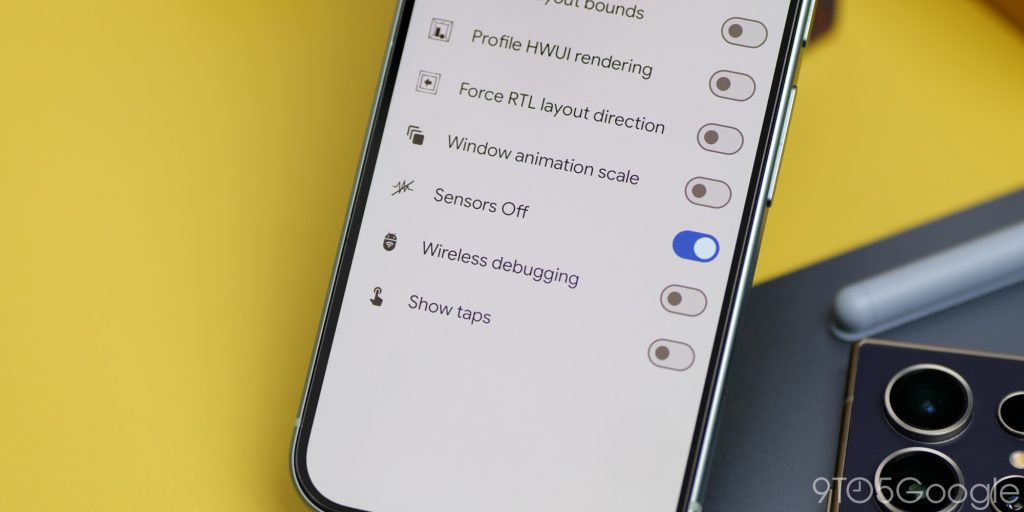
Block all sensors tile​

Sensors-off.jpg


Your smartphone knows a lot about you. Some might say too much. If you are worried about your privacy at certain points, then there is a neat quick toggle to disable all of your on-device sensors including GPS, microphone, camera, accelerometer, gyroscope, proximity sensor, and even magnetometer will be inaccessible to any app on your phone while this is toggled.

There could be some battery benefits here, too. You will lose out on some functionality if you leave the block in place all the time though. However, it’s still useful to have access to. To add it to your device Quick Settings panel, head to Settings > System > Developer options > Quick settings developer tiles > Sensors off.

This will be added to the first position in your Quick Settings panel or notification shade but can be moved to wherever you see fit. Mobile data and Wi-Fi are unaffected by this tile.

Select mock location app​

There are tons of applications that need your location for functionality. Some might argue too many. There are tons of apps out there that allow you to fake your current location, which can be useful for games that require location for certain in-game unlocks or features. A prime example is Pokémon Go or even streaming apps when you want to access geo-locked content.

You can use location spoofing applications to default to a specified region, and with the Developer options, you can place your Android anywhere on the planet with zero problems. To enable head to Settings > System > Developer options > Select mock location app > Now select your preferred app.

 
Important Forum Advisory Note
This forum is moderated by volunteer moderators who will react only to members' feedback on posts. Moderators are not employees or representatives of HWZ Forums. Forum members and moderators are responsible for their own posts. Please refer to our Community Guidelines and Standards and Terms and Conditions for more information.
Top